Transferring Files to Your New Machine
Now that you've created a machine, we will use Cyberduck to move our precious files up to this machine.


Now that you've created a machine, connected to it, now we need a way to move our precious files up to this machine.
SFTP Clients allow you to upload and transfer files to your machine in RONIN using SFTP. You'll be able to drag and drop files from your desktop to either a Linux or Windows machine.
SFTP stands for Secure File Transfer Protocol, and it's exactly that. Secure meaning encrypted, and encrypting things helps prevent baddies from spying on what you're doing.
If you're on Windows / Mac, we recommend downloading Cyberduck. For the rest of this tutorial, we'll be using Cyberduck, however any SFTP client will work just as well (such as FileZilla or WinSCP).
If you're on Linux, we recommend Remmina, which comes with many distributions already, and also has SSH capabilities for Linux and RDP for Windows machines.
- Download a FTP client on your local computer. In this blog post we will be using Cyberduck - a free FTP software for Windows and Mac. You can however use any SFTP software such as FileZilla or WinSCP etc. The process should be very similar for each though the interface may be slightly different.
- Ensure the RONIN machine you are wanting to transfer files to/from is running.
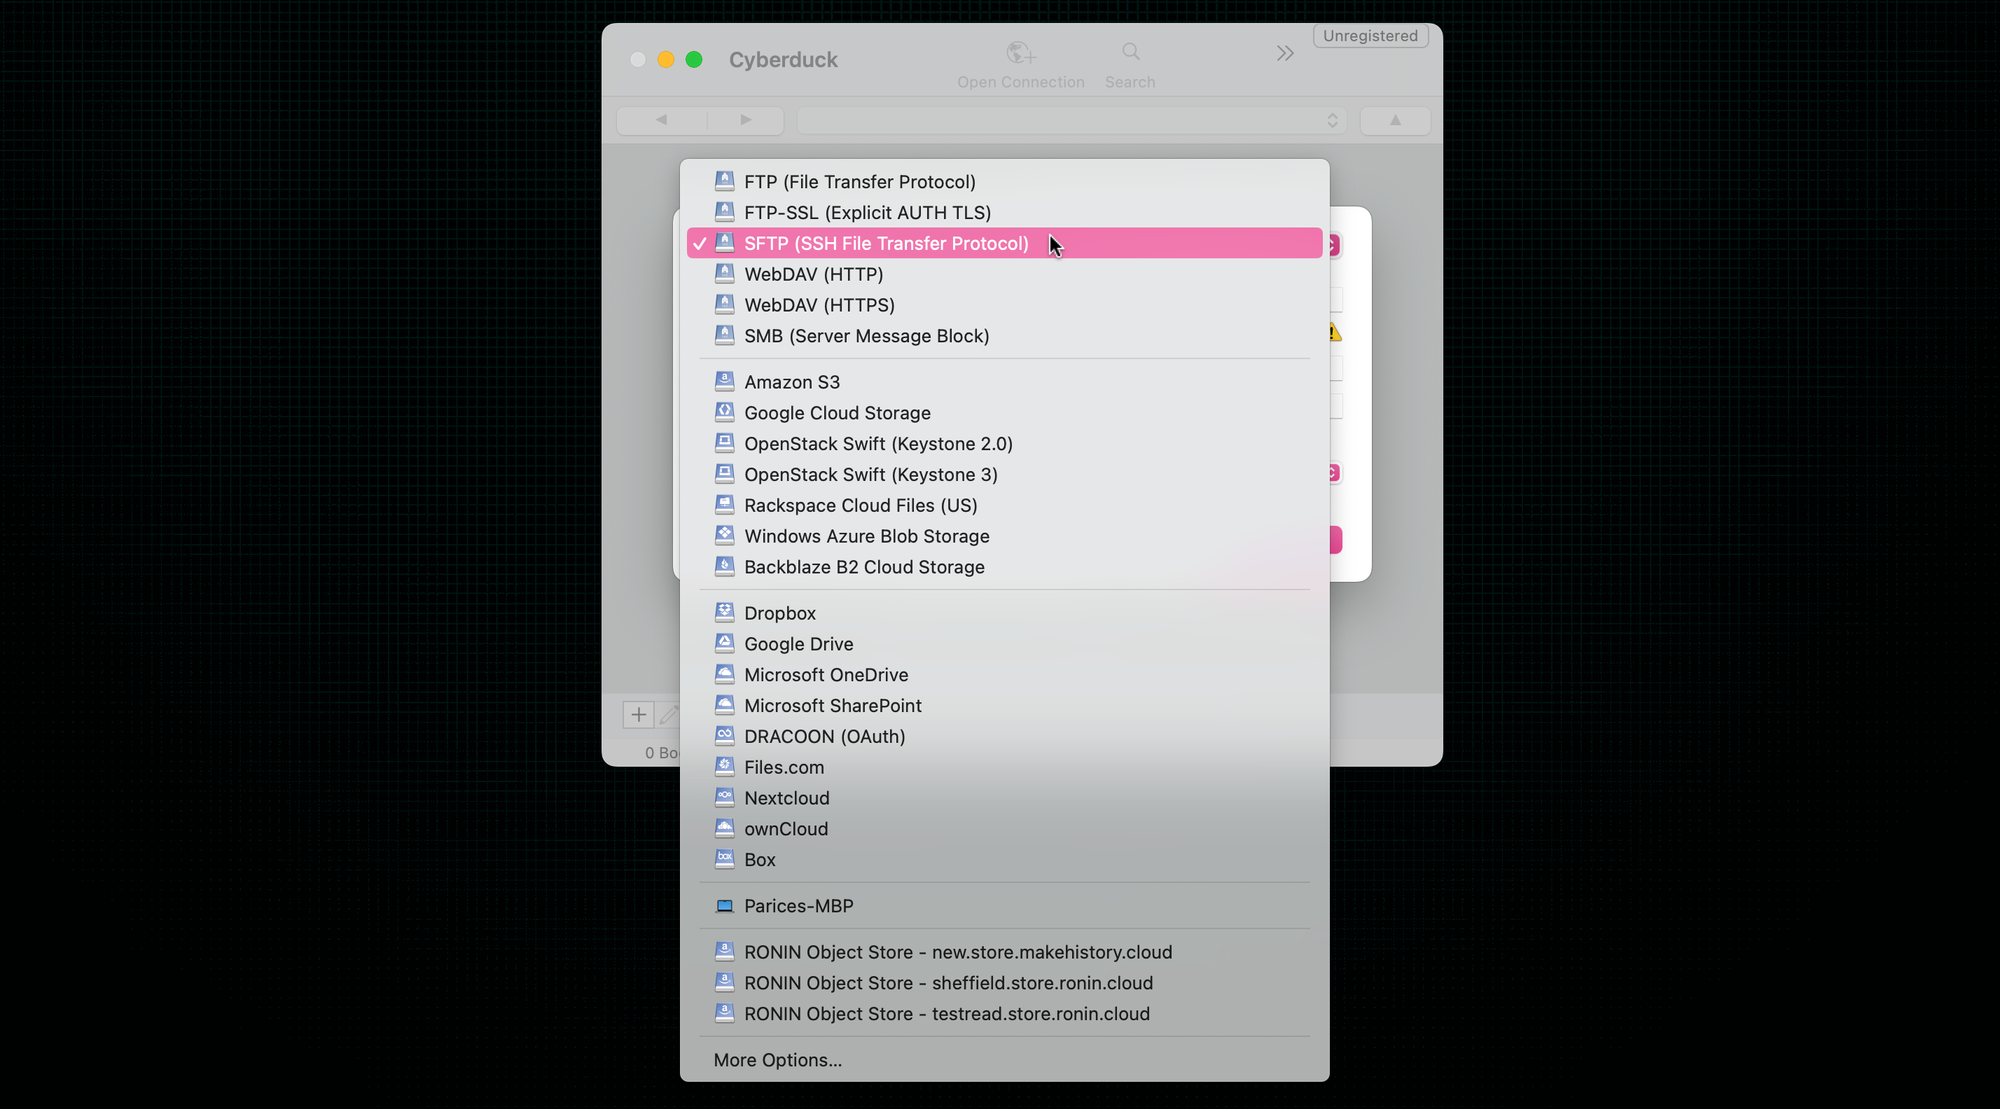
- Open Cyberduck and click File > Open Connection (or if you want to save the connection details for - this will open a new window for you to input information about your RONIN machine so that you can connect to it and transfer files between it and your local computer.
- In the first dropdown, ensure SFTP (SSH File Transfer Protocol) is selected - this will ensure your files are transferred securely.
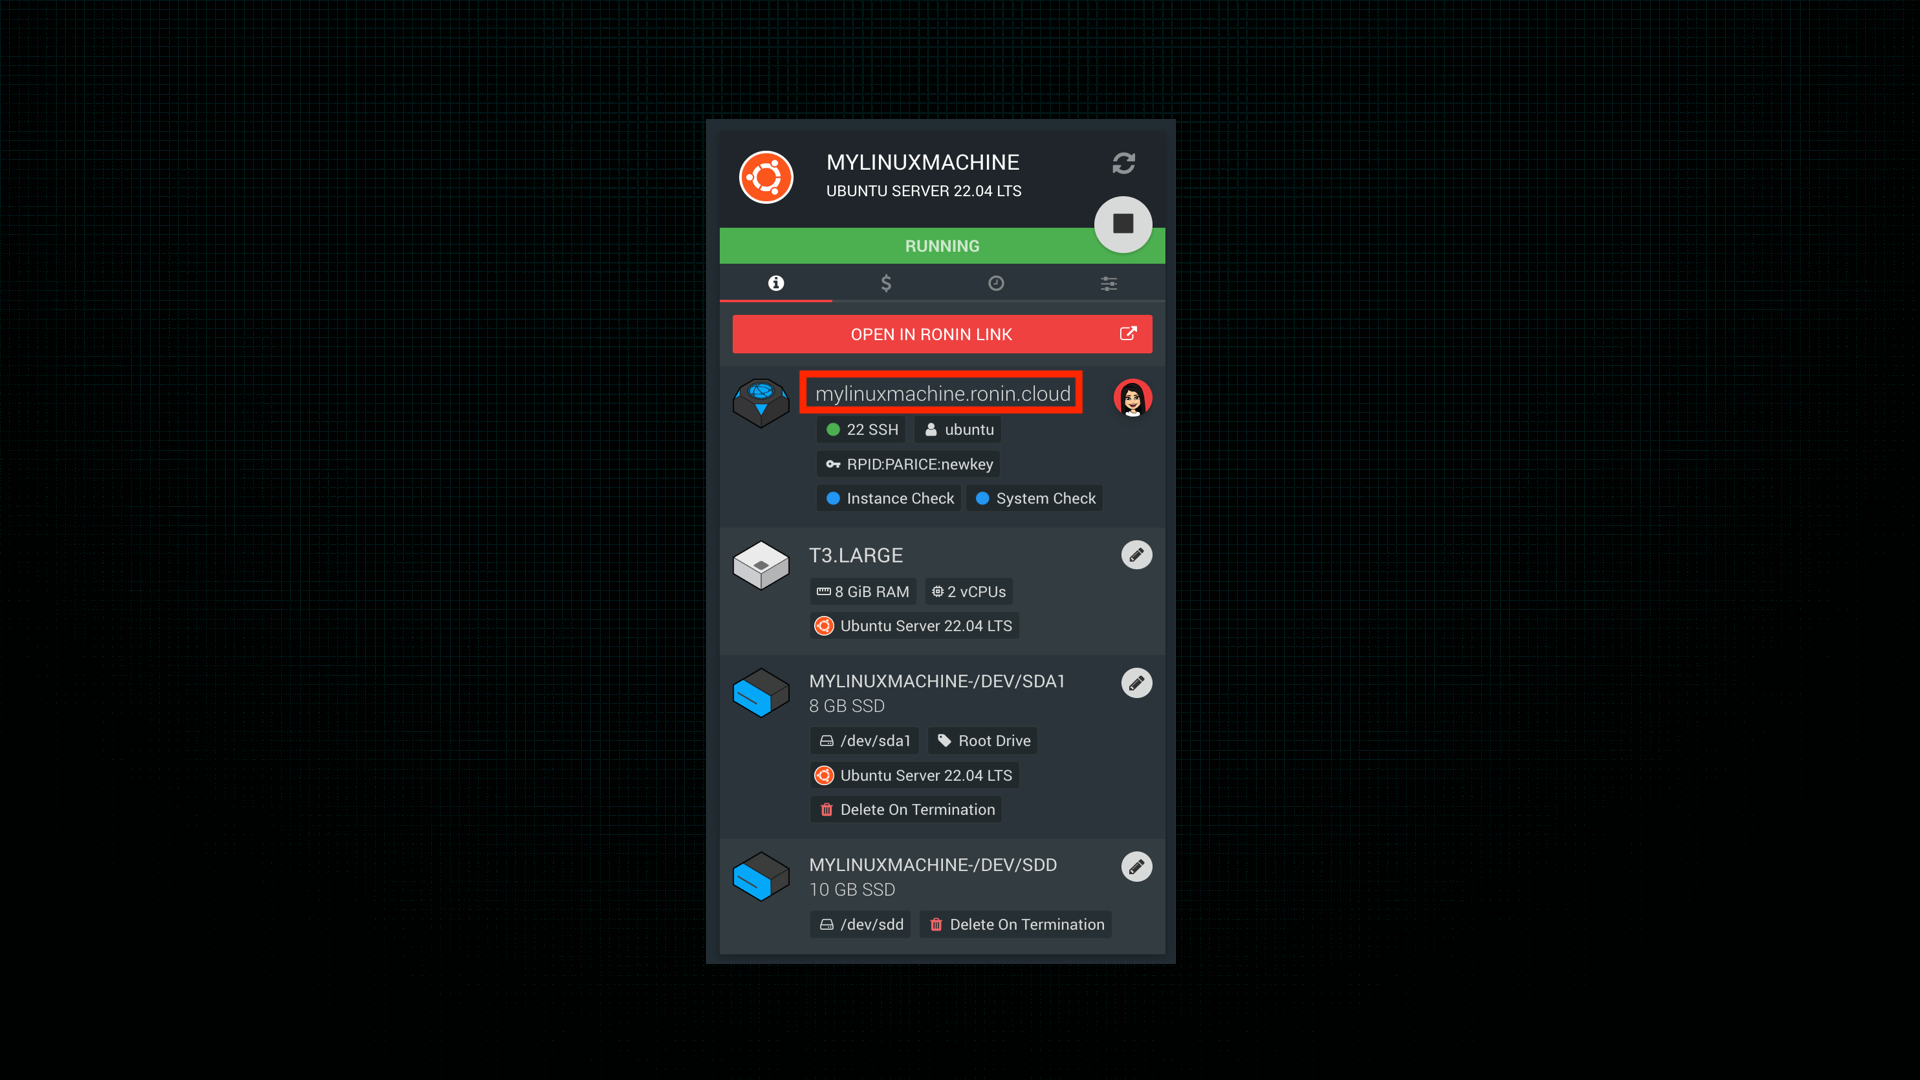
- In the server section, put in your full RONIN machine address including the suffix e.g. mylinuxmachine.ronin.cloud. You can find this on your machine card in your Machine Summary screen in RONIN:
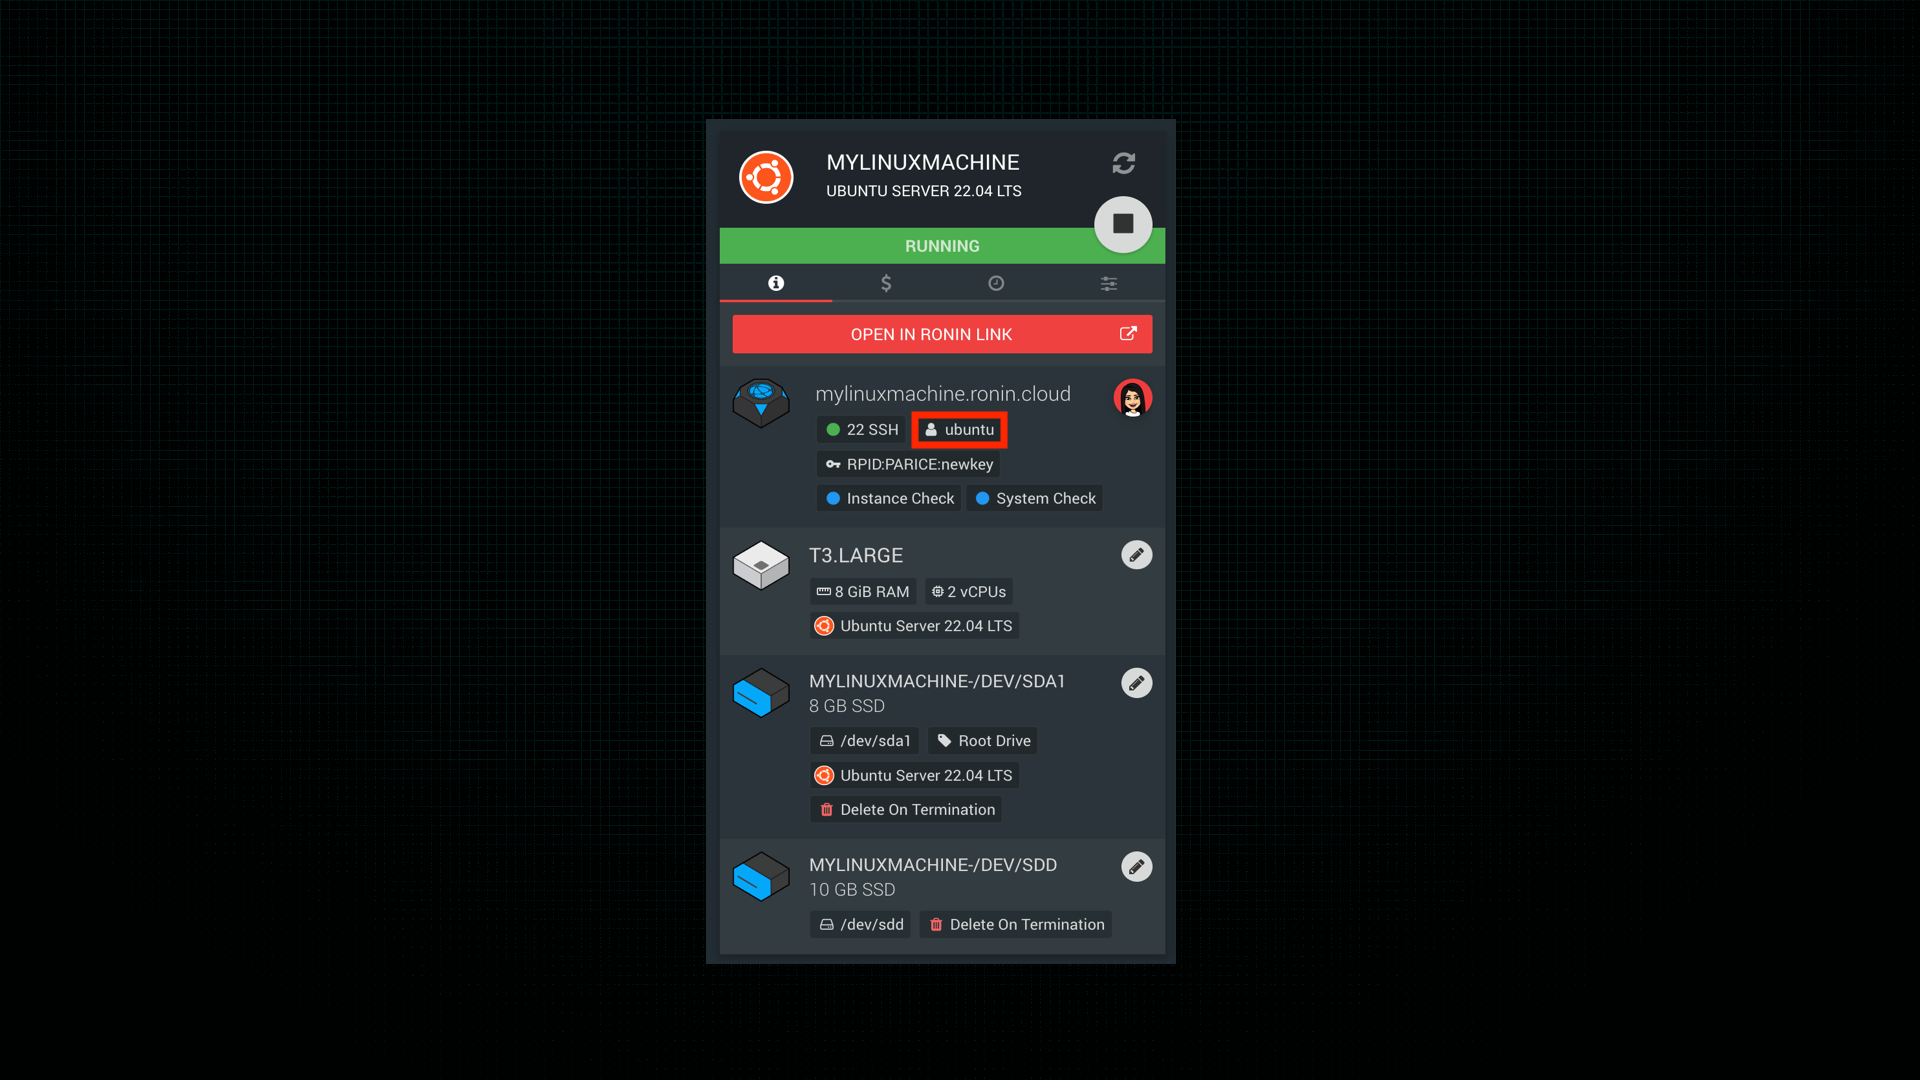
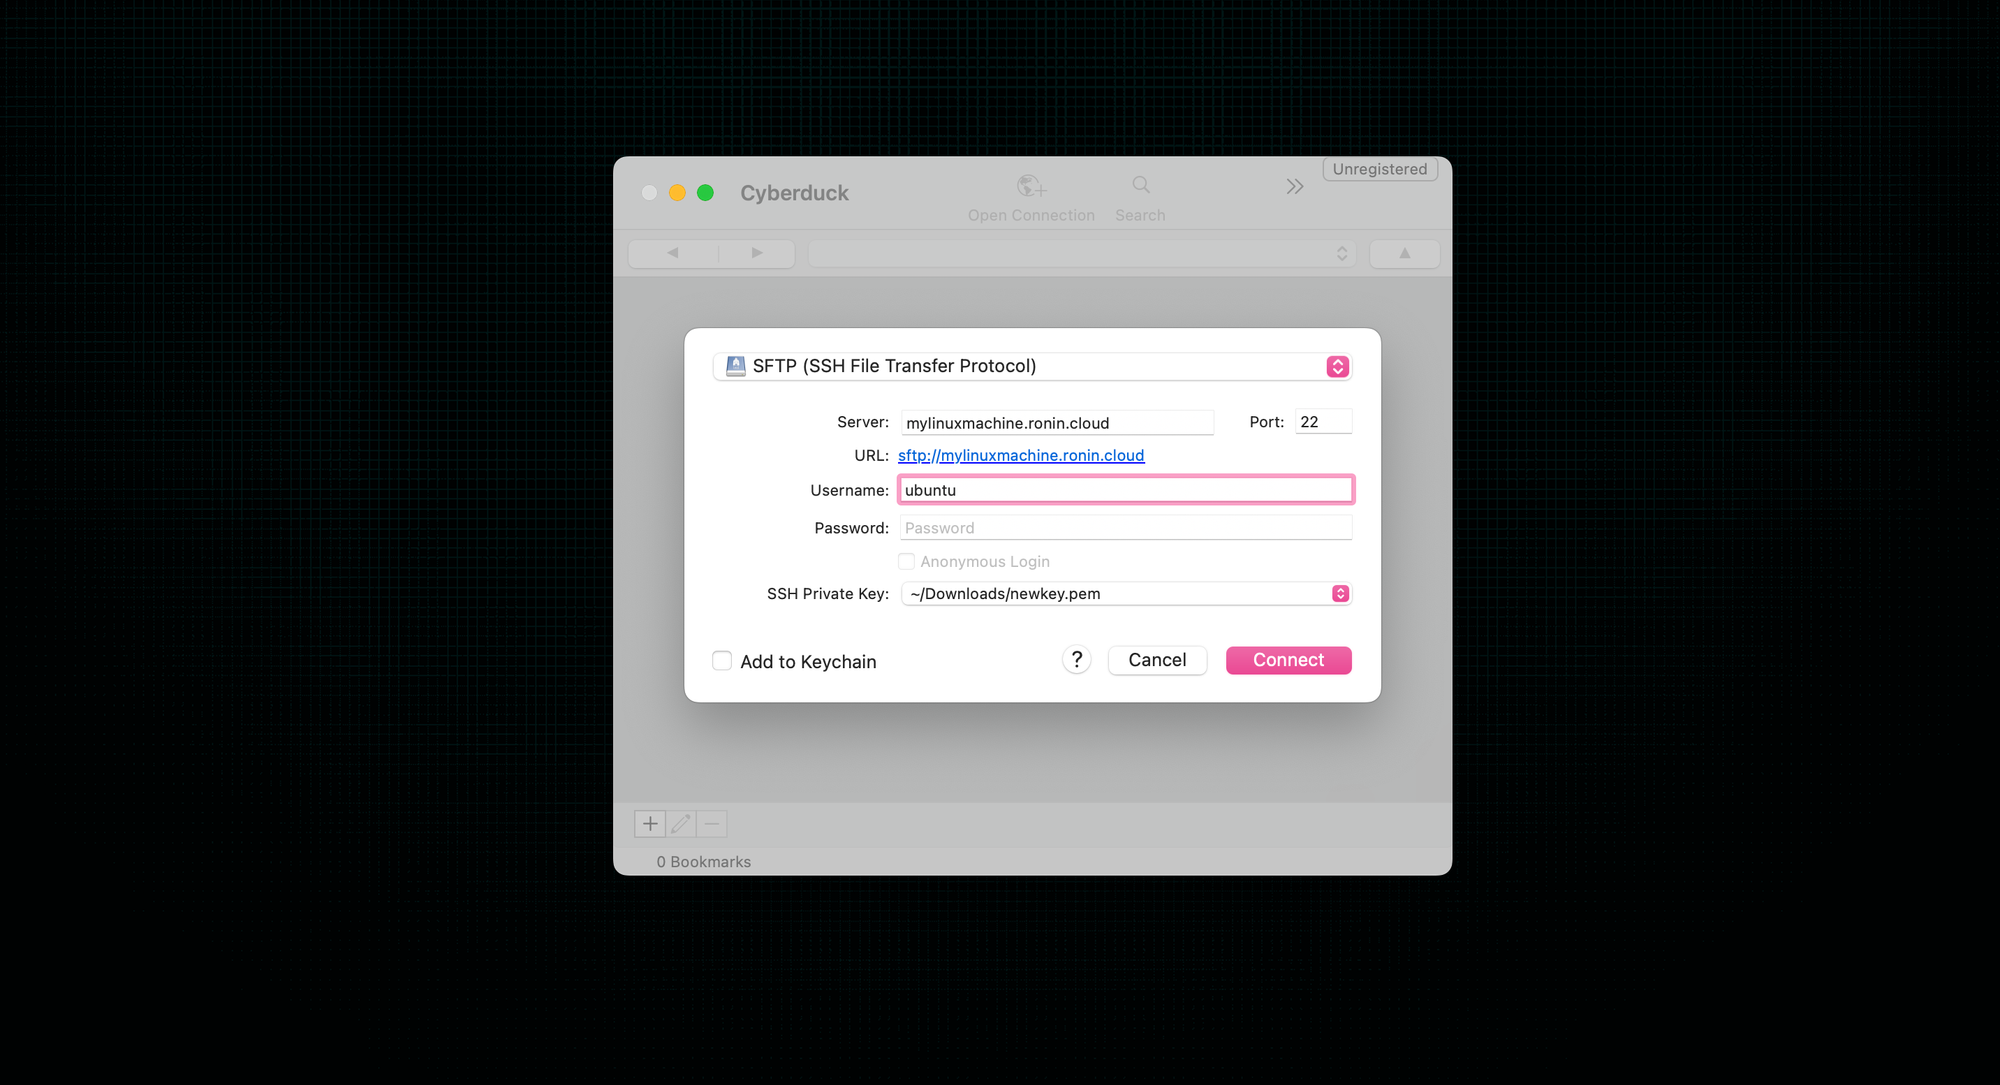
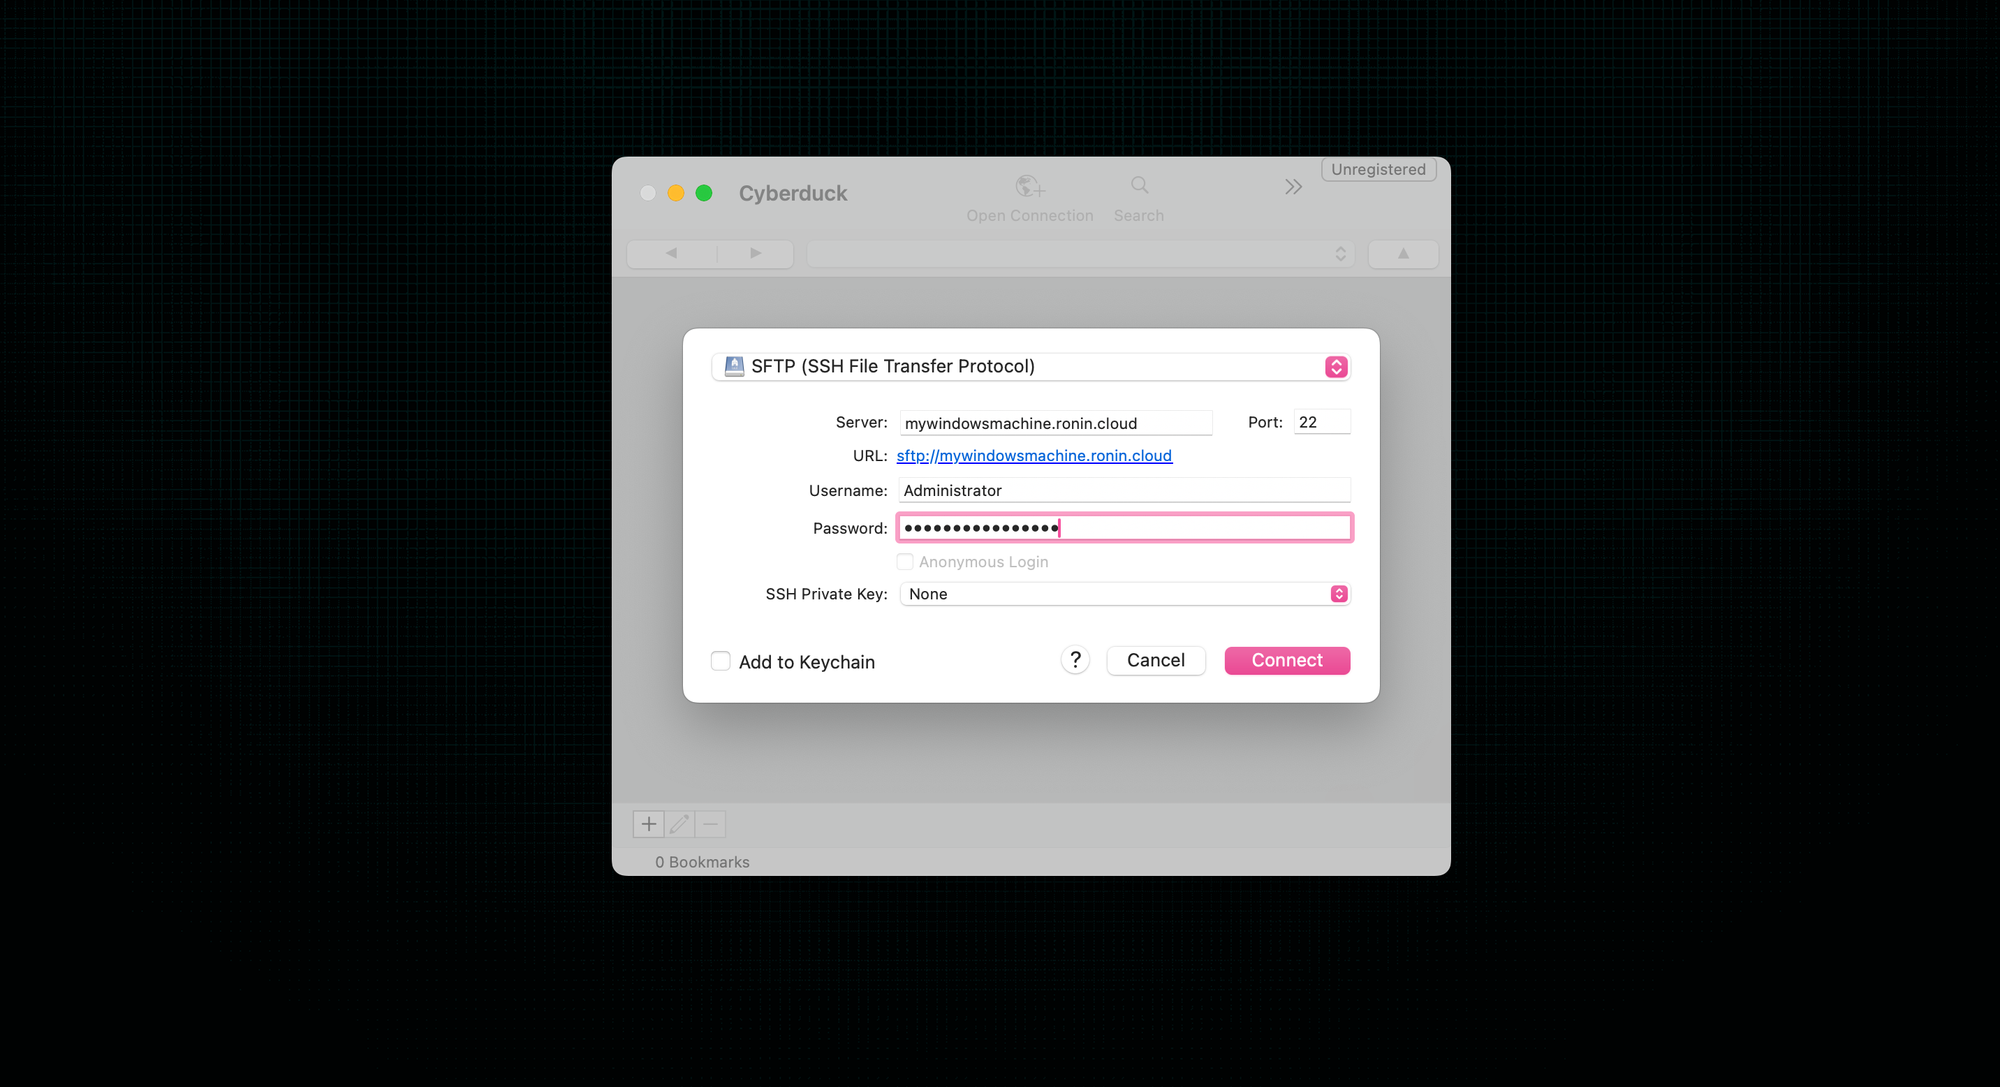
- For the username, this is based on the operating system of your RONIN machine. For example, if your machine is an Ubuntu machine, the username will be "ubuntu", if it is a Windows machine the username will be "Administrator", and if it is another Linux-based operating system like Amazon Linux, SUSE, or Redhat, the username is typically "ec2-user". You can also find this on your machine card in your Machine Summary screen in RONIN:
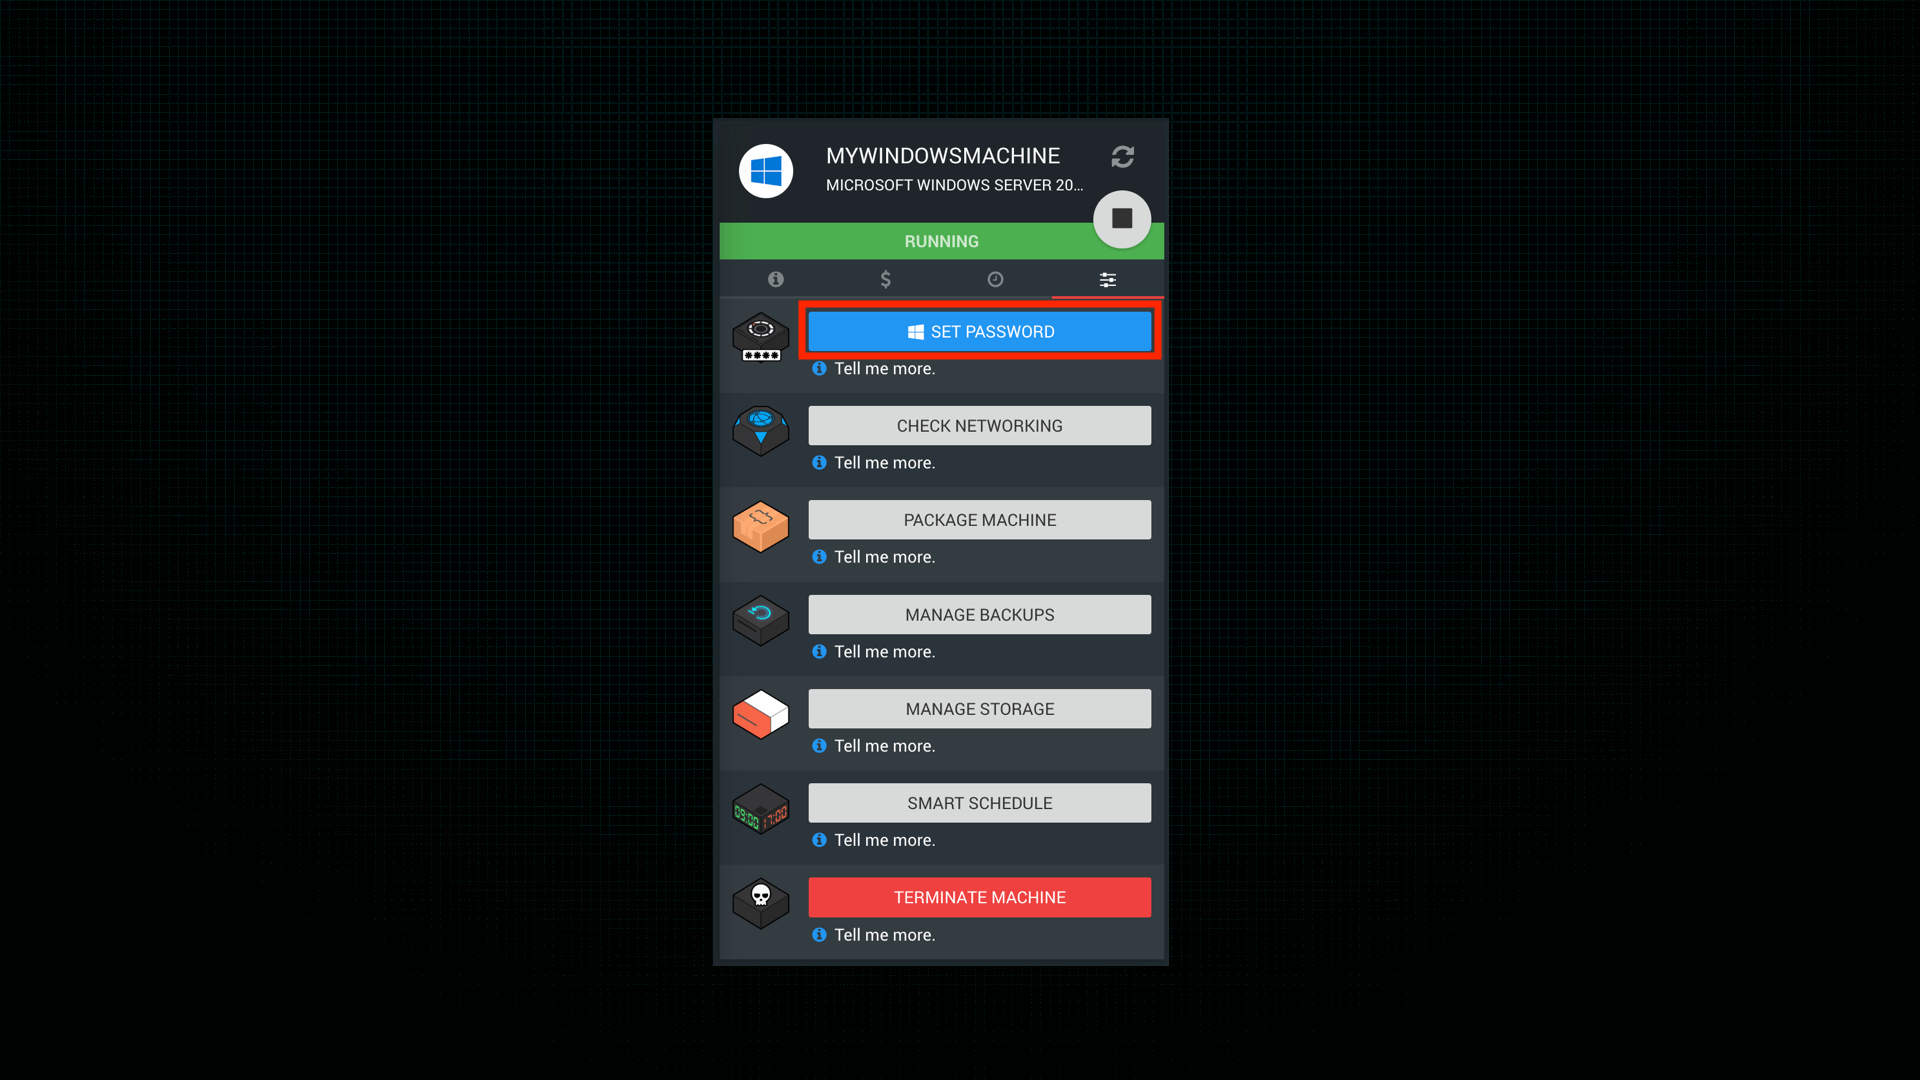
- For the password section, leave this blank if your RONIN machine is linux based. For Windows machines, enter the password that you input when creating your RONIN Machine. If you have forgotten your password, you can reset it from the 4th tab of your machine card in the Machine Summary screen in RONIN:
- If your RONIN machine is linux based, instead of specifying a password, you will need to supply Cyberduck with the SSH key you selected when creating your Machine in RONIN. To do this, click the "SSH Private Key" dropdown, and then click "Choose" to specify the location of your SSH Key. Typically it will be in your Downloads folder. If you have forgotten the name of your SSH key, you can find the name of it on your machine card in the Machine Summary screen in RONIN:

- This is what your Cyberduck options should look like for an Ubuntu (linux-based) RONIN machine:
- This is what your Cyberduck options should look like for a Windows RONIN machine:
- Once you have entered all these details, click "Connect".
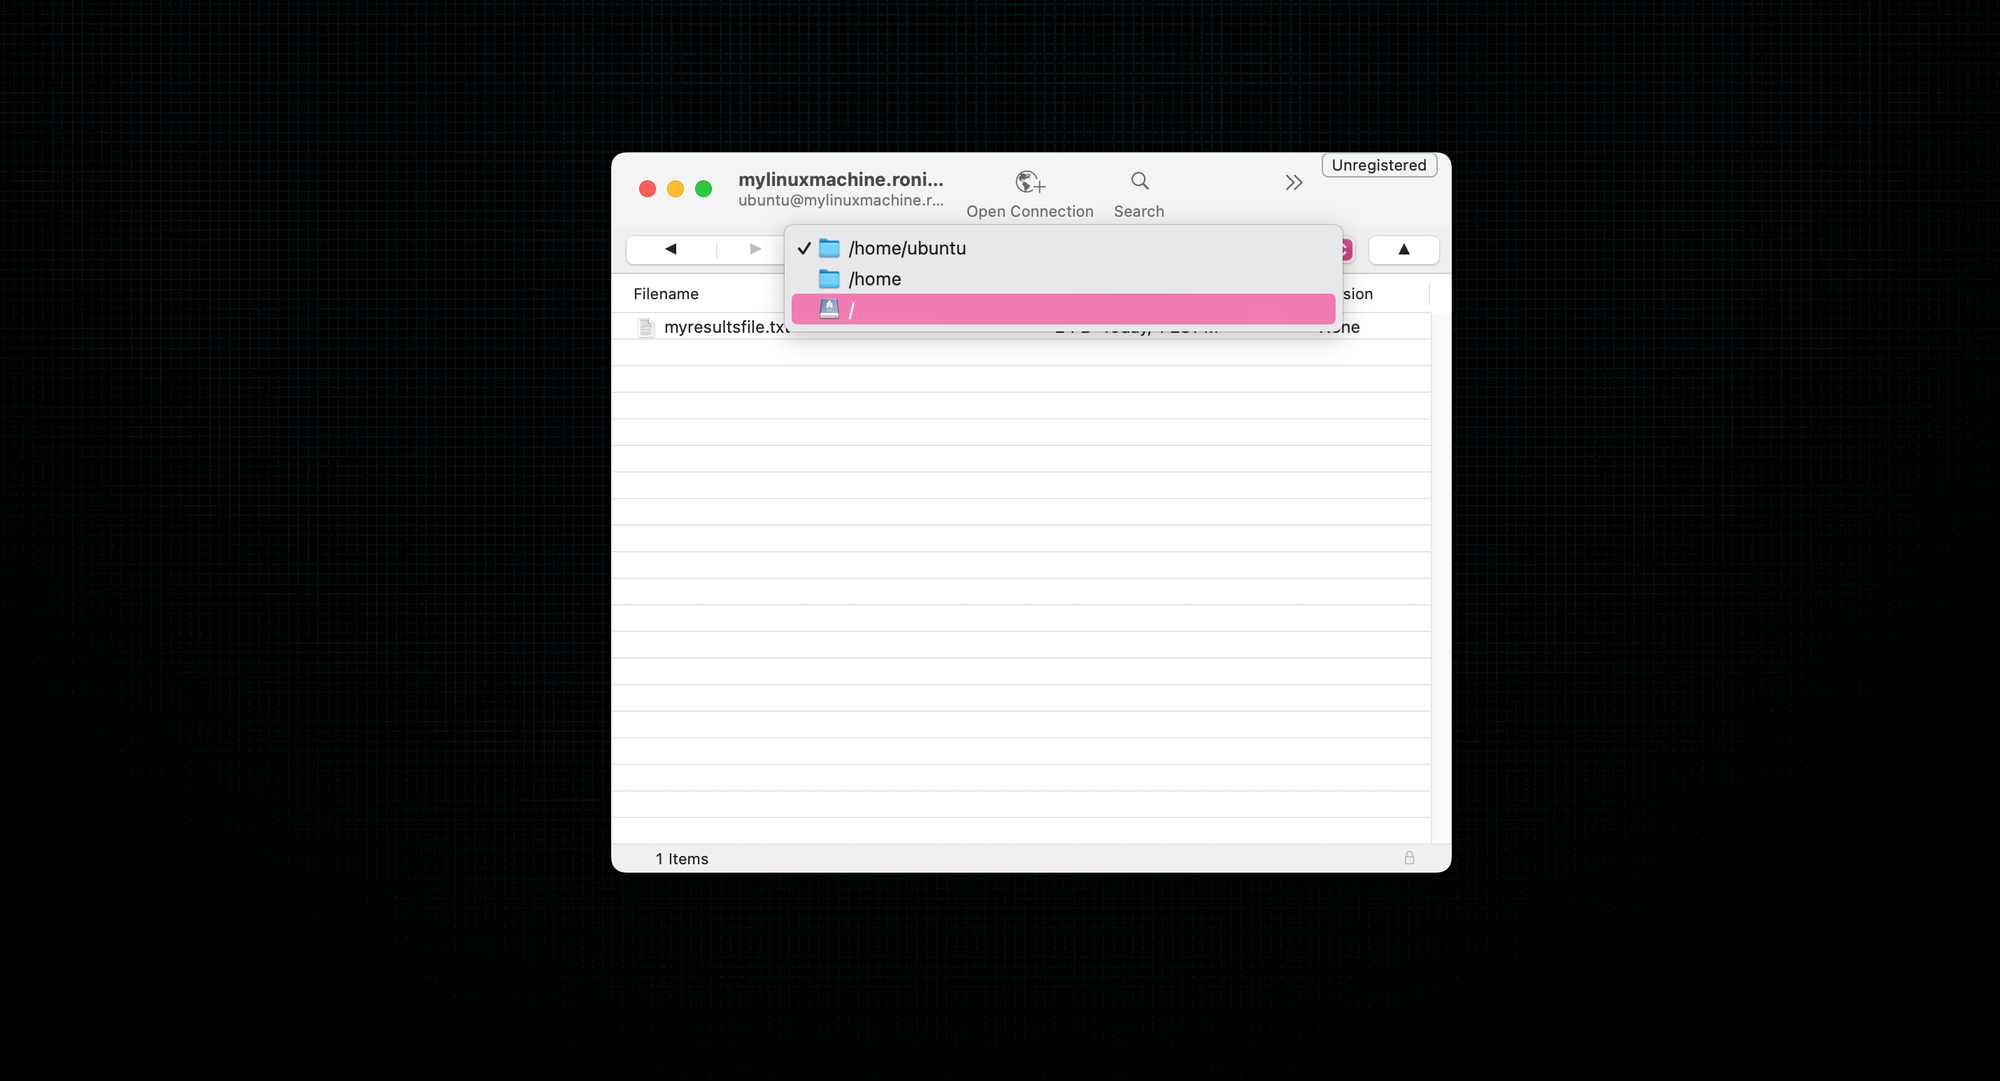
- A new window should open in the default home folder of your RONIN machine e.g.
/home/ubuntufor an Ubuntu machine and/C:/Users/Administratorfor a Windows machine. If you need to change to another folder, like where your extra attached drives are mounted to your machine (e.g. a/mnt/sddfolder for a linux machine) click on the folder dropdown and navigate to the root/directory. From there you will be able to go down the folder hierarchy to the folder you are after:
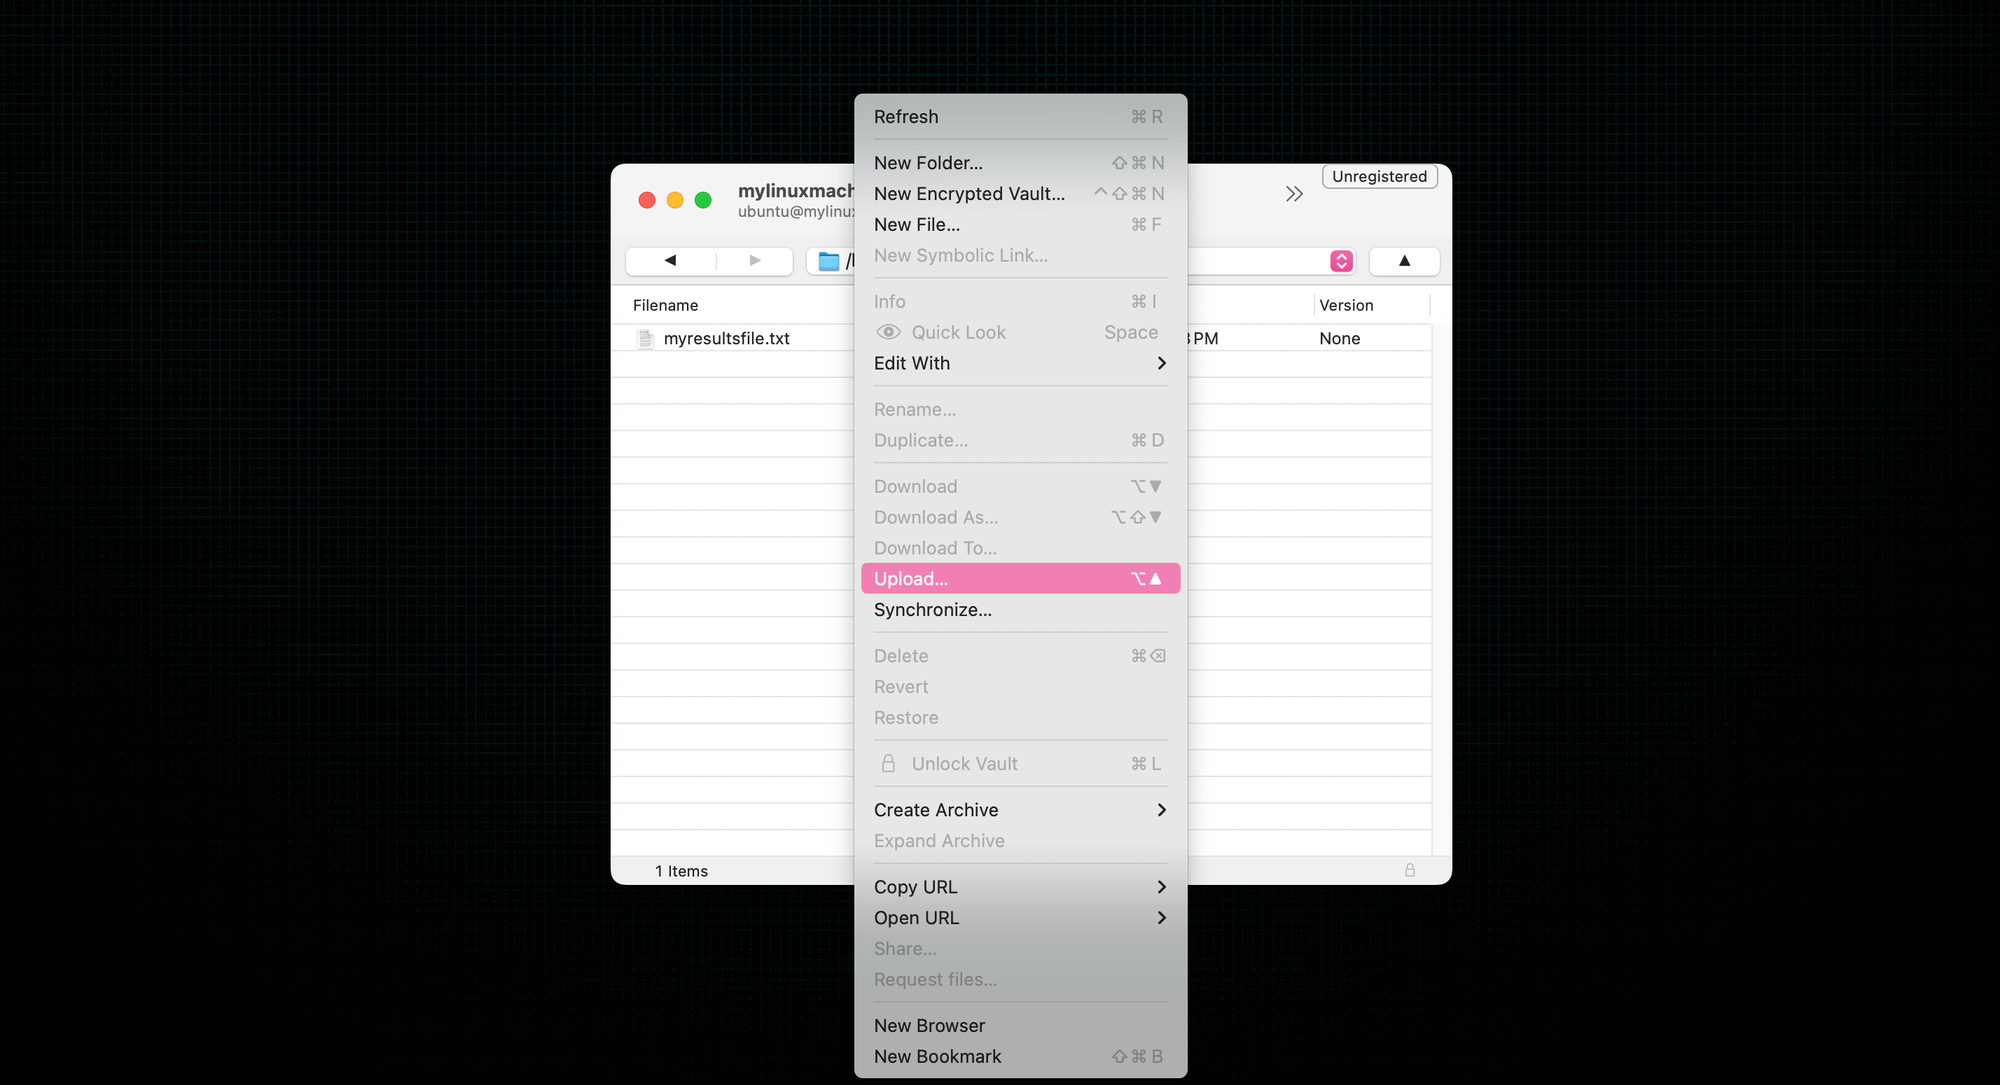
- Once you are in the folder you wish to download or upload files to. You can easily upload a file from your local computer to your RONIN machine by dragging the file onto this Window, or right clicking in the Window and clicking "Upload".
- To Download a file from your RONIN machine to your local computer, simply right click the file and click "Download".
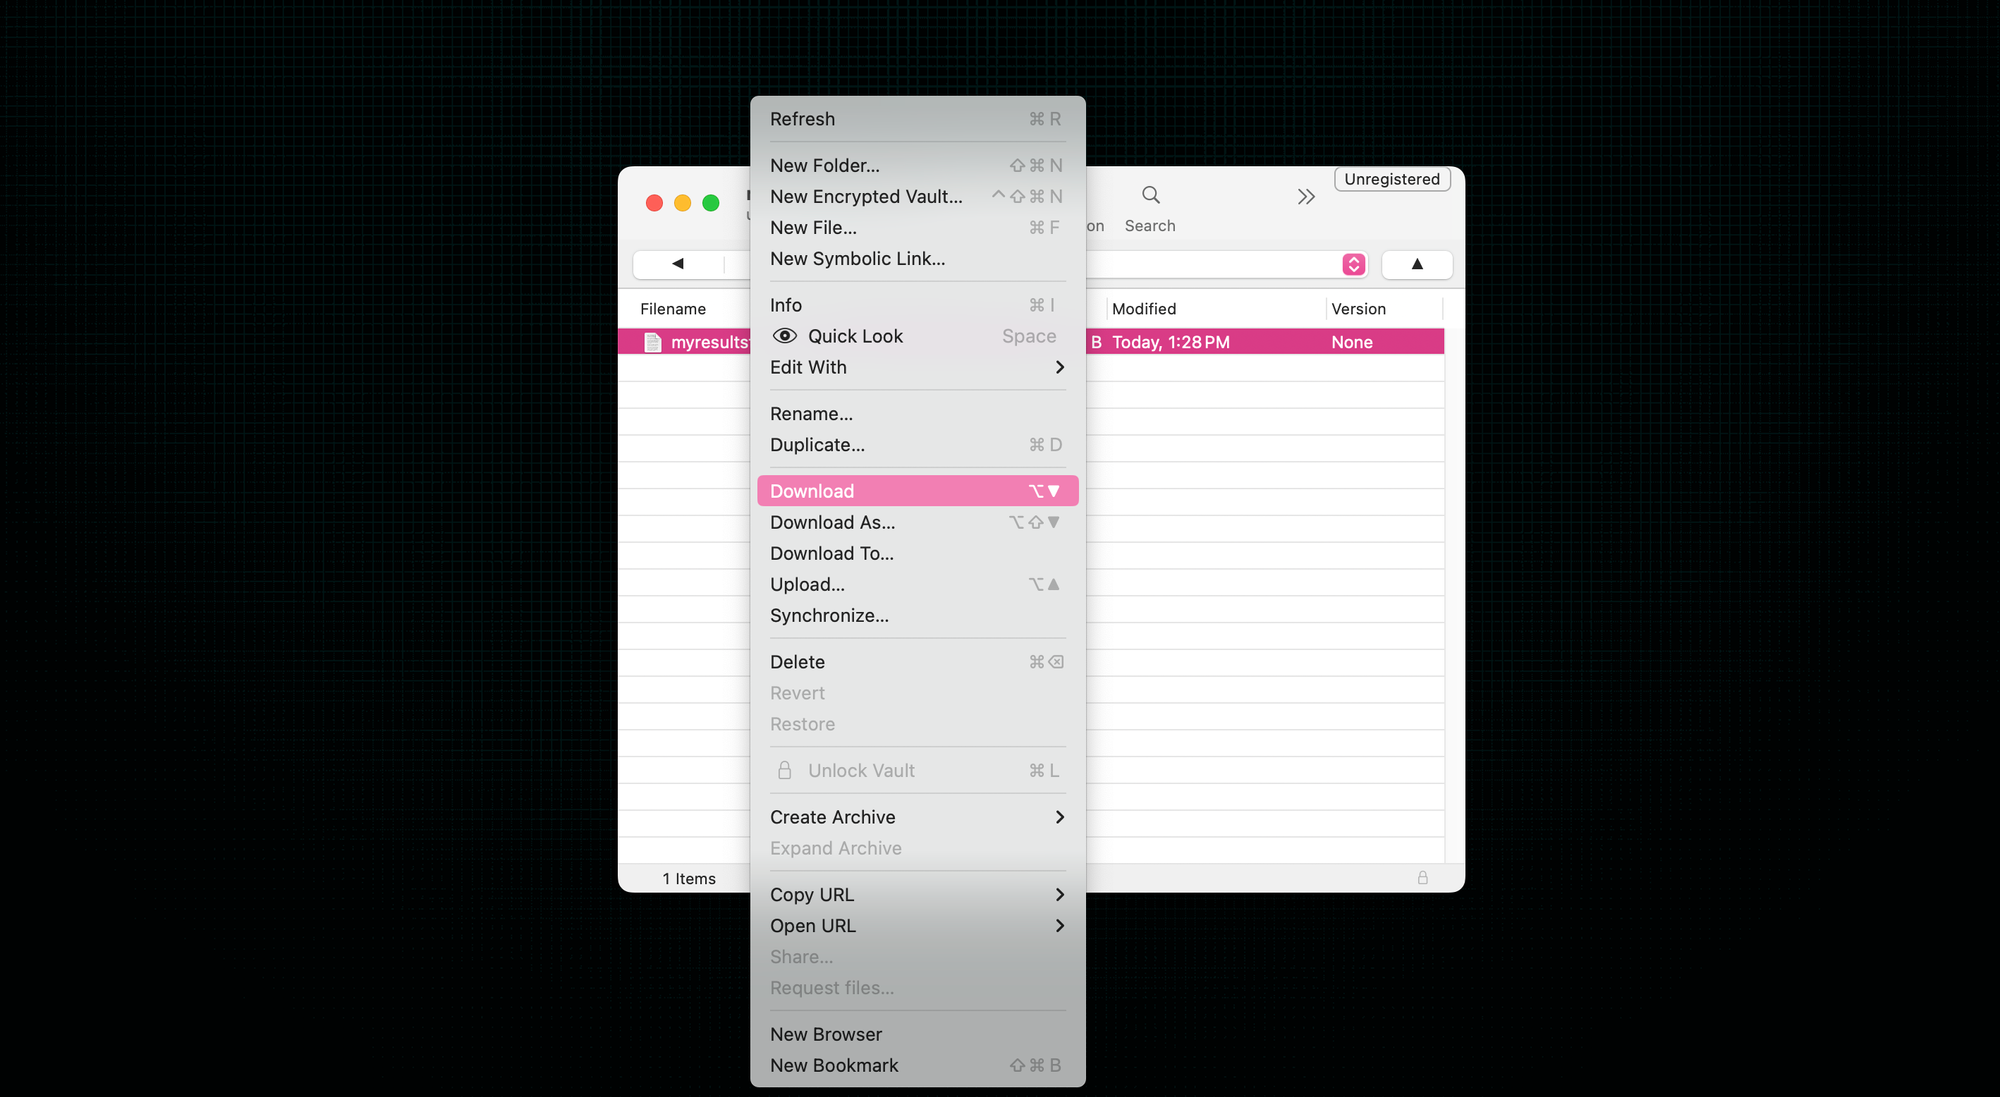
- You can also delete files, rename files, create new folders and rearrange files etc.
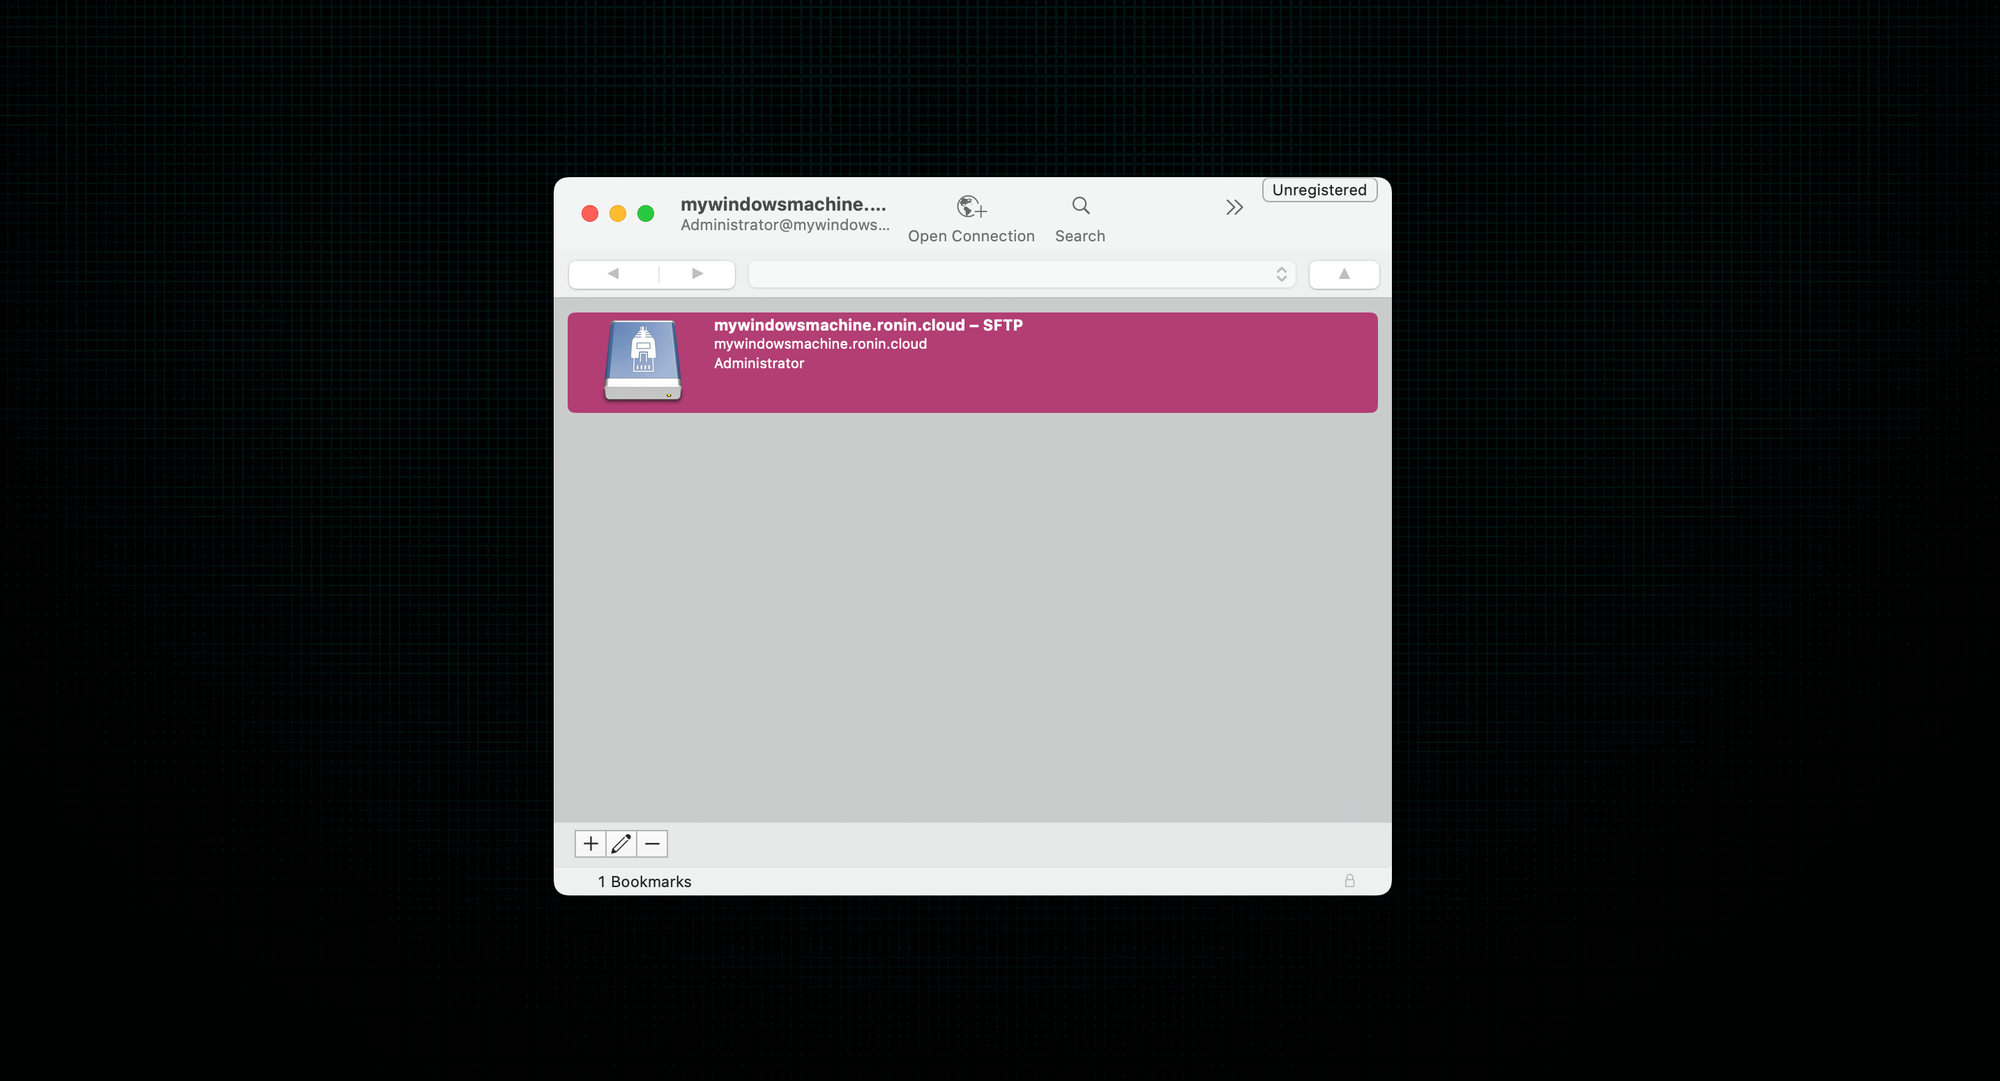
- If you want to save these connection details for next time so that you don't have to input them again next time you open Cyberduck, right click in the Window and click "New Bookmark". This connection will then appear in your list of Bookmarks when you open Cyberduck:
If you're a command-line whizz, you can also transfer files from a terminal with the SFTP command, rather than using a FTP client - there's already a great blog by DigitalOcean that covers this:
Tada! You're now officially a cloud warrior
To become a cloud guru, further your reading with the below articles.
Introduction to Snapshots
Introduction to Packages
Introduction to Storage