Creating a Project in RONIN
First of all, you need a place where you can experiment. The project you create in RONIN is your space and you are in charge.

Welcome to RONIN! We are glad to have you here! You're probably eager to get started, so let's begin!
First of all, you need a place where you can experiment.
Consider a project in RONIN as a sandbox. No matter what incredible research you wish to work on, the project you create in RONIN is your space and you are in charge.
A project can be anything, perhaps you're a team of researchers observing trends in the human genome, and require high performance compute power. Maybe you're a teacher and want to create a place where your students can learn computing while keeping a watchful eye on them. Or maybe you're just ridin' solo and need a place to experiment in the world of cloud computing.
RONIN strives to make all these scenarios easy.
Lets get started
Step 1 - Navigate to the Create Project screen
To create a project, log into RONIN, and click the CREATE PROJECT button at the top of the screen.
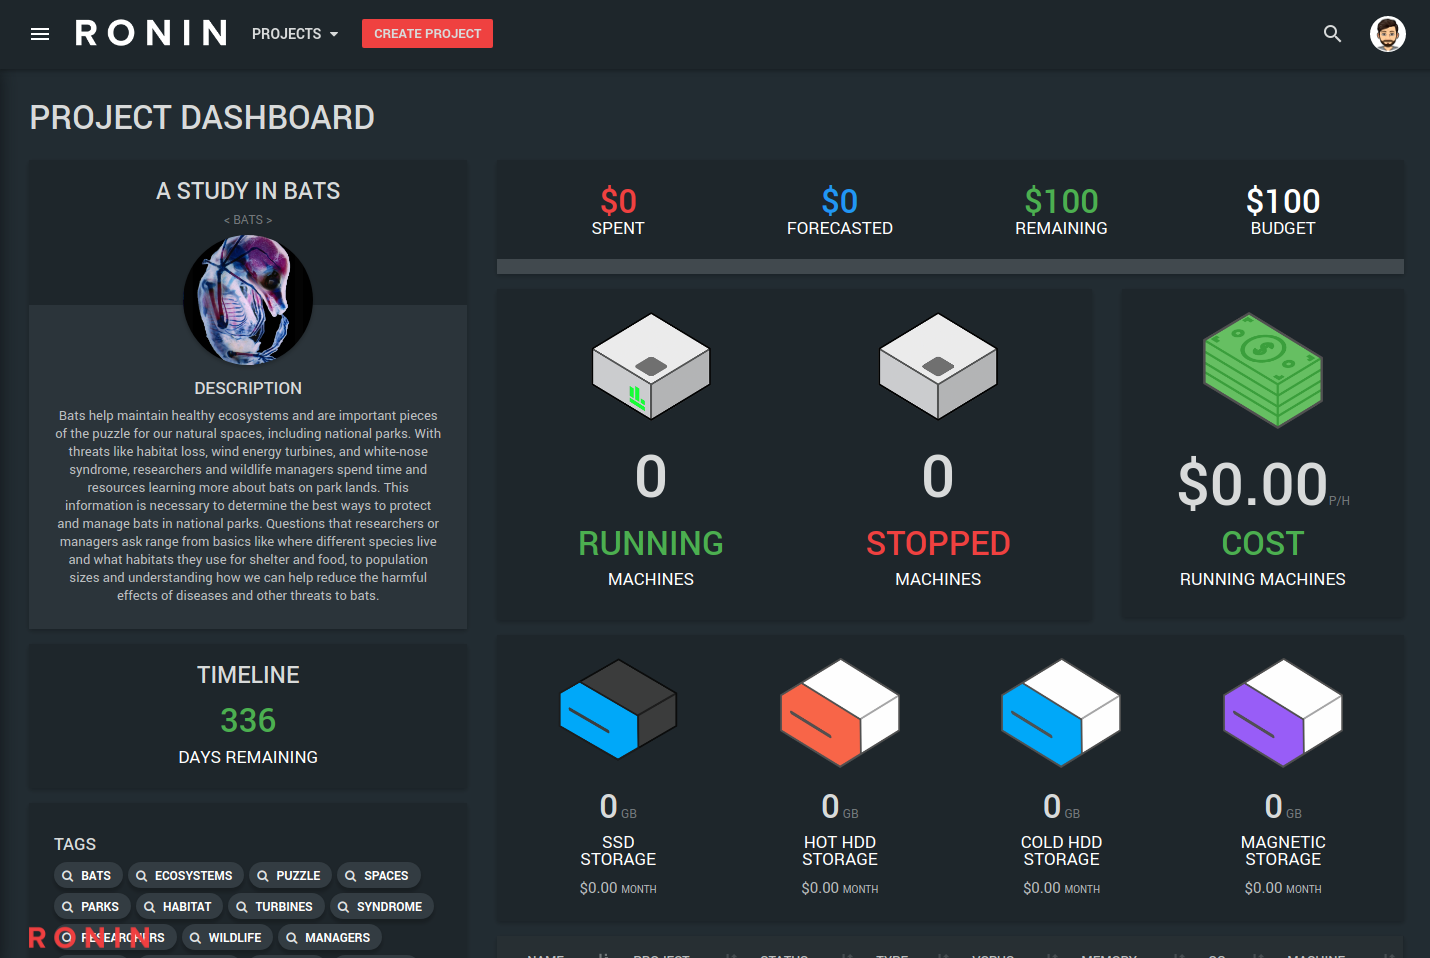
You will be greeted with this page.
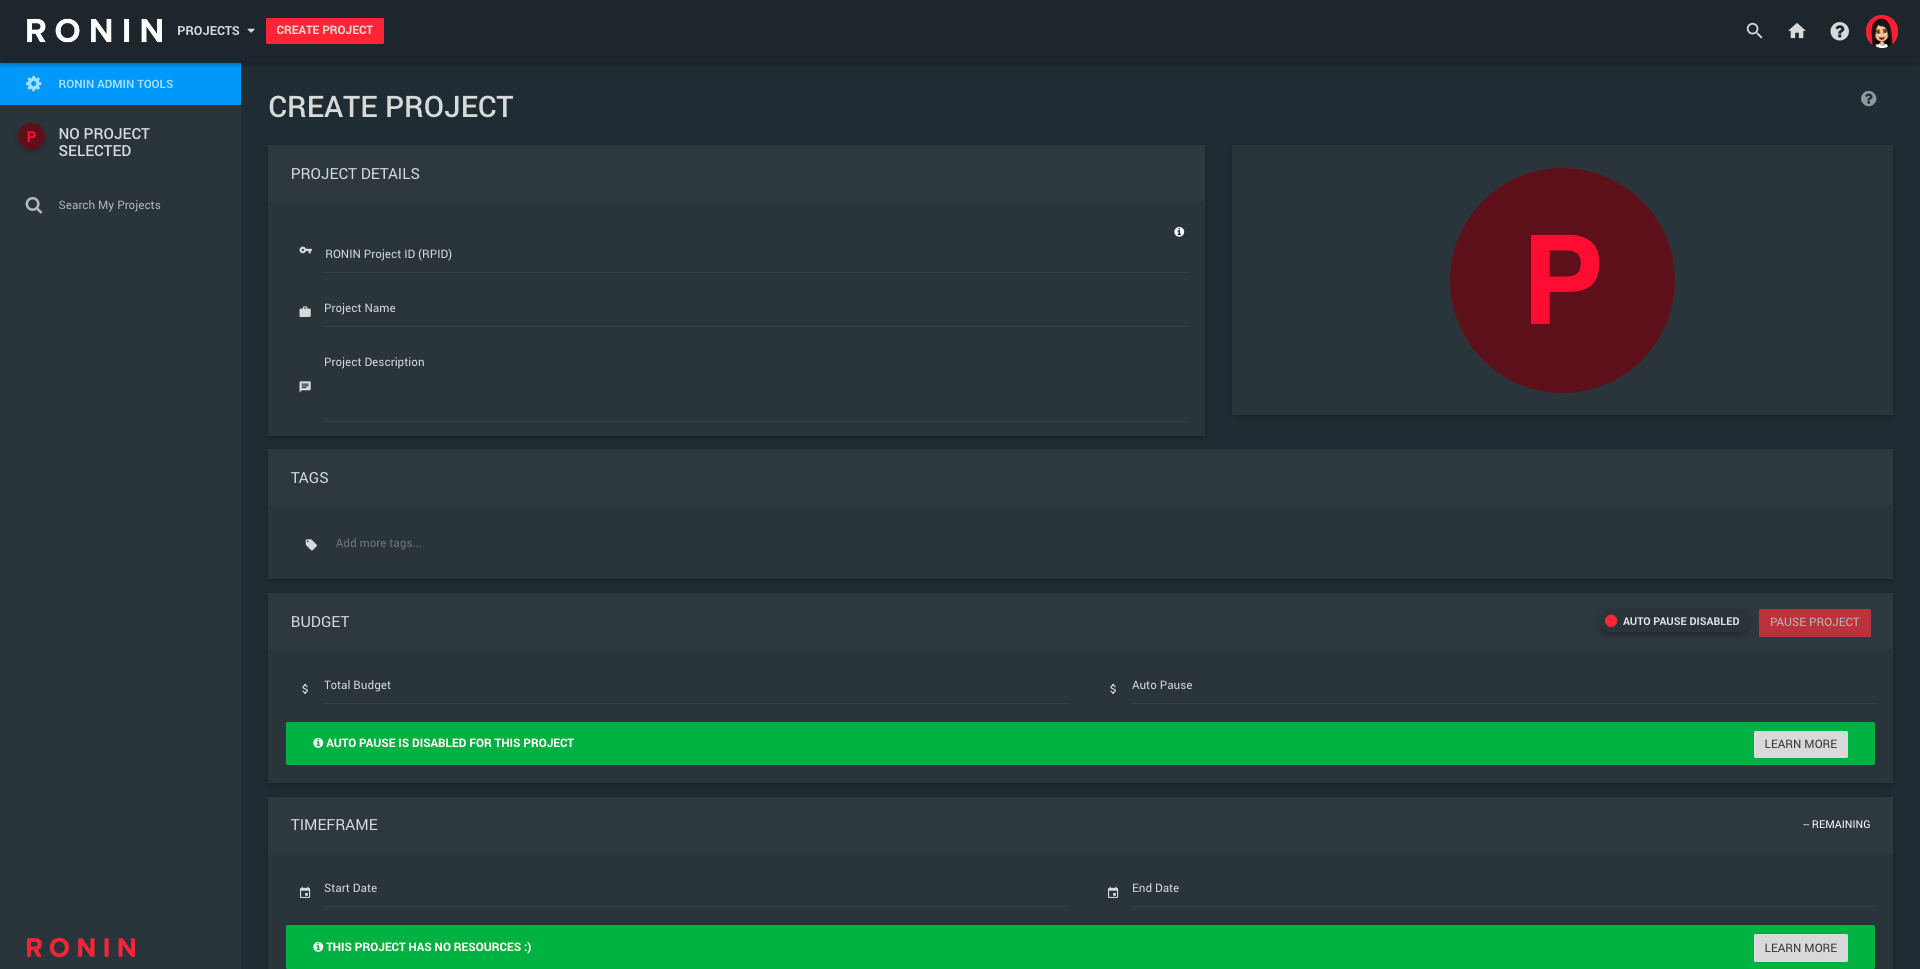
Step 2 - You will be required to fill in the following fields:
RONIN PROJECT ID (RPID) - A unique ID for the project - Must be alphanumeric and at least 3 characters in length (dots . and dashes - are also accepted). The RPID is what RONIN uses to keep a track of all project resources and expenditure in AWS so it is recommended that the RPID is meaningful and easy to differentiate from others.
Project Name - A display name for the project - This can be longer and more detailed than the RPID.
Project Description - A brief description of what the project is.
Tags - Keywords related to your project that anyone can search on to find the project.
When you've finished writing a description, your tags will automagically appear for you. Feel free to add or remove any of these tags.
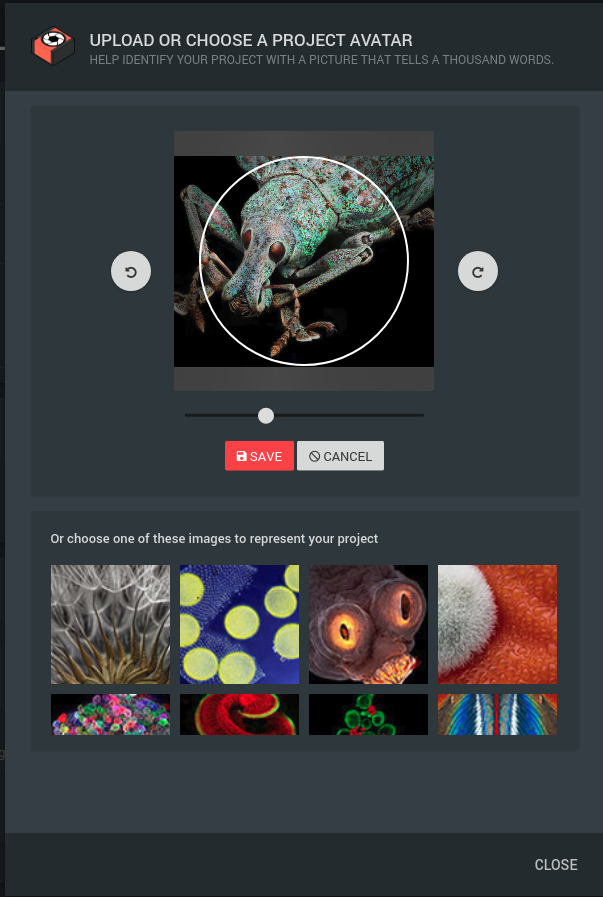
Project Avatar - Upload or select an image to make your project instantly recognisable.
HIGHLY RECOMMENDED! This will help identify your resources in RONIN with something familiar. Click the big red circle at the top of the page and upload your image, or choose one of the defaults included.
Budget - The max amount of money allocated to this project for the above timeframe.
The Total Budget that you enter will trigger email alerts to ensure you don't go over your spend limit - at 25%, 50%, 75% and 100% of your allocated spend.
Autopause - If you wish to set an auto pause threshold for the project, ensure you first enable auto pause by toggling the switch at the top right of the budget section, and then enter the desired auto pause value. We recommend setting this value to be slightly lower than the total budget to allow for any storage costs that may accrue while the project is paused. You can read more about auto pause here.
Timeframe - The start and end date of your project. This allows us to forecast predicted expenditure of the project based on usage patterns across the given timeframe.
Permissions - Who in your team / organisation you want to have access to this project's resources.
- Admin - has access to all resources, and the ability to add / remove others to the project
- User - has access to all resources, but cannot add / remove people from the project
- View - can only view the project, can not create or edit.
Emails for Budget Alerts - Add the desired email addresses that budgeting alerts and auto-pause notifications should be sent to.
RONIN automatically adds everyone who has been granted permissions to the project to the budgeting alerts field, but this can be modified as required.
WBS Code / Purchase Order Number - Codes that will assist the "big wigs" in charge of financing, to find out where money is being spent. These codes can be useful for grouping multiple projects together.
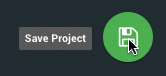
Step 3 - Save your changes
To save your changes, click the little green button at the bottom right corner of your screen.
Step 4 - Thats it!
Your new project is now setup and ready for whatever you want to throw it's way.
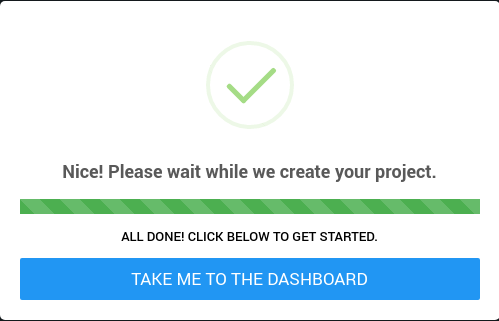
Navigate to the dashboard by clicking the blue button in the alert. More info on the Dashboard page here.
Next step - Creating a machine