Making a Storage Volume Available for Use in Windows
After you attach a storage volume to your machine, you will still have to let your operating system know it's there. We'll take you through how to do just that.

After you attach a storage volume to your machine, you will still have to let Windows know it's there. It will also have to be in a format that Windows recognises.
In the next steps, we will take you through how to do just that.
If you are on Linux, check out this instead - Making a storage volume available for use in Linux
We recommend you take a snapshot of your storage volume for backup purposes or to use as a baseline when you create another volume.
Step 1 - Making the Volume Available on Windows
Log in to your Windows machine using Remote Desktop. For more information, see Connecting to Your Windows Machine.
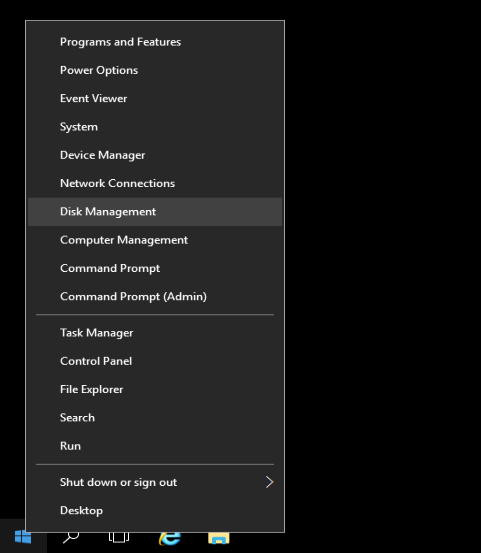
Step 2 - Start the Disk Management utility.
On the taskbar, open the context (right-click) menu for the Windows logo and choose Disk Management.
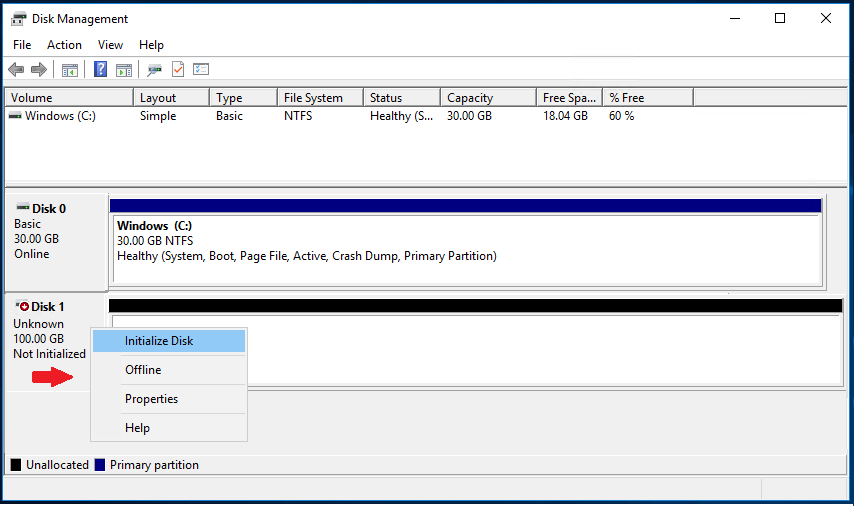
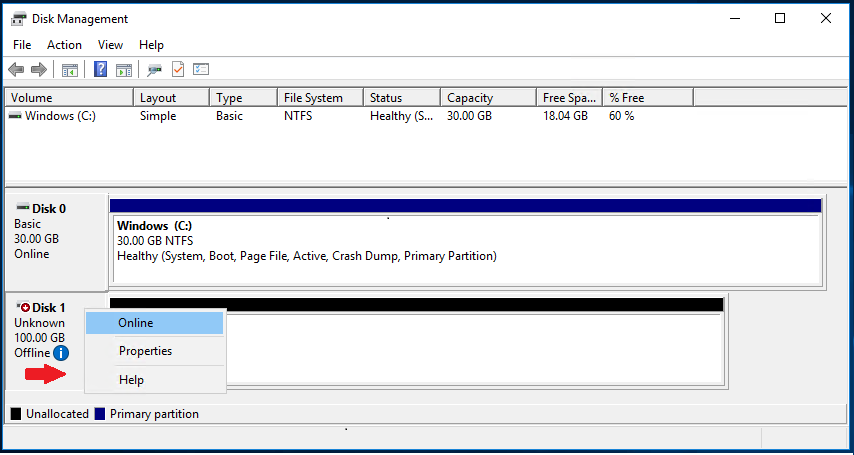
Step 3 - Bring the volume online
In the lower pane, open the context (right-click) menu for the left panel for the disk for the EBS volume. Choose Online.

If the storage volume matches the right format (usually NTFS for Windows machines) then that's all you have to do. It will show up as a new drive in the This PC app (e.g. D:) in the Start Menu.
If you're mounting a storage volume that already has data on it (for example, a public data set, or a volume that you created from a snapshot), do not format it or you will delete the existing data!
Step 4 - Initialise the disk (Conditional)
When you create a brand new storage device, you'll probably need to initialise a disk before you can use it.
To do so, open the context (right-click) menu for the left panel for the disk and choose Initialise Disk. In the Initialise Disk dialog box, select a partition style and choose OK.
Open the context (right-click) menu for the right panel for the disk and choose New Simple Volume.
The disk will now appear as a new drive in the This PC app (e.g. D:) found in the Start Menu.