Determining which DNS server to use for your RONIN Isolate
Since RONIN Isolate operates via internal IP addresses only, a custom DNS server will need to be set within your workspace in order for you to be able to connect to your RONIN Isolate machines. This blog post teaches you how.

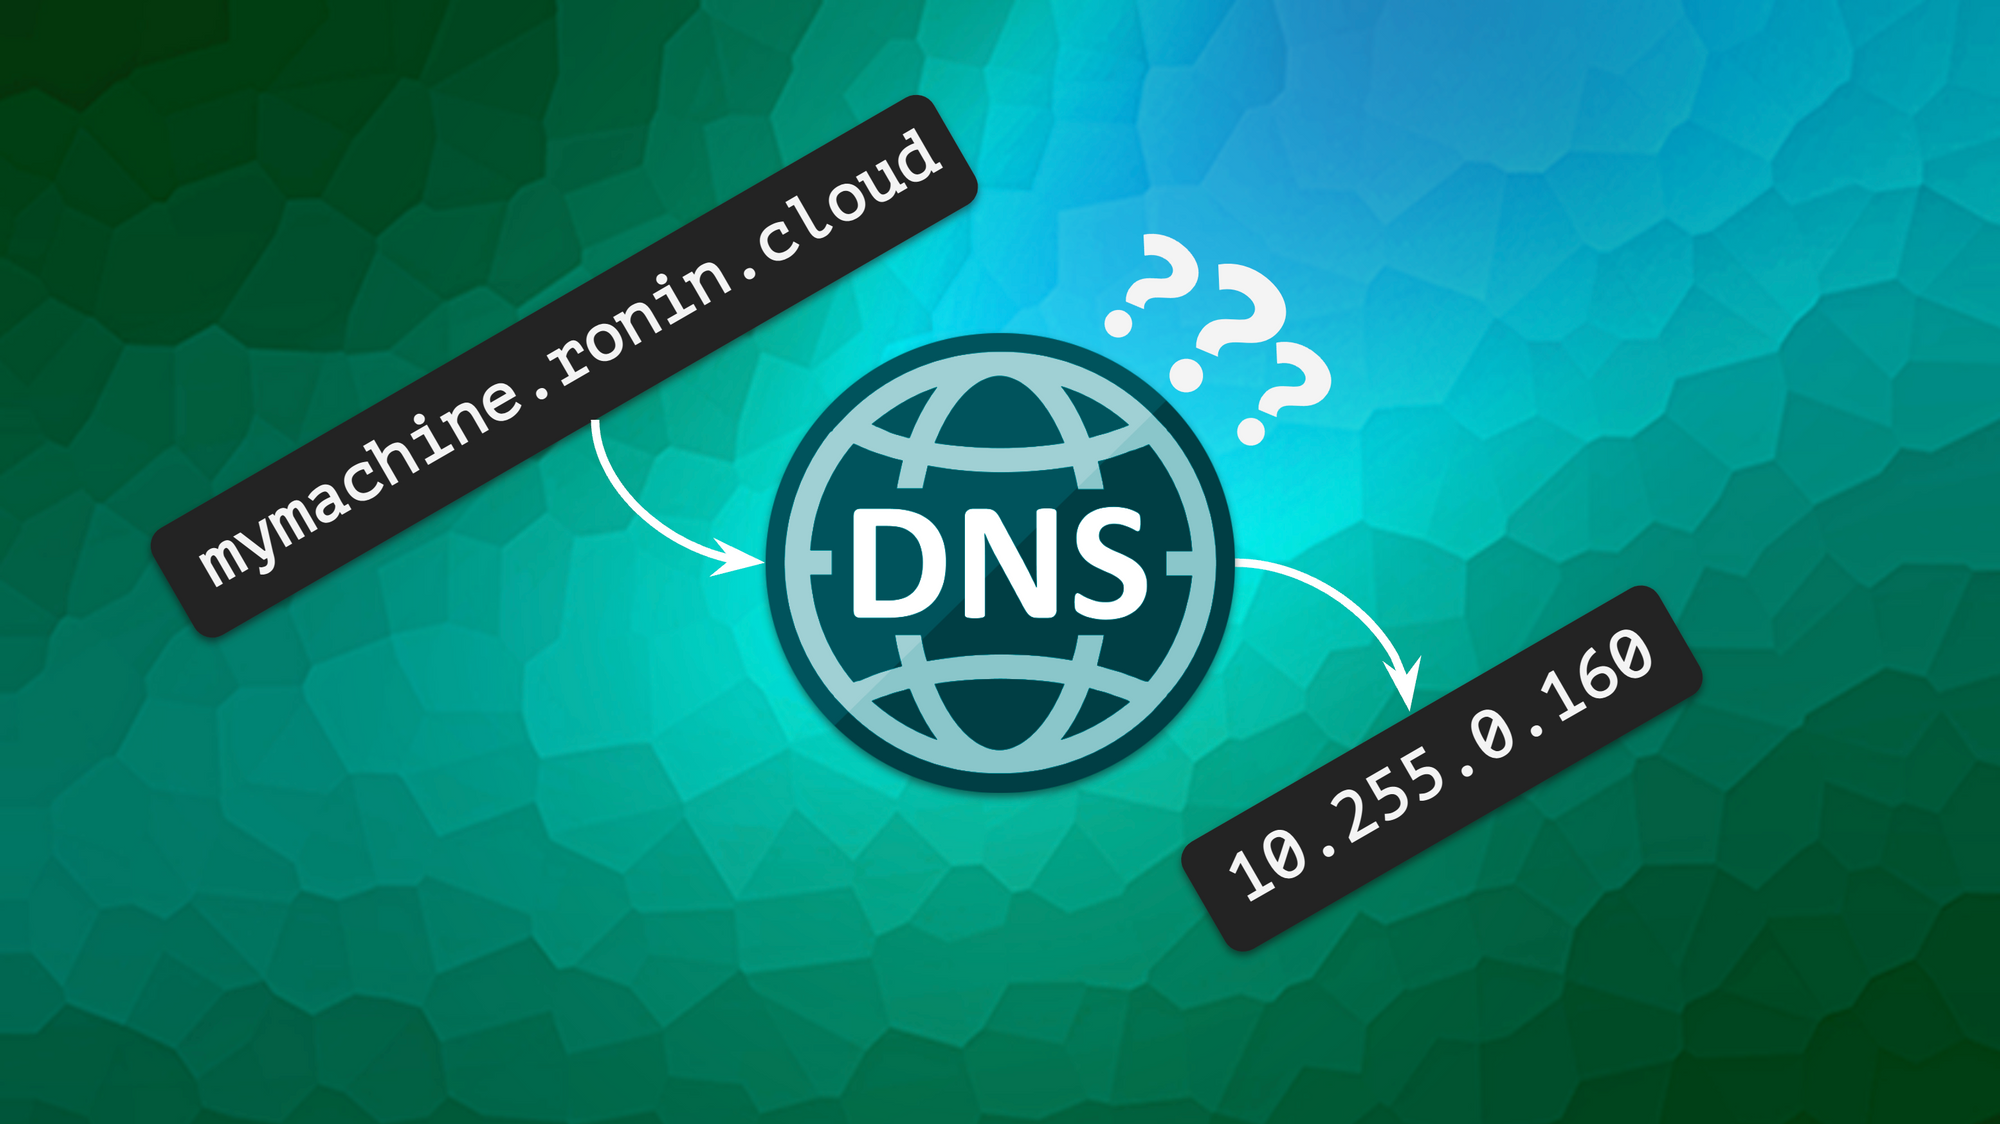
What is a DNS server?
Before we get started, you may be wondering what a DNS server is, and why it is important for your RONIN Isolate. This video gives a great simple explanation of how a DNS server works:
Since RONIN Isolate operates via internal IP addresses only, all machines launched within your RONIN Isolate will not have public domains or IP addresses, meaning common public DNS servers (like Google's 8.8.8.8 & 8.8.4.4 DNS servers) will not be able to resolve and allow you to connect to your RONIN Isolate machines.
In order to connect to a machine in RONIN Isolate from your Isolate Workspace, you will need to change the default DNS server used by RONIN LINK (simplest option), or your Isolate WorkSpace to a specific DNS server that can find your internal machines. Below we will provide instructions on how to determine which DNS server to use and how to adjust your DNS settings to use this server in either RONIN LINK or more generally in your Windows Isolate WorkSpace.
Determining your DNS server address
AWS reserves the base of the VPC network range plus two to be the IP address of your DNS server, as described here. So, to determine you DNS server address, follow the below steps (and refer to the screenshot with steps highlighted in red):
- In your RONIN Isolate AWS Account, navigate to the VPC service and select "Your VPCs"
- Tick the "ronin-core-vpc"
- Click on "CIDRs" tab in the bottom panel
- Find your main CIDR in the list of CIDRs - this should be the CIDR with the lowest digit in the second position
- Ignore the forward slash and everything after it, and add 2 to the last digit, this will be the address of your DNS server.
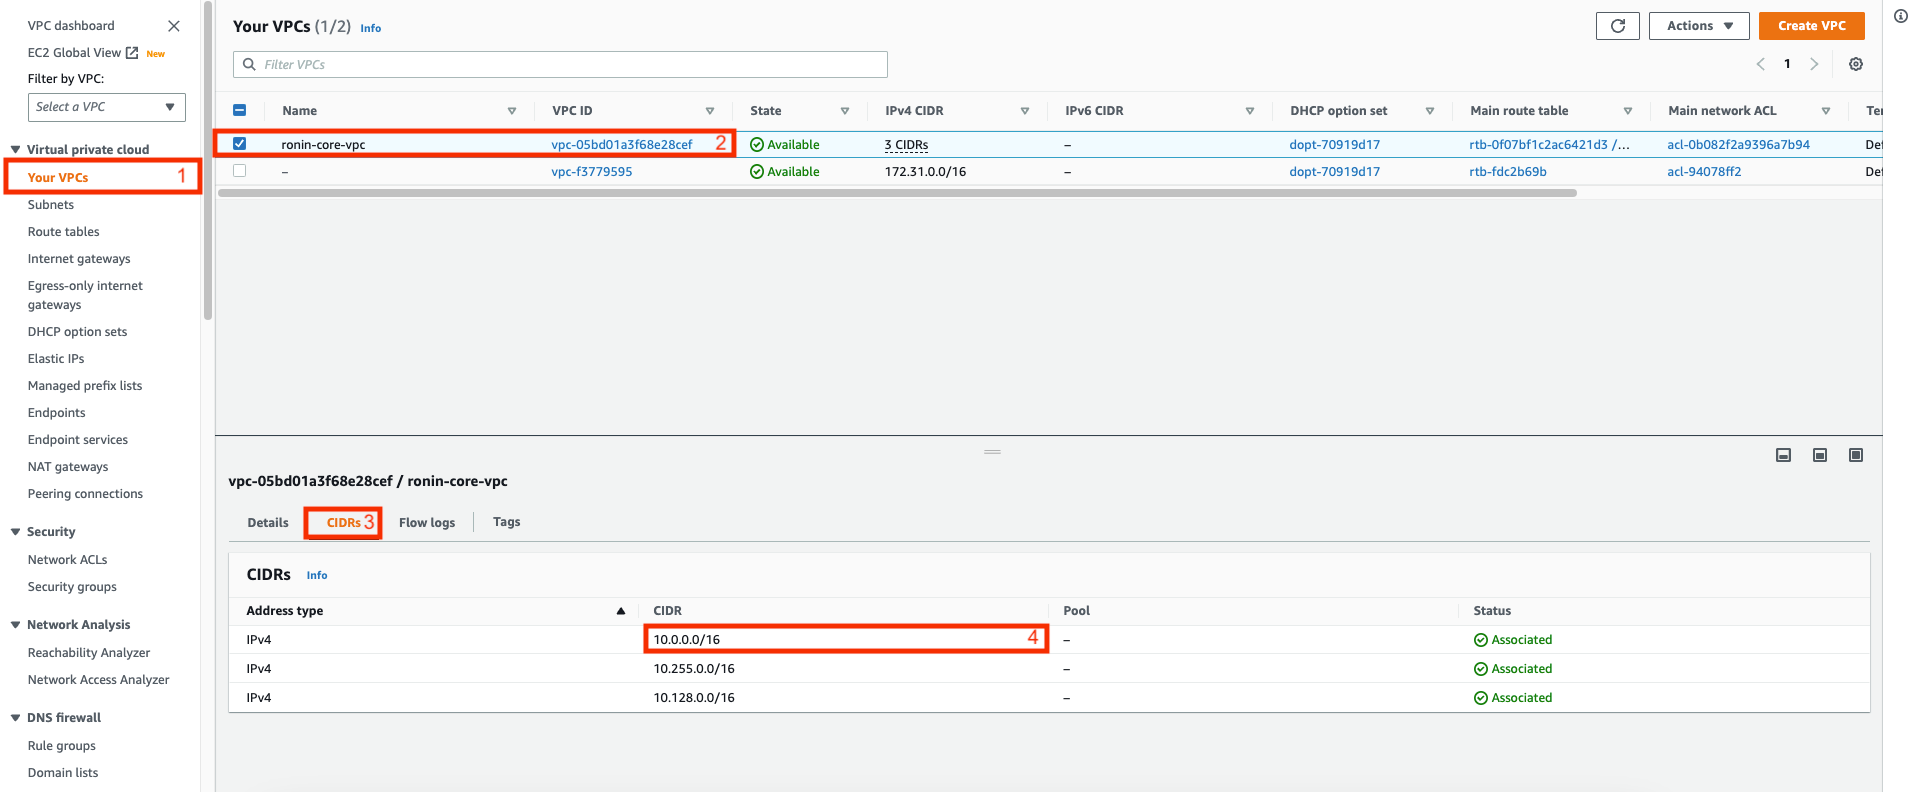
In this example, the main CIDR would be 10.0.0.0/16, so the DNS server would be 10.0.0.2. Your main CIDR may be slightly different if RONIN was set up with a custom range, but the process remains the same. For example, if your main CIDR was 10.34.8.0, then your DNS server would be 10.34.8.2.
Setting a custom DNS Server in RONIN LINK
By default, RONIN LINK will use the default DNS servers of your Isolate WorkSpace, meaning it will not be able to find any of your RONIN machines (unless you have customised the default DNS servers already - see the following section for an example of this). Fortunately, it is easy to tell RONIN LINK to use a custom DNS server so that you can easily connect to your RONIN Isolate machines:
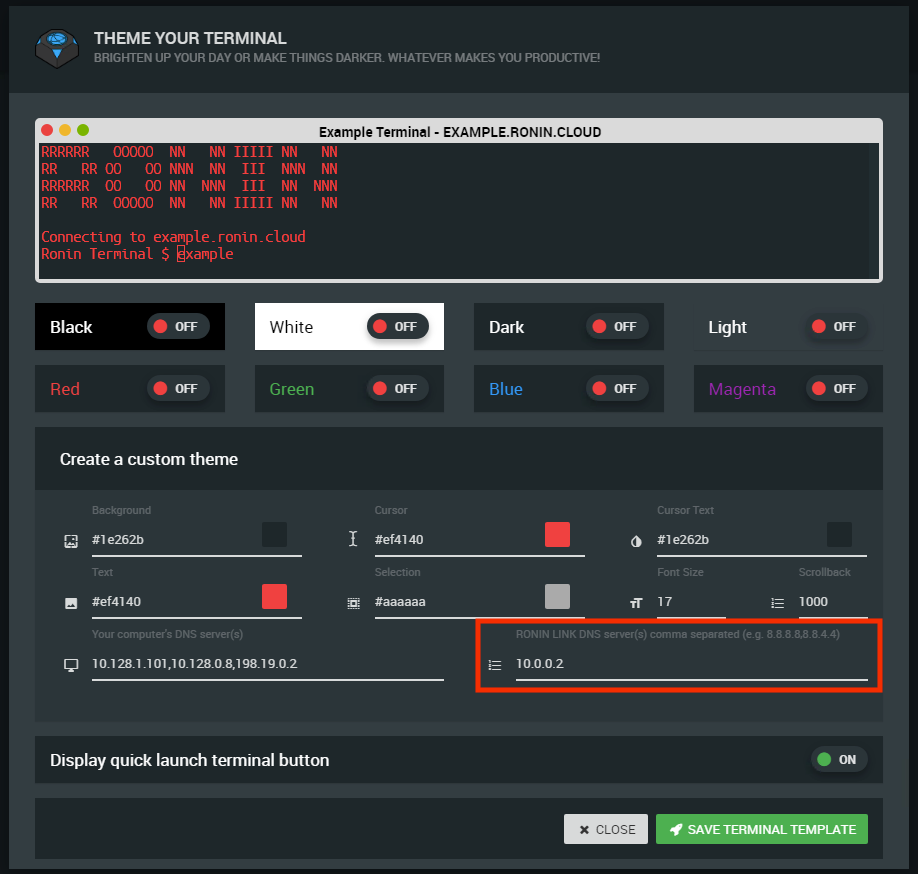
- Open the RONIN LINK settings - the settings button can be found in the top right hand corner of the main RONIN LINK Window
- Edit the RONIN LINK DNS Server to the custom DNS server address for your RONIN Isolate (e.g. 10.0.0.2) as shown below
- Save the changes
Once the changes are saved, RONIN LINK should be able to find and connect to any machines that have been launched within your RONIN Isolate.
Setting a custom DNS server in Windows
If you wish to use another SSH application like PuTTY, you will need to configure your custom DNS server in the Windows settings of your Isolate WorkSpace as follows:
- Select the Windows icon in the taskbar and open Windows settings
- Click on "Network & Internet"
- Then click, "Change adapter options" under "Change your network settings"
- This will bring up a window with the network connections of your WorkSpace, right click on the "Ethernet 3/Internet 2" option and then select "Properties"
- Ensure the "Networking" tab is selected in the new window, then under "This connection uses the following items", double click on "Internet Protocol Version 4 (TCP/IPv4)"
- Ensure the "General" tab is selected in the new window, and also ensure "Use the following DNS server addresses" is selected
- In the "Preferred DNS Server" section, input the custom DNS server address for your RONIN Isolate (e.g. 10.0.0.2)
- Click "OK" to close the Window and then "OK" again on the previous window to save your changes
Your Workspace should now be using the custom DNS server for all internet connections, meaning you will now be able to connect to all of your RONIN Isolate machines with applications such as PuTTY.