VS Code Meets the Cloud: Data Science on a RONIN Machine
Visual Studio Code (VS Code) can connect straight to a machine in the cloud, so you edit, run and debug code on that machine as if it were sitting on your desk - this blog shows you how!

Your laptop fan sounds like it's about to take off, your dataset keeps growing, and you'd really like to run your analysis somewhere with a bit more room. The good news: you don't have to give up the editor you already know. Visual Studio Code (VS Code) can connect straight to a machine in the cloud, so you edit, run and debug code on that machine as if it were sitting on your desk.
In this tutorial, we will:
- Launch a small Ubuntu LTS machine in RONIN.
- Connect VS Code to it over SSH (with Remote-SSH), and look at SFTP as an alternative.
- Use the VS Code terminal to create a Python virtual environment.
- Upload a CSV dataset.
- Write and run a Python script that reads the CSV into pandas and prints some basic stats.
- Keep track of your work with git.
This post is written for researchers and students who are new to the cloud. If you've never used SSH before, that's fine, we'll walk through it.
Before you begin
You'll need:
- Access to a RONIN project where you can create machines.
- Visual Studio Code installed on your own computer (Windows, Mac or Linux).
- An SSH client. Mac, Linux and recent Windows 10/11 all include one. Windows users, see SSH and Windows 10.
- A CSV dataset. We're using the Palmer Penguins data (
penguins.csv), which is small, friendly and free to use (details at the end).
Cost: the machine in this tutorial is a t3.medium, which costs about $0.06/hr in total in our project. Leave it running for a week by accident and you're buying your cloud bill a coffee or two, so remember to stop it when you're done (see the final step).
Step 1: Launch an Ubuntu machine in RONIN
- In your RONIN project, click New Machine.
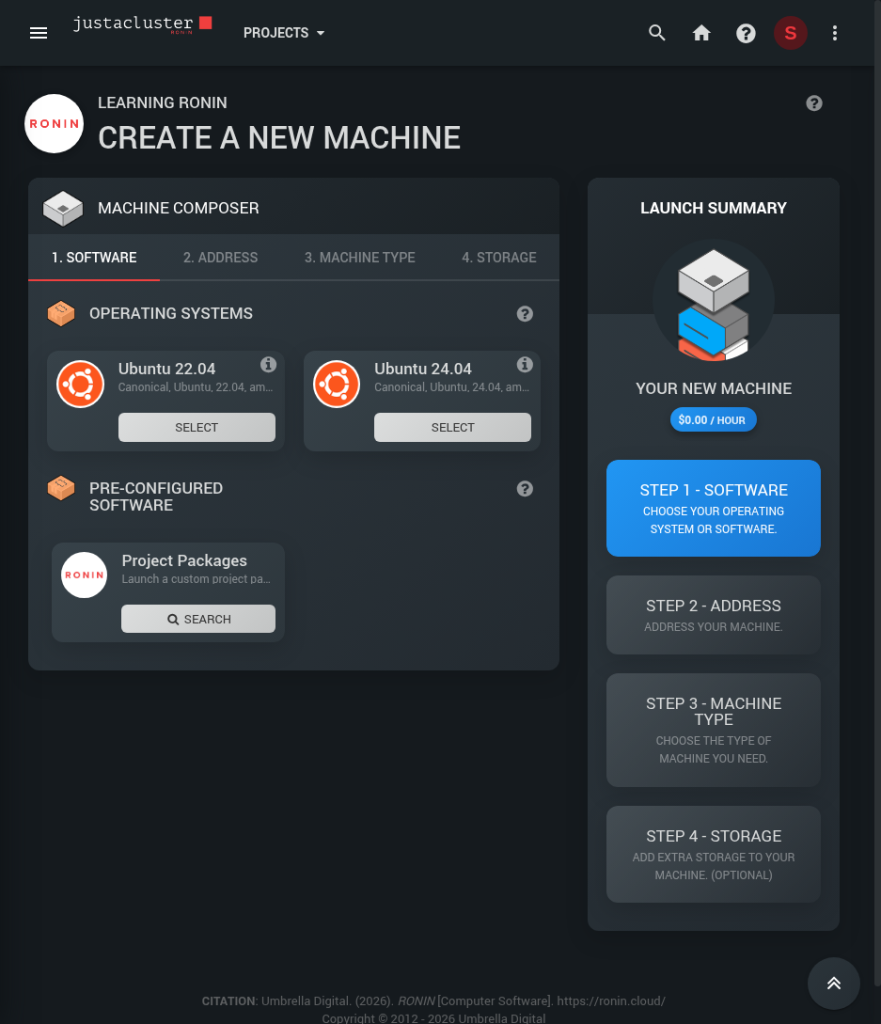
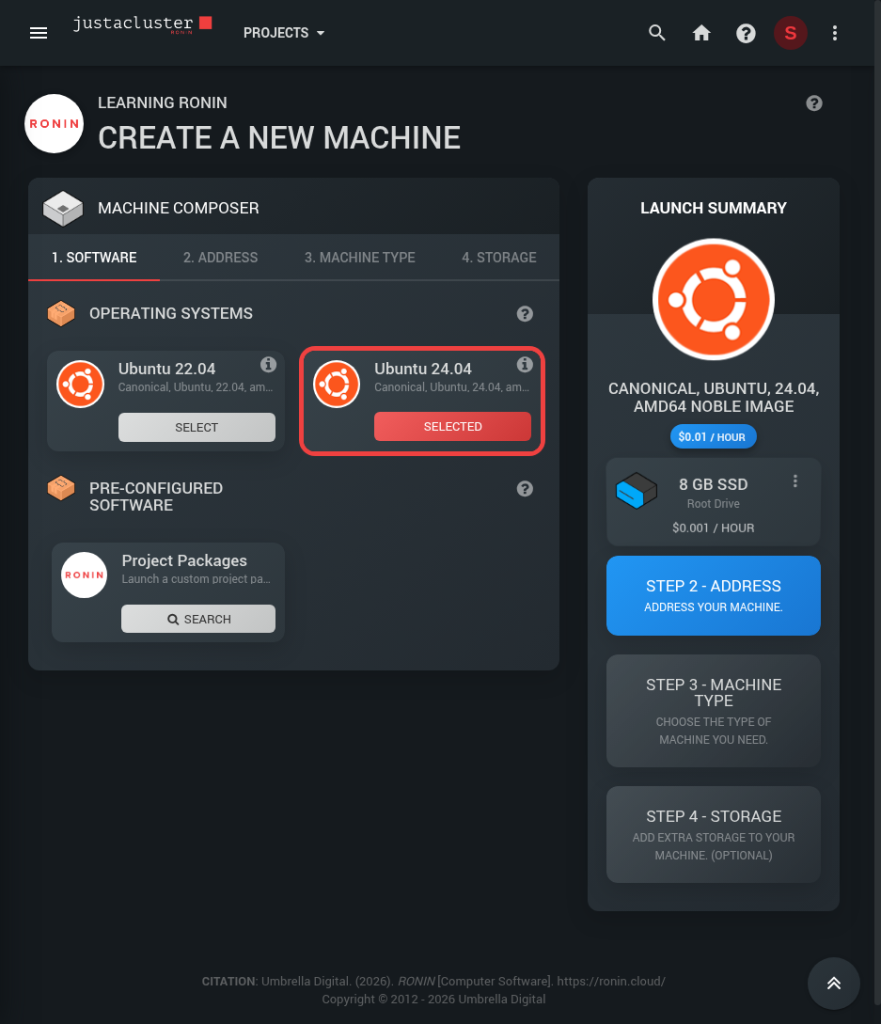
- Under Software, look at the operating system options and choose Ubuntu 24.04 (the current Long Term Support, or LTS, release).
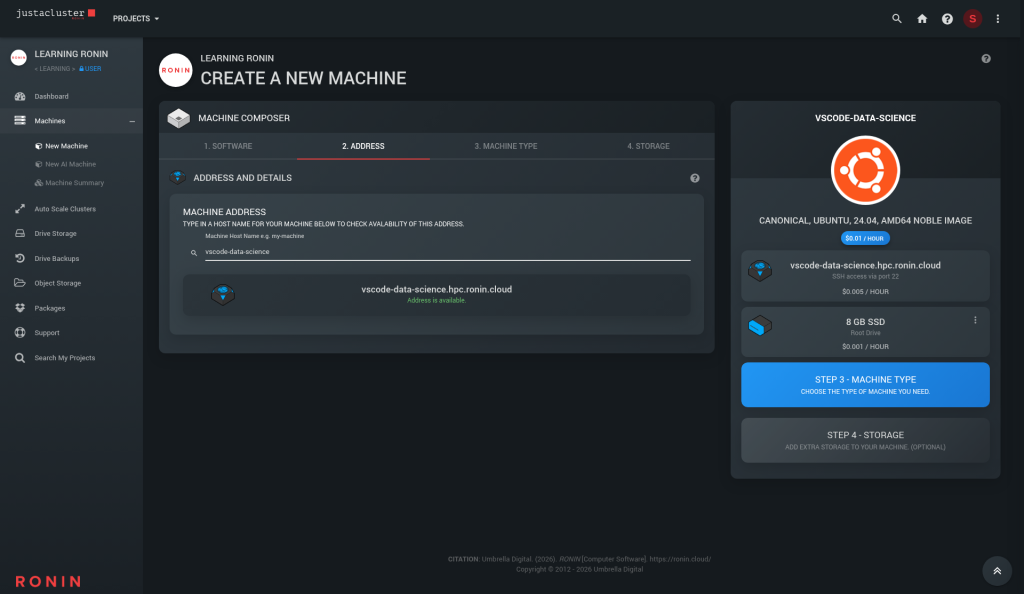
- Give your machine a name. This becomes part of its address. We called ours
vscode-data-science, so its address isvscode-data-science.hpc.ronin.cloud. Your address will end in your own RONIN domain.
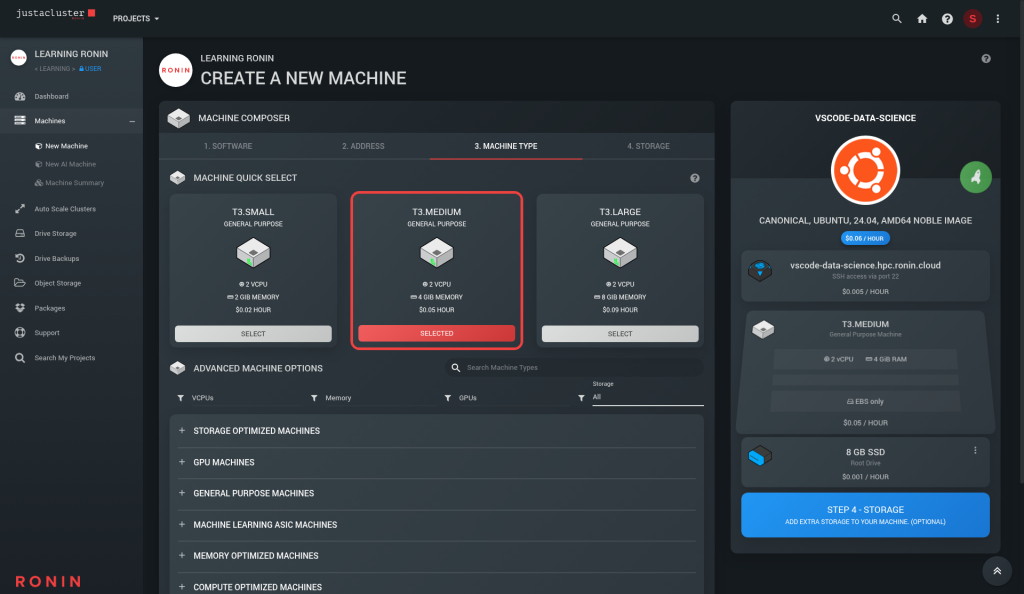
- Choose a machine type. A t3.medium (2 vCPUs, 4 GiB of memory) is plenty for learning pandas on small to medium datasets.
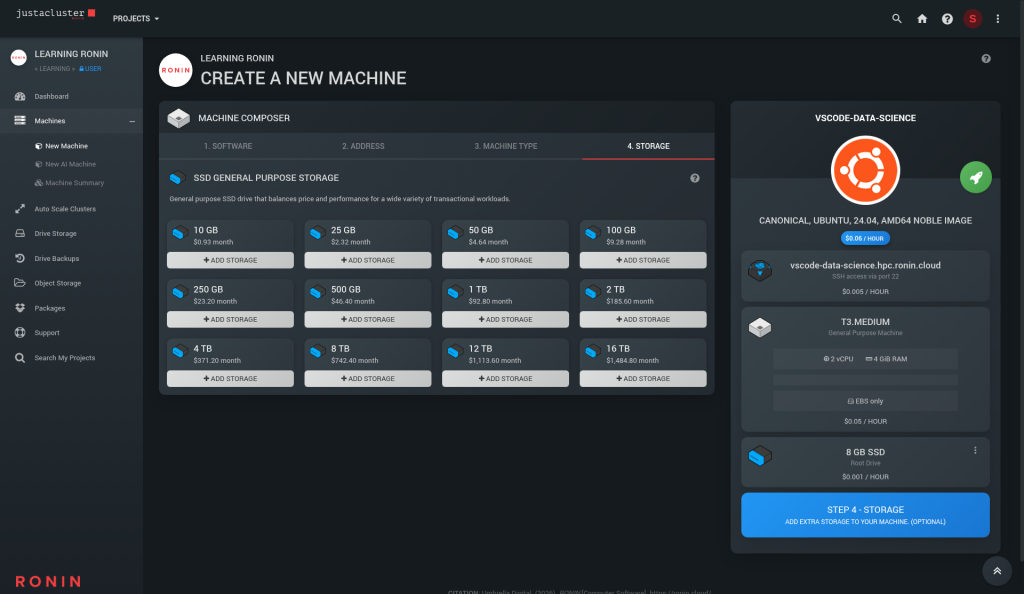
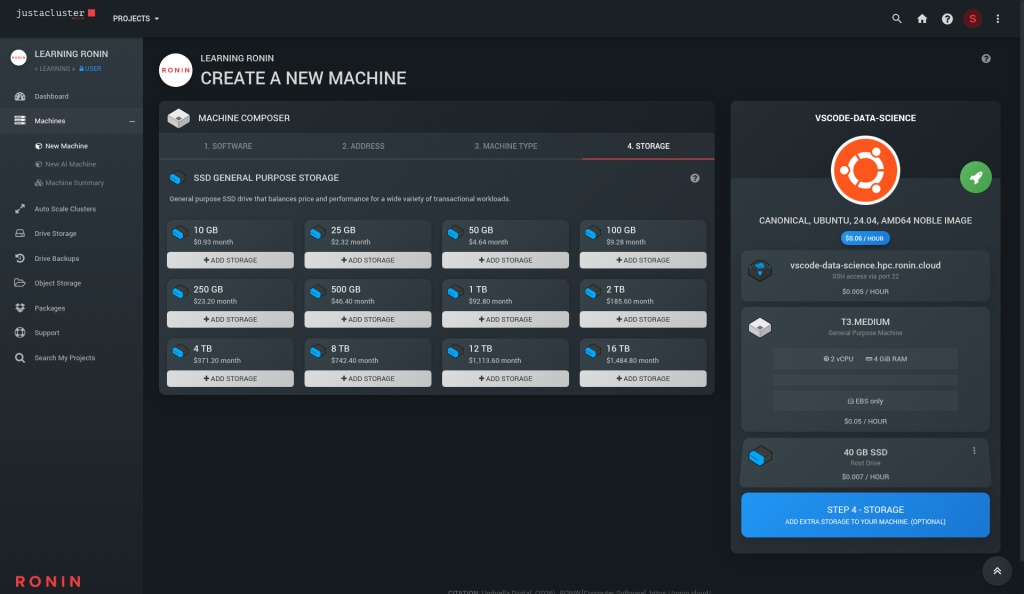
- Under Storage, increase the root drive. The default is 8 GB, which fills up fast once Python packages arrive. We set it to 40 GB. The summary panel shows the running cost, $0.06/hr in our case.
💡 Tip: You can make a drive bigger later, but you can't easily make it smaller. Start with what you need plus a bit of breathing room.
- Under SSH key, create a new key. RONIN will download a
.pemfile to your computer. This is your private key, so keep it somewhere safe and don't share it.
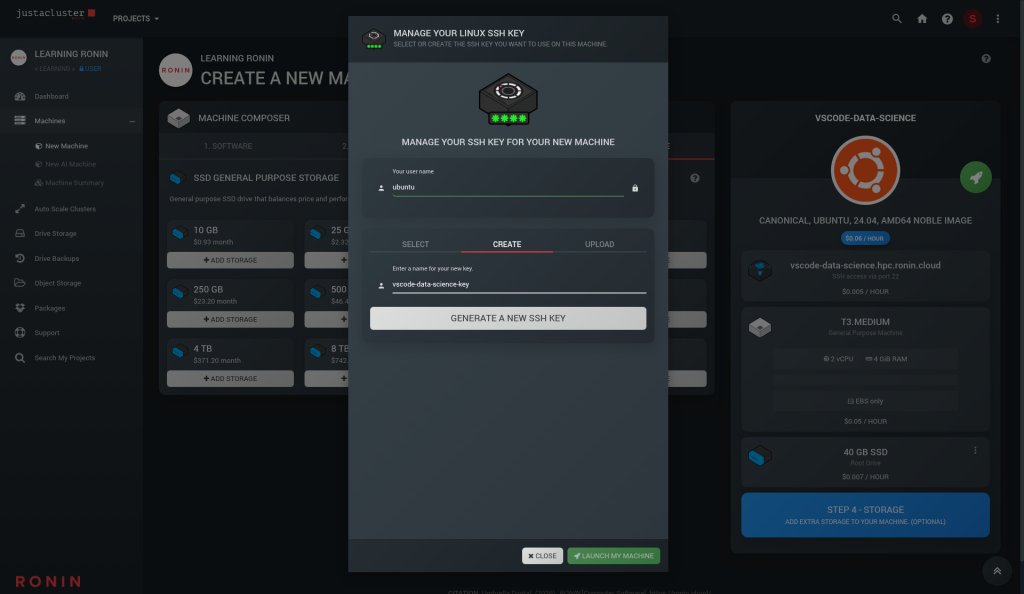
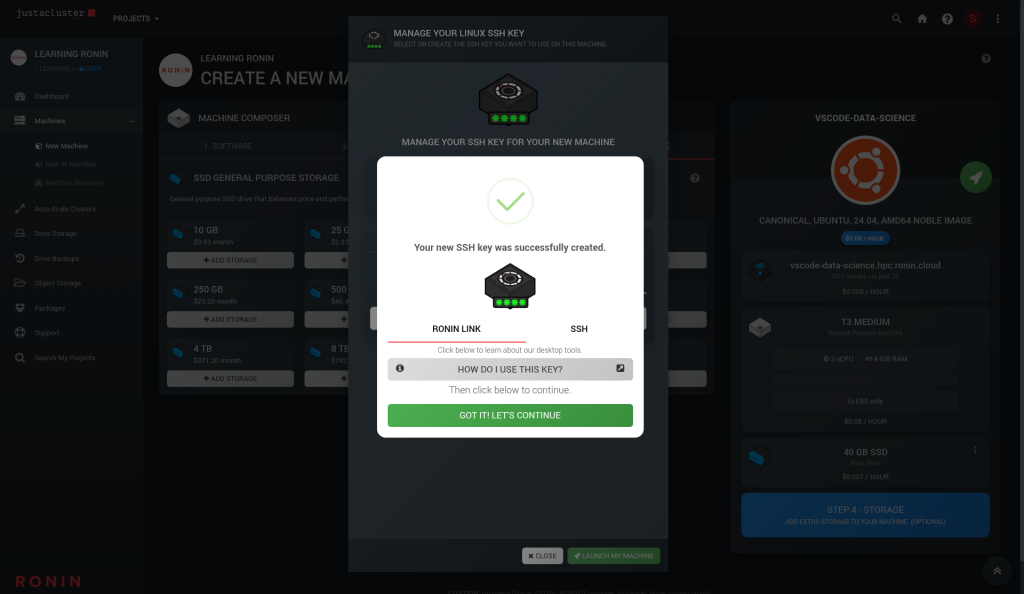
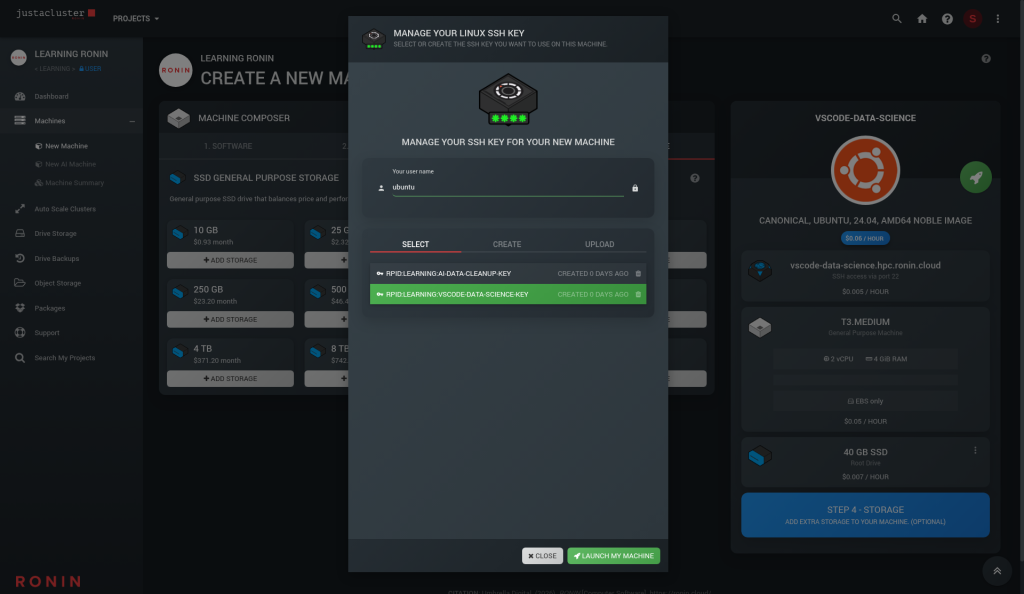
- Review your settings, check your new key is selected, and click Launch.
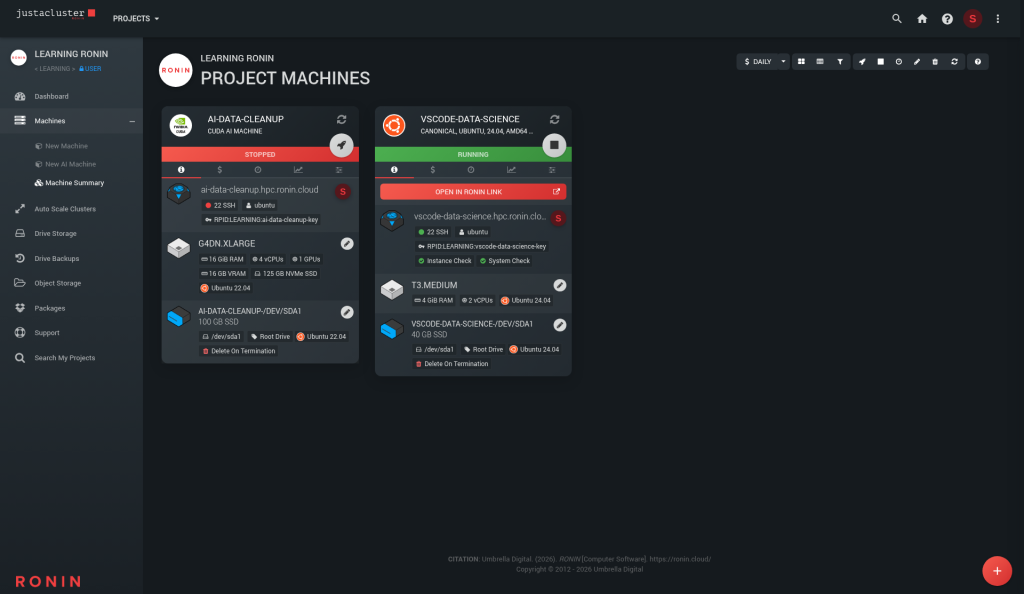
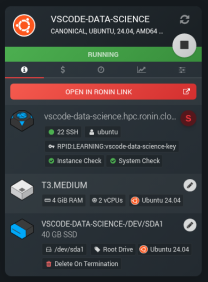
After a minute or two your machine shows as running. Click the info icon on the machine card to see its address and username (ubuntu).
Step 2: Set up SSH on your computer
First, move the downloaded key into your SSH folder and lock down its permissions.
On Mac or Linux, open a terminal and run (swap in your key's file name):
mkdir -p ~/.ssh
mv ~/Downloads/vscode-data-science-key.pem ~/.ssh/
chmod 600 ~/.ssh/vscode-data-science-key.pem
The chmod 600 command makes the key readable only by you. SSH will refuse to use a key that other users can read.
On Windows, put the key in C:\Users\<you>\.ssh\. If SSH complains that the key's permissions are "too open", right-click the file, open Properties > Security > Advanced, disable inheritance and leave only your own user with access. The SSH and Windows 10 post has more detail.
Next, add an entry to your SSH config file (~/.ssh/config, or C:\Users\<you>\.ssh\config on Windows). Create the file if it doesn't exist:
Host vscode-data-science
 HostName vscode-data-science.hpc.ronin.cloud
 User ubuntu
 IdentityFile ~/.ssh/vscode-data-science-key.pem
This gives your machine a short nickname, so ssh vscode-data-science is all you need to type. Test it from your terminal:
ssh vscode-data-science
The first time, SSH asks whether you trust the host. Type yes. Once you see an ubuntu@... prompt, you're in. Type exit to leave.
💡 Tip: Not sure which username to use? Ubuntu machines use ubuntu. See SSH Commands and Default Usernames for other operating systems.Step 3: Connect VS Code with Remote-SSH
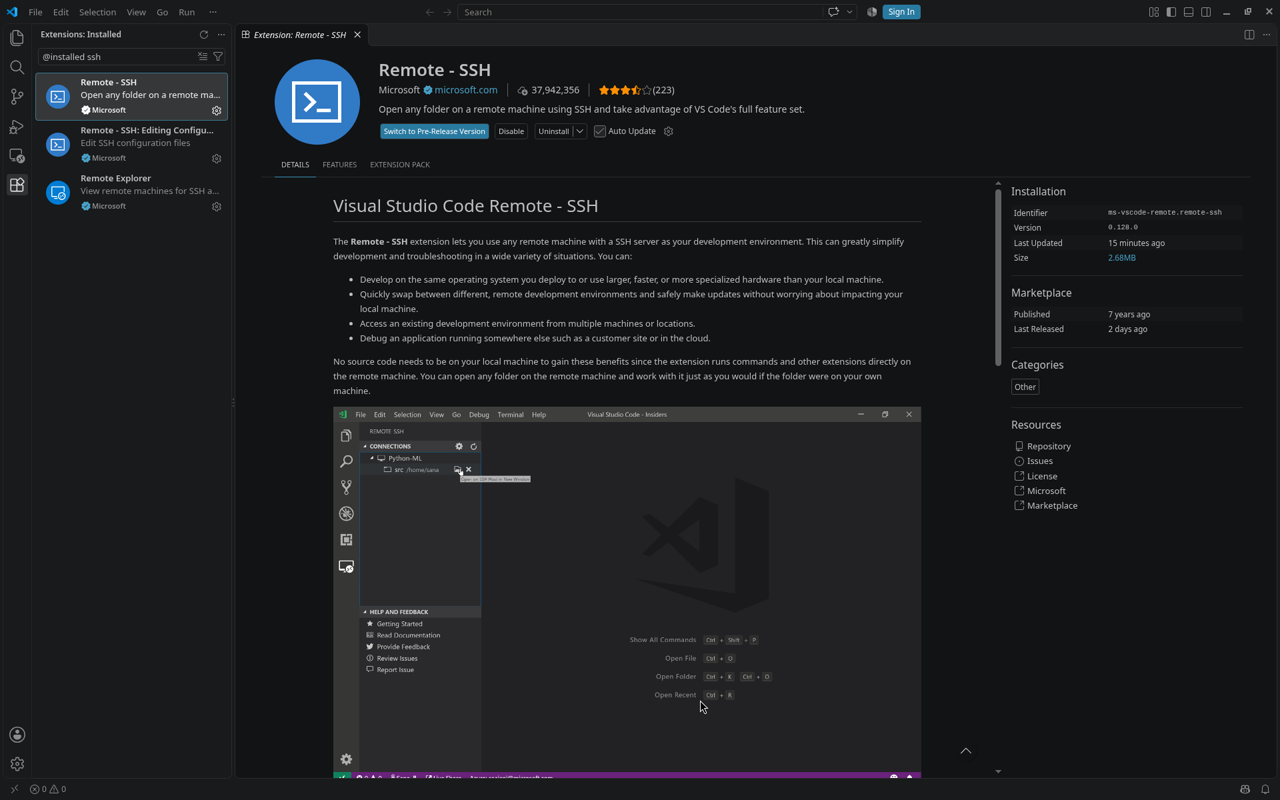
- In VS Code, open the Extensions view (the four squares icon), search for Remote - SSH (by Microsoft) and click Install.
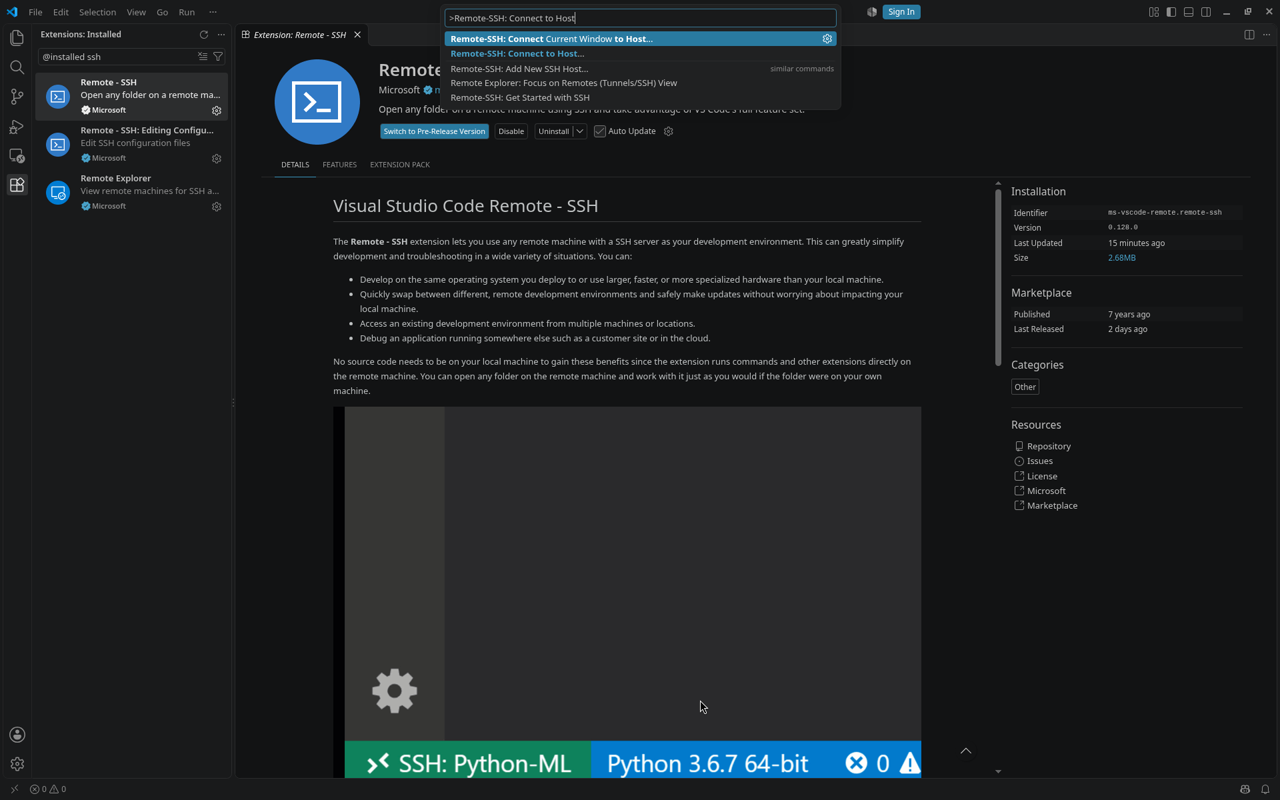
- Open the Command Palette (
Ctrl+Shift+P, orCmd+Shift+Pon Mac) and run Remote-SSH: Connect to Host....
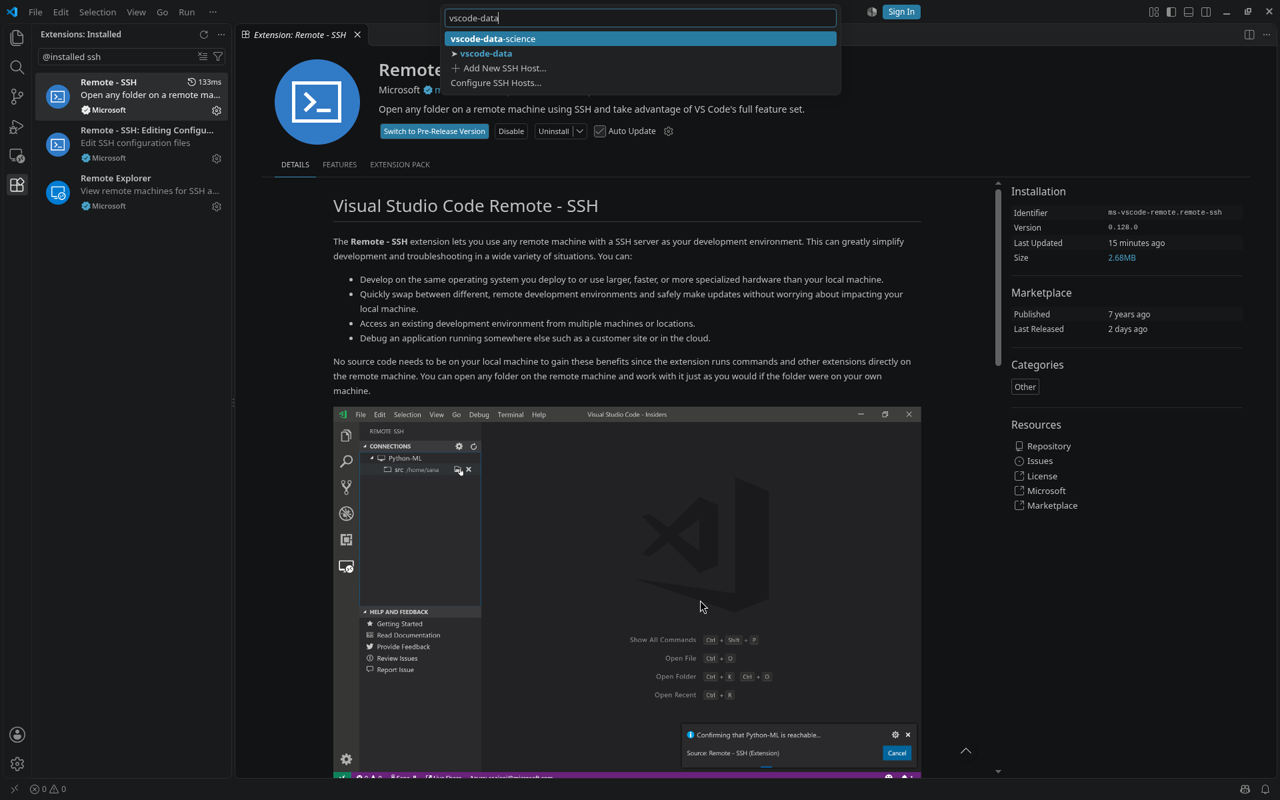
- VS Code reads your SSH config, so
vscode-data-scienceappears in the list. Pick it.
- The first connection takes a minute while VS Code installs a small server on the machine. When it's done, the bottom-left corner shows SSH: vscode-data-science.
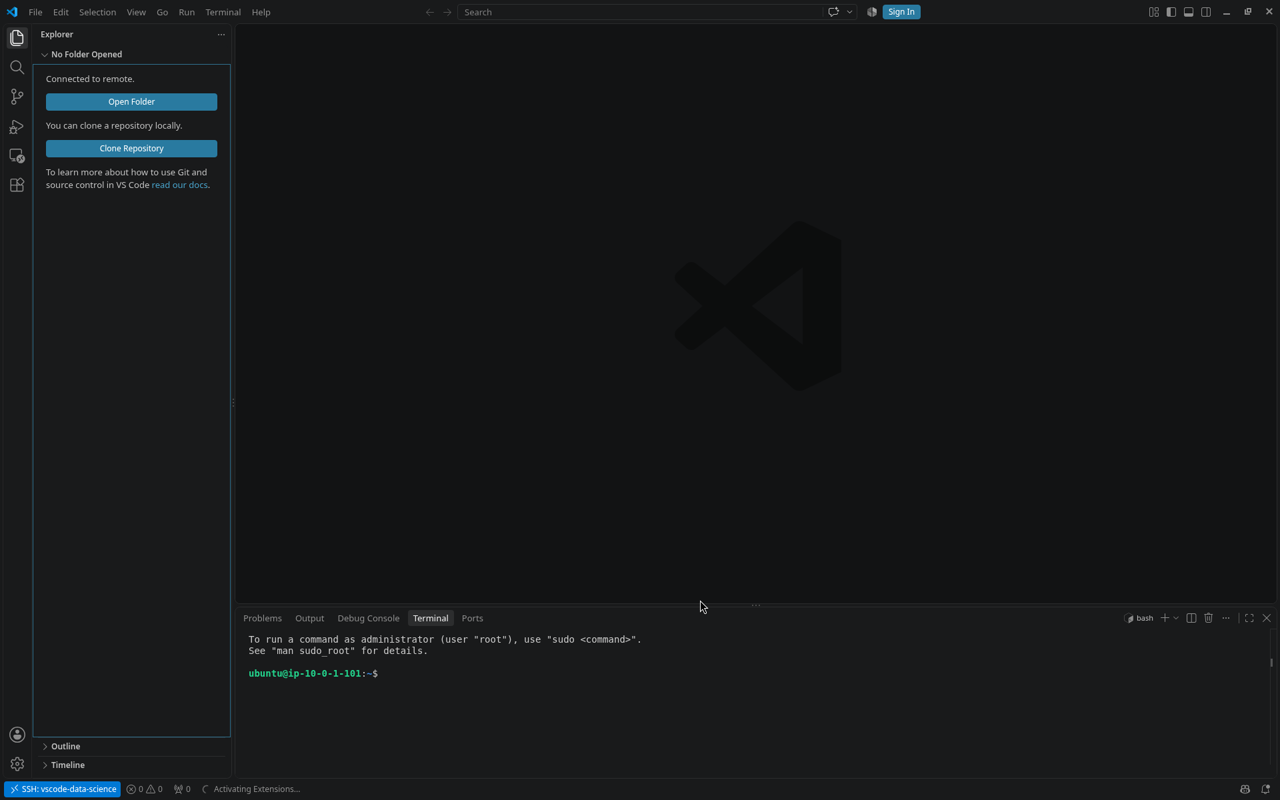
Everything you do in this window (opening files, running the terminal, running Python) now happens on your RONIN machine, not your laptop.
Step 4: Create a project folder
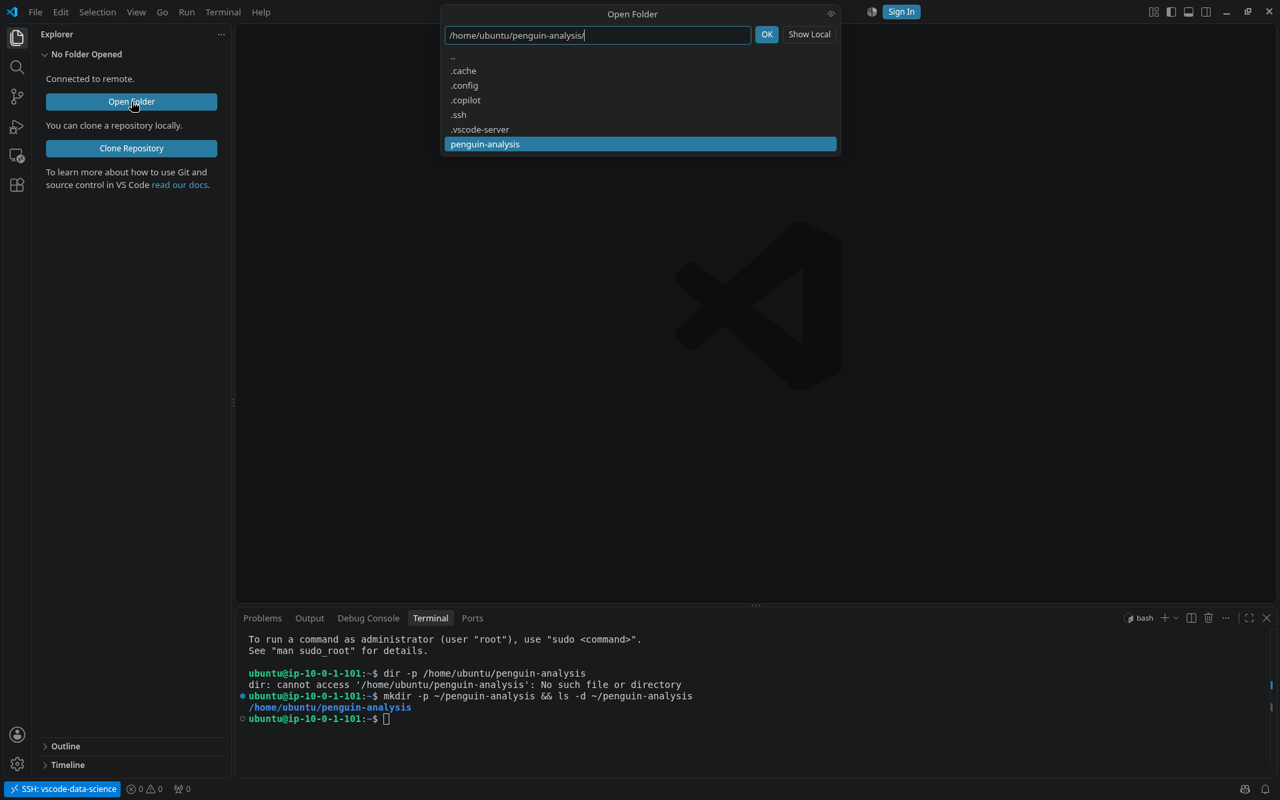
Open the terminal in VS Code with Terminal > New Terminal (or Ctrl+`). It's a terminal on the remote machine. Create a folder for the project:
mkdir -p ~/penguin-analysis
Then use File > Open Folder..., choose /home/ubuntu/penguin-analysis and click OK.
Step 5: Create a Python virtual environment
A virtual environment (venv) is a private box of Python packages for one project, so different projects don't trip over each other's versions. Ubuntu 24.04 comes with Python 3.12 but needs one extra package to make venvs:
sudo apt update && sudo apt install -y python3-venv
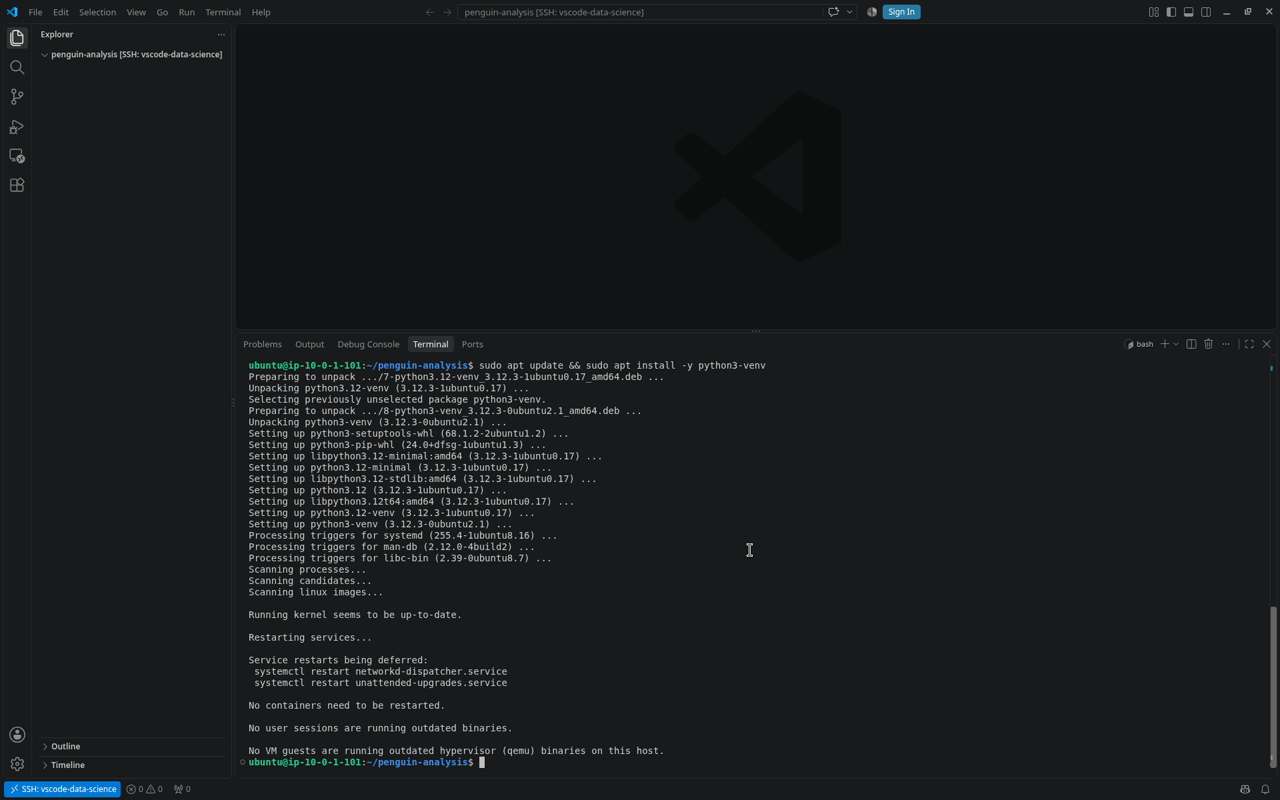
Now create the venv in your project folder and switch it on:
cd ~/penguin-analysis
python3 -m venv .venv
source .venv/bin/activate
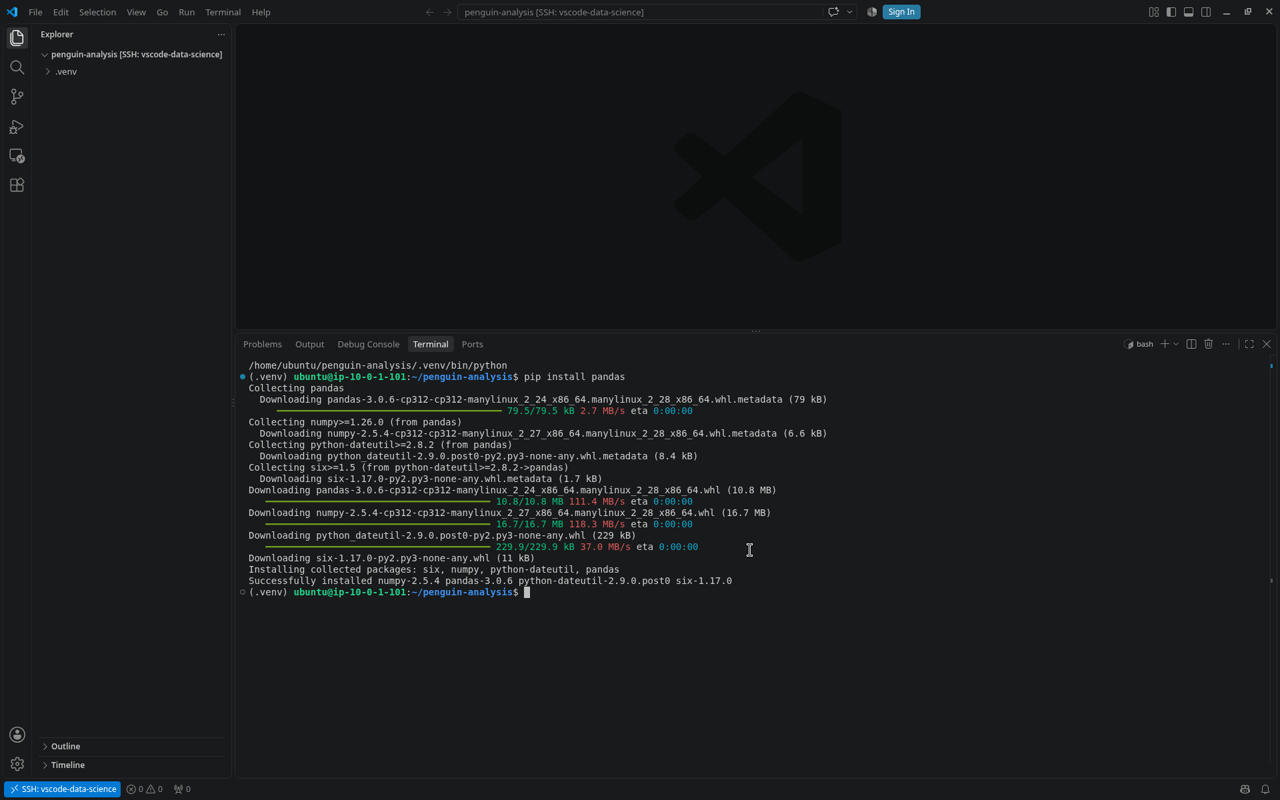
Your prompt now starts with (.venv), which tells you the venv is active.
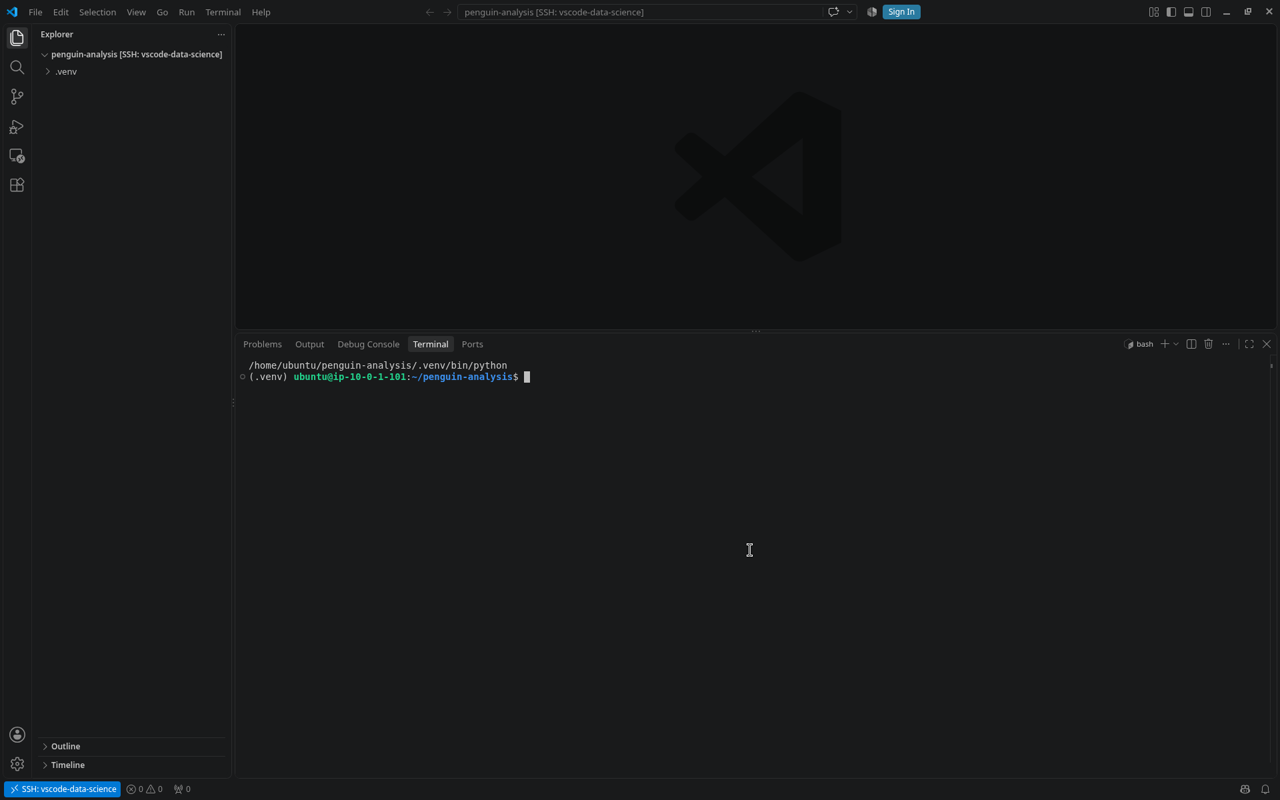
Install pandas:
pip install pandas
You should see something like:
Successfully installed numpy-2.5.4 pandas-3.0.6 python-dateutil-2.9.0.post0 six-1.17.0
💡 Tip: If you open a new terminal later, run source .venv/bin/activate again. VS Code often does this for you once you've selected the interpreter (Step 7).Step 6: Upload your dataset
There are a few ways to get files onto your machine. Here they are, most reliable first.
Option A: scp (reliable)
scp copies files over SSH. Run this in a terminal on your own computer (not the VS Code remote terminal), from the folder containing penguins.csv:
scp -i ~/.ssh/vscode-data-science-key.pem penguins.csv ubuntu@vscode-data-science.hpc.ronin.cloud:~/penguin-analysis/
Because you set up the SSH config, the shorter form works too:
scp penguins.csv vscode-data-science:~/penguin-analysis/
Option B: drag and drop
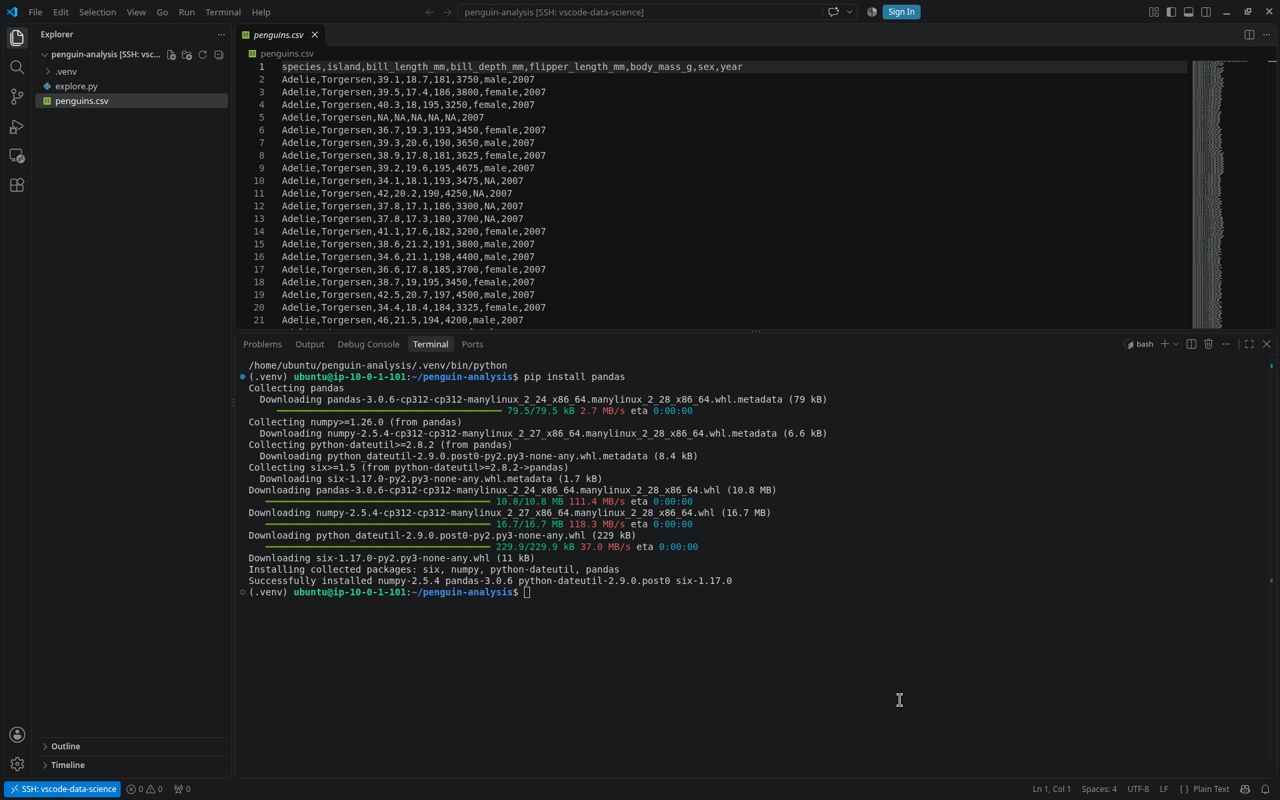
On Mac and Windows, dragging a file from your file manager into the VS Code Explorer panel usually uploads it to the remote folder. It's handy for the odd small file, but if it doesn't work on your setup, fall back to scp.
Either way, penguins.csv now shows up in the Explorer.
Option C: SFTP sync
If you'd rather keep your files on your laptop and have them copied to the machine every time you save, the SFTP extension (Natizyskunk.sftp) does exactly that. This works from a normal (local) VS Code window, not a Remote-SSH one.
Our earlier post, Automatically syncing scripts to your RONIN machine with Visual Studio Code, covers this option and how to set it up in more depth.
Step 7: Point VS Code at your venv
For VS Code to run your code with the venv's Python (and know about pandas), it needs the Python extension on the remote machine. Open the Extensions view, find Python (by Microsoft) and click Install in SSH: vscode-data-science.
Then open the Command Palette, run Python: Select Interpreter, and choose the one in ./.venv/bin/python.
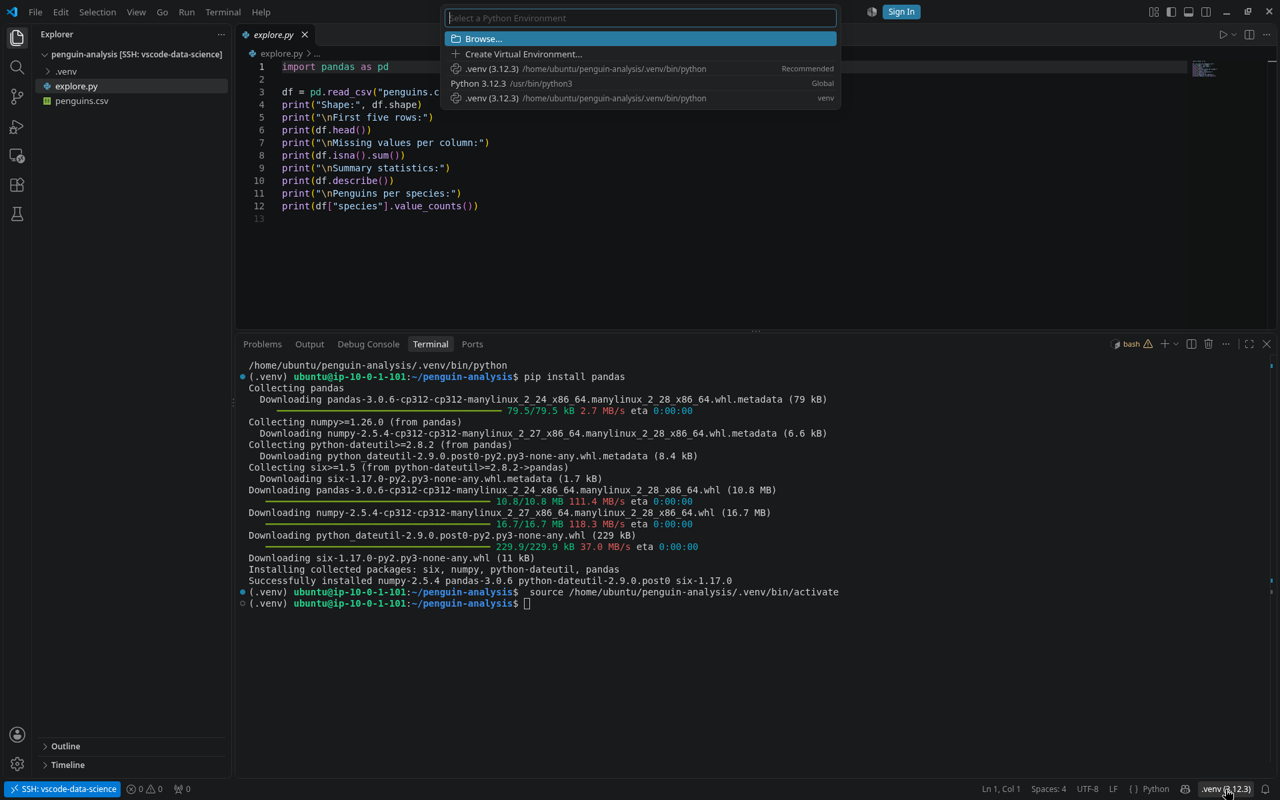
💡 Tip: If .venv doesn't appear in the list, the Python extension is probably only installed locally. Look for the Install in SSH: ... button, install it, then try again.Step 8: Write and run your first analysis script
Create a new file called explore.py in the Explorer and paste in:
import pandas as pd

# Read the CSV into a DataFrame
df = pd.read_csv("penguins.csv")

print("Shape:", df.shape)

print("\nFirst five rows:")
print(df.head())

print("\nMissing values per column:")
print(df.isna().sum())

print("\nSummary statistics:")
print(df.describe())

print("\nPenguins per species:")
print(df["species"].value_counts())
Run it with the ▶ button in the top right, or from the terminal:
python explore.py
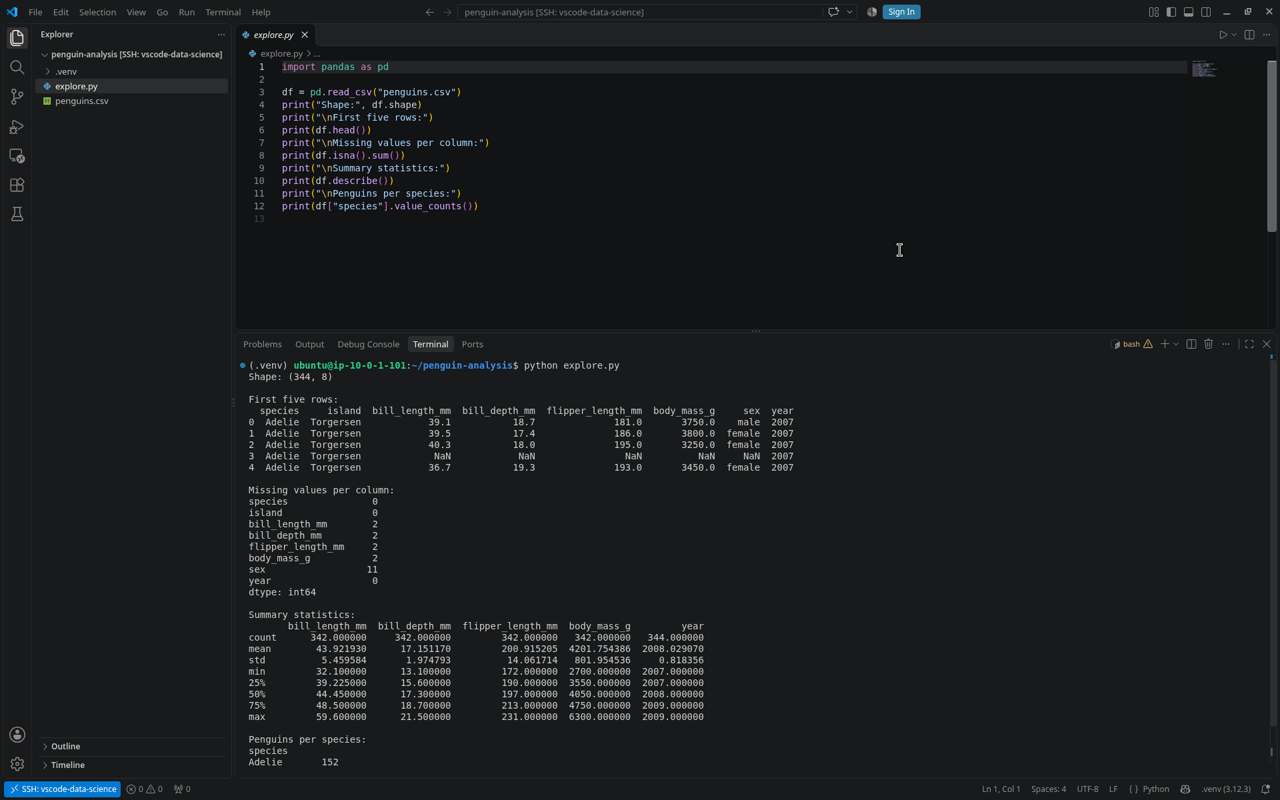
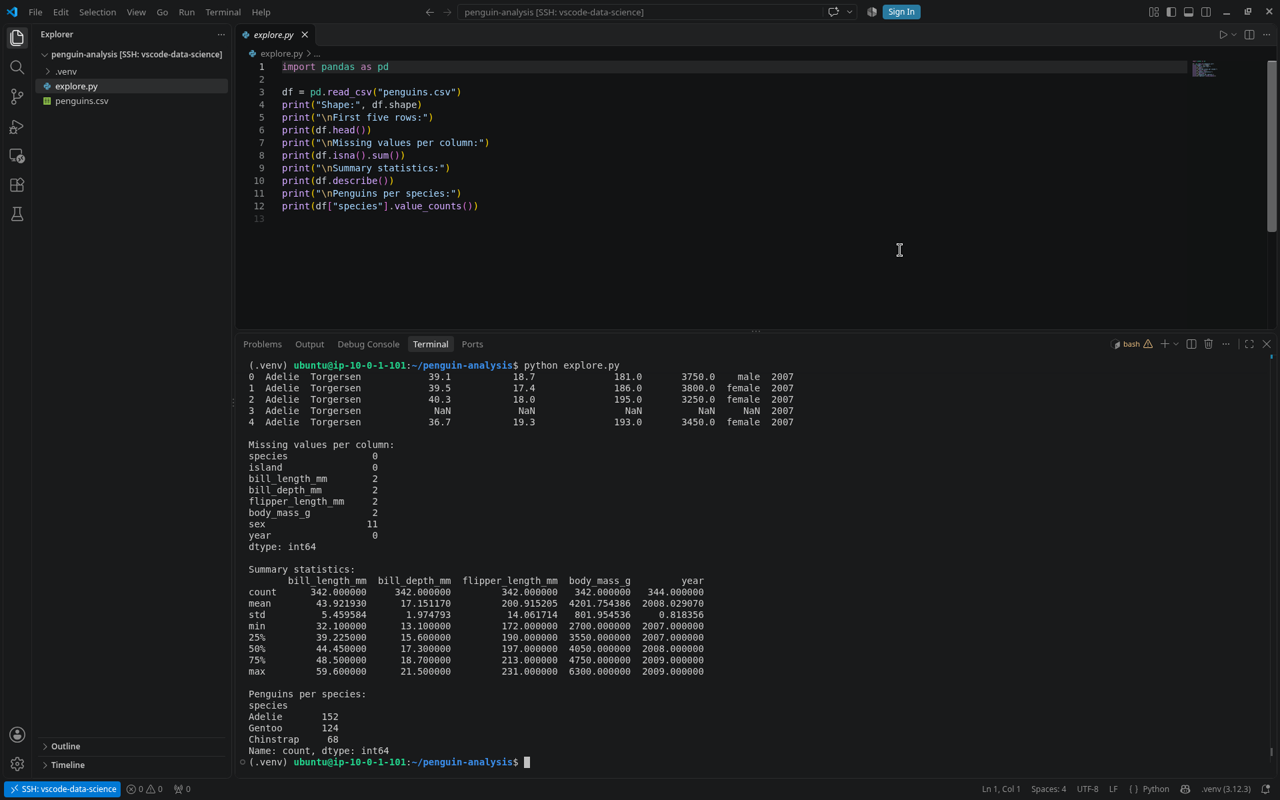
Here's what our run told us:
- Shape:
(344, 8), so 344 penguins and 8 columns. - Missing values: 2 each for
bill_length_mm,bill_depth_mm,flipper_length_mmandbody_mass_g, 11 forsex, and none in the other columns. Real data is rarely tidy! - Averages: bill length 43.92 mm, bill depth 17.15 mm, flipper length 200.92 mm, body mass 4,201.75 g.
- Species: Adelie 152, Gentoo 124, Chinstrap 68.
From here you can try df.groupby("species").mean(numeric_only=True) to compare species, or drop the missing rows with df.dropna().
Step 9: Version your work with git
git keeps a history of your changes, so you can always get back to a version that worked. Ubuntu 24.04 already has git installed. In the VS Code terminal, tell git who you are (once per machine):
git config --global user.name "Your Name"
git config --global user.email "you@university.edu.au"
Create a repository in your project folder:
cd ~/penguin-analysis
git init
git may print a hint about the default branch name being master. You can ignore it, or rename the branch with git branch -m main if you prefer.
Tell git not to track the venv (it's big and easy to rebuild) or Python's cache files, by creating a .gitignore:
printf '.venv/\n__pycache__/\n' > .gitignore
Then save your first snapshot:
git add .
git commit -m "First look at the penguin data"
git log --oneline
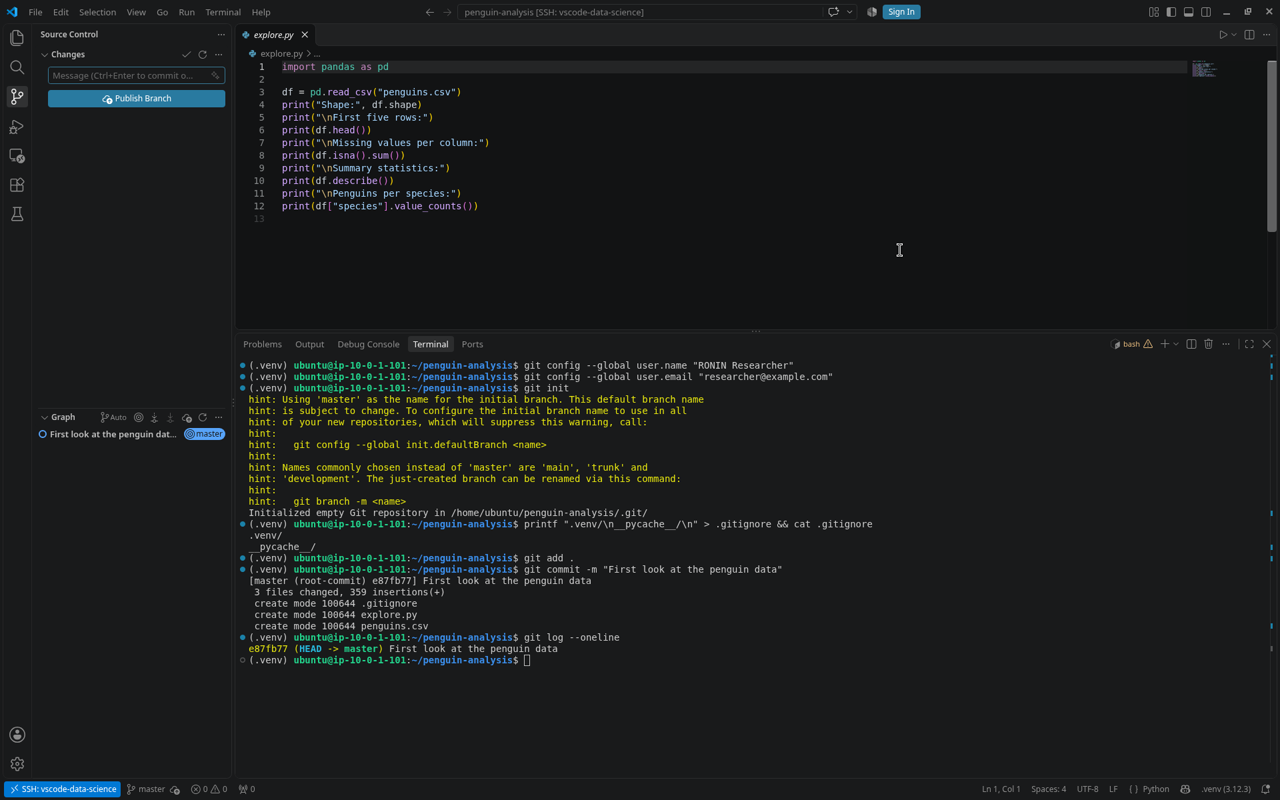
Our commit came out as e87fb77 First look at the penguin data, with 3 files changed (.gitignore, explore.py and penguins.csv). You can also stage and commit from VS Code's Source Control view.
A note on where this repository lives
This repository is local to your RONIN machine. It's great for tracking changes, but if the machine is deleted, the history goes with it. For a proper backup (and to share with collaborators), you can push it to a private GitHub repository. In short: create an empty private repo on GitHub, set up authentication (an SSH key or a personal access token) on the machine, then run:
git remote add origin git@github.com:<your-username>/penguin-analysis.git
git push -u origin master
(Use main instead of master if you renamed the branch.) That's a topic for its own post, so we'll leave the details there for now.
💡 Tip: If your dataset is sensitive or large, think twice before committing it to git, and never push sensitive data to GitHub. Add it to .gitignore instead.Step 10: Stop your machine when you're done
Your machine charges by the hour while it's running. When you finish, go back to RONIN and Stop the machine. Your files stay on its drive, ready for next time, and you only pay a small amount for storage. When the project is completely finished and your work is backed up, Terminate (delete) it so it stops costing anything.
💡 Tip: Next time you start the machine, just reconnect with Remote-SSH: Connect to Host.... Your folder, venv and git history are all still there.
Considerations and troubleshooting
- "Permission denied (publickey)": check that the
IdentityFilepath in your SSH config points to the right.pemfile, and that the username isubuntu. - "UNPROTECTED PRIVATE KEY FILE" / permissions too open: run
chmod 600on the key (Mac/Linux), or fix the file permissions on Windows as described in Step 2. - Connection times out: make sure the machine shows as running in RONIN, and that your network allows outbound SSH (port 22). Some university or corporate networks block it.
- VS Code hangs on "Setting up SSH host": the first connection installs the VS Code server, which can take a minute. If it fails, run Remote-SSH: Kill VS Code Server on Host... and try again.
ModuleNotFoundError: No module named 'pandas': the venv isn't active, or VS Code is using the system Python. Runsource .venv/bin/activateand re-select the interpreter (Step 7).ensurepip is not available: you skippedsudo apt install -y python3-venv. Install it, then create the venv again.- Running out of memory: 4 GiB is fine for datasets in the hundreds of megabytes. For bigger data, stop the machine and change it to a larger type.
Wrapping up
You now have a cloud machine you can drive entirely from VS Code: a terminal, an isolated Python environment, your data, a working pandas script and a git history to keep it all honest. Swap the penguins for your own data and you're away.
Related posts
- Connecting to Linux (Ubuntu) Machine via SSH
- SSH Commands and Default Usernames
- SSH and Windows 10
- Automatically syncing scripts to your RONIN machine with Visual Studio Code
- RONIN LINK - Our Handy Desktop App!
- Accessing Your Server Application with SSH Port Forwarding
- Creating and Connecting to RStudio with RONIN LINK
Dataset credit: Palmer Penguins, CC0 1.0. Horst AM, Hill AP, Gorman KB (2020). palmerpenguins: Palmer Archipelago (Antarctica) penguin data. doi:10.5281/zenodo.3960218. Data collected by Dr Kristen Gorman and the Palmer Station Long Term Ecological Research (LTER) Program.