SSH and Windows 10
Connecting to machines in Windows just got a whole lot easier. Here's how you do it when you can't use RONIN LINK


Finally! Windows has got with the time and enabled both a Client and Server SSH tool for using when connecting to machines!
https://www.howtogeek.com/336775/how-to-enable-and-use-windows-10s-built-in-ssh-commands/
Here's the summarised version of the link above to get started with this in RONIN
How to Install Windows 10’s SSH Client
The SSH client is a part of Windows 10, but it’s an “optional feature” that isn’t installed by default.
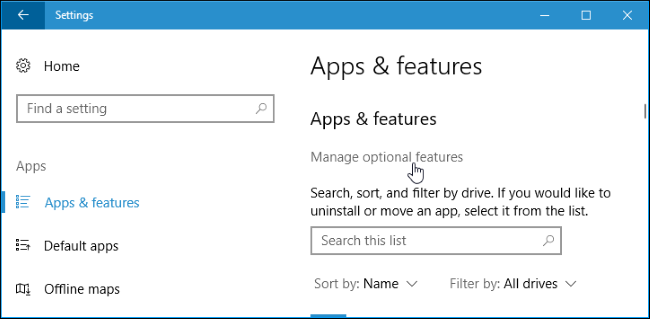
To install it, head to Settings > Apps and click “Manage optional features” under Apps & features.
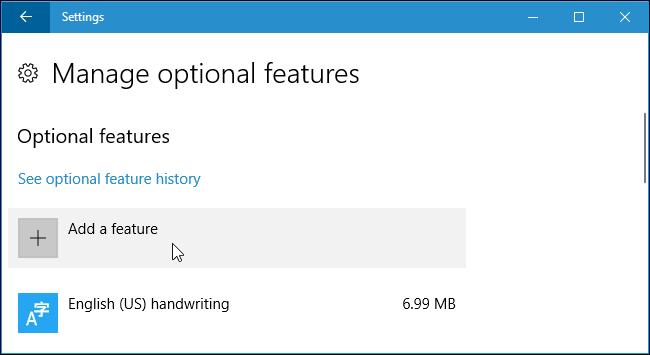
Click “Add a feature” at the top of the list of installed features. If you already have the SSH client installed, it will appear in the list here.
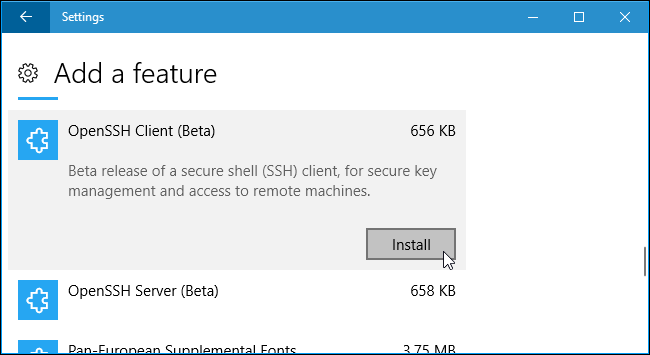
Scroll down, click the “OpenSSH Client (Beta)” option, and click “Install”.
Step 2 - Connect to your machine.
Assuming your key is located in the Downloads folder, to connect to this machine run the below in a command prompt (Start Menu > Command Prompt)
ssh -i %userprofile%\Downloads\your-key.pem ubuntu@example.ronin.cloud Step 3 - Connect to your app web server!
To access your app from the cloud (e.g. Jupyter notebook) we need to add the port forward!
ssh -i %userprofile%\Downloads\your-key.pem -L 8888:localhost:8888 ubuntu@example.ronin.cloudTo see if your notebook is running
jupyter notebook listTo start a notebook (if none are running)
jupyter notebookYou will see a url that looks like this
http://localhost:8888/?token=exampleexampleexampleexampleexampleexampleCopy and paste this url into your Chrome browser

Tada! All done!