How to configure a RONIN machine as a public webserver
If you have configured a RONIN machine as a webserver and would like to open it up to the public internet, there are a few manual steps that need to be performed in the AWS console via a RONIN Administrator. This blog will run you through those key steps.

If you have configured a RONIN machine as a webserver and would like to open it up to the public internet, there are a few manual steps that need to be performed in the AWS console via a RONIN Administrator.
1. Allow public access on port 80 and port 443 of the machine
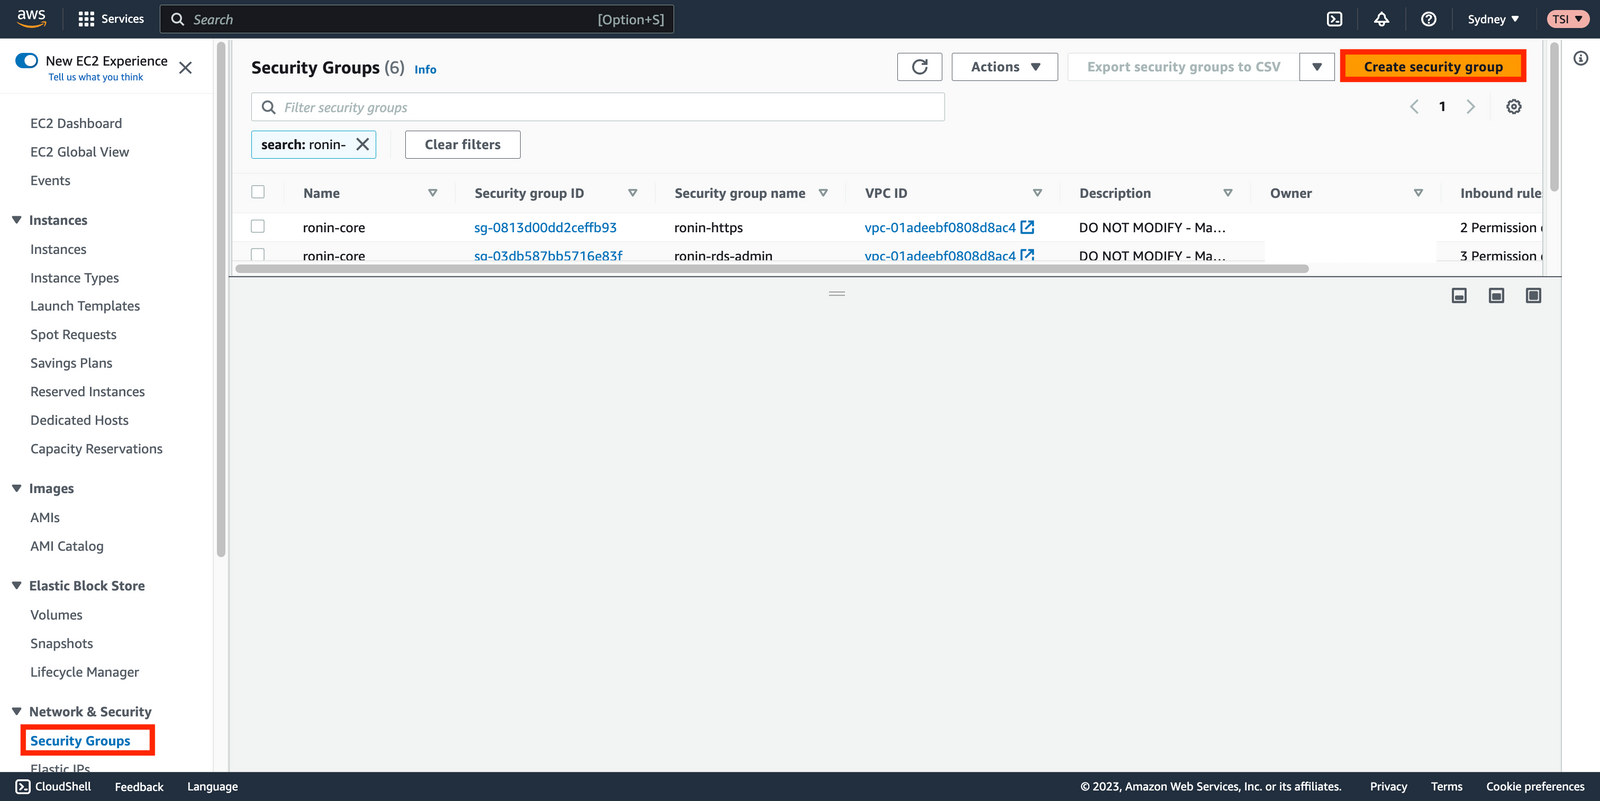
In the AWS console, head to EC2 and select Security Groups in the left panel. Then select the Create security group button in the top right.
Name your security group something easy to identify like "WebAccess", give it a description and ensure the RONIN VPC is selected. Then, in inbound rules, add a new rule of type "HTTP" and select "Anywhere-IPv4" as the source. This will allow access from the public internet (i.e. any IP address) to port 80 on your machine. Repeat this process to add a rule for type "HTTPS" (i.e. port 443) too. Leave the rest as default and click Create security group at the bottom right.
Note: You can enable access only from certain IP addresses (e.g. an institutions VPN range), instead of making it publicly available to everyone. To do so, leave the Source as "Custom" and type in the IP ranges in the adjacent box. You can also open other ports other than the HTTP/HTTPS ports 80/443 - for example if you would like to enable access to a database that is running on a different port (e.g. port 5432 for a PostgreSQL database), or a custom application that is running on a non-standard port.
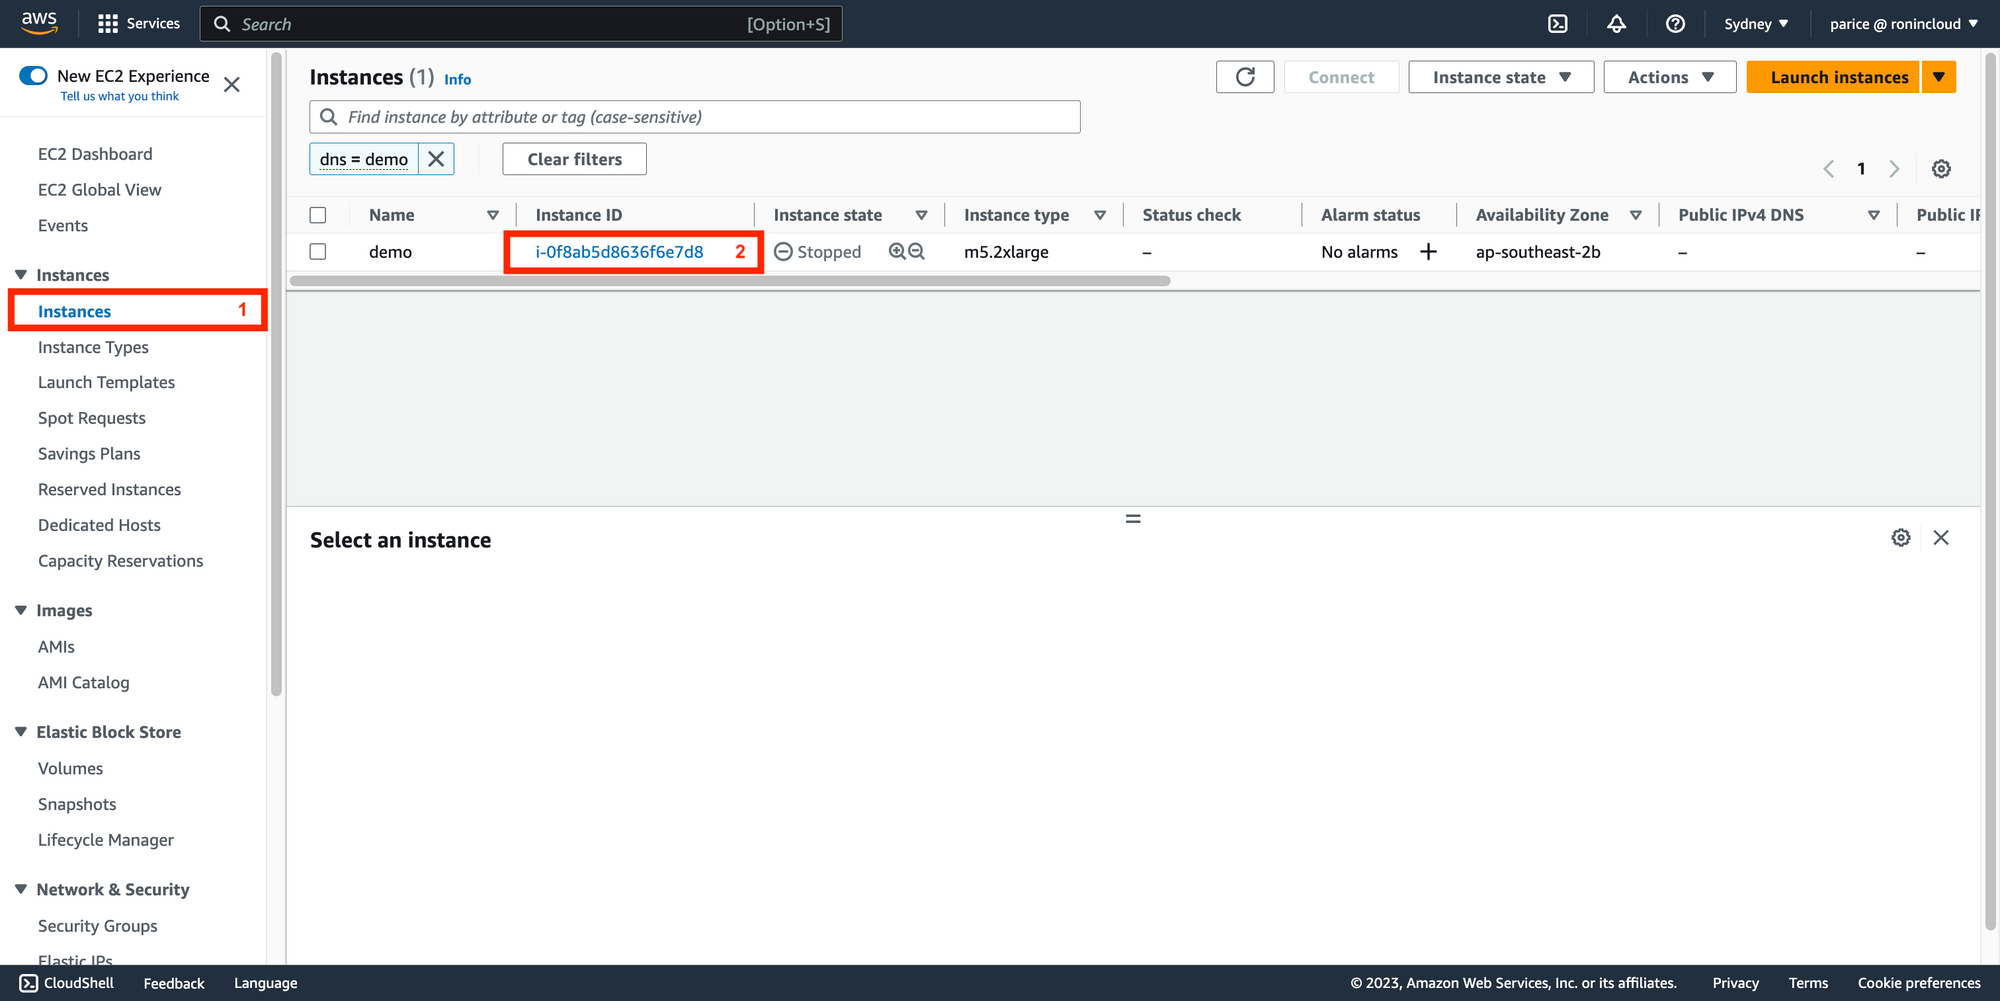
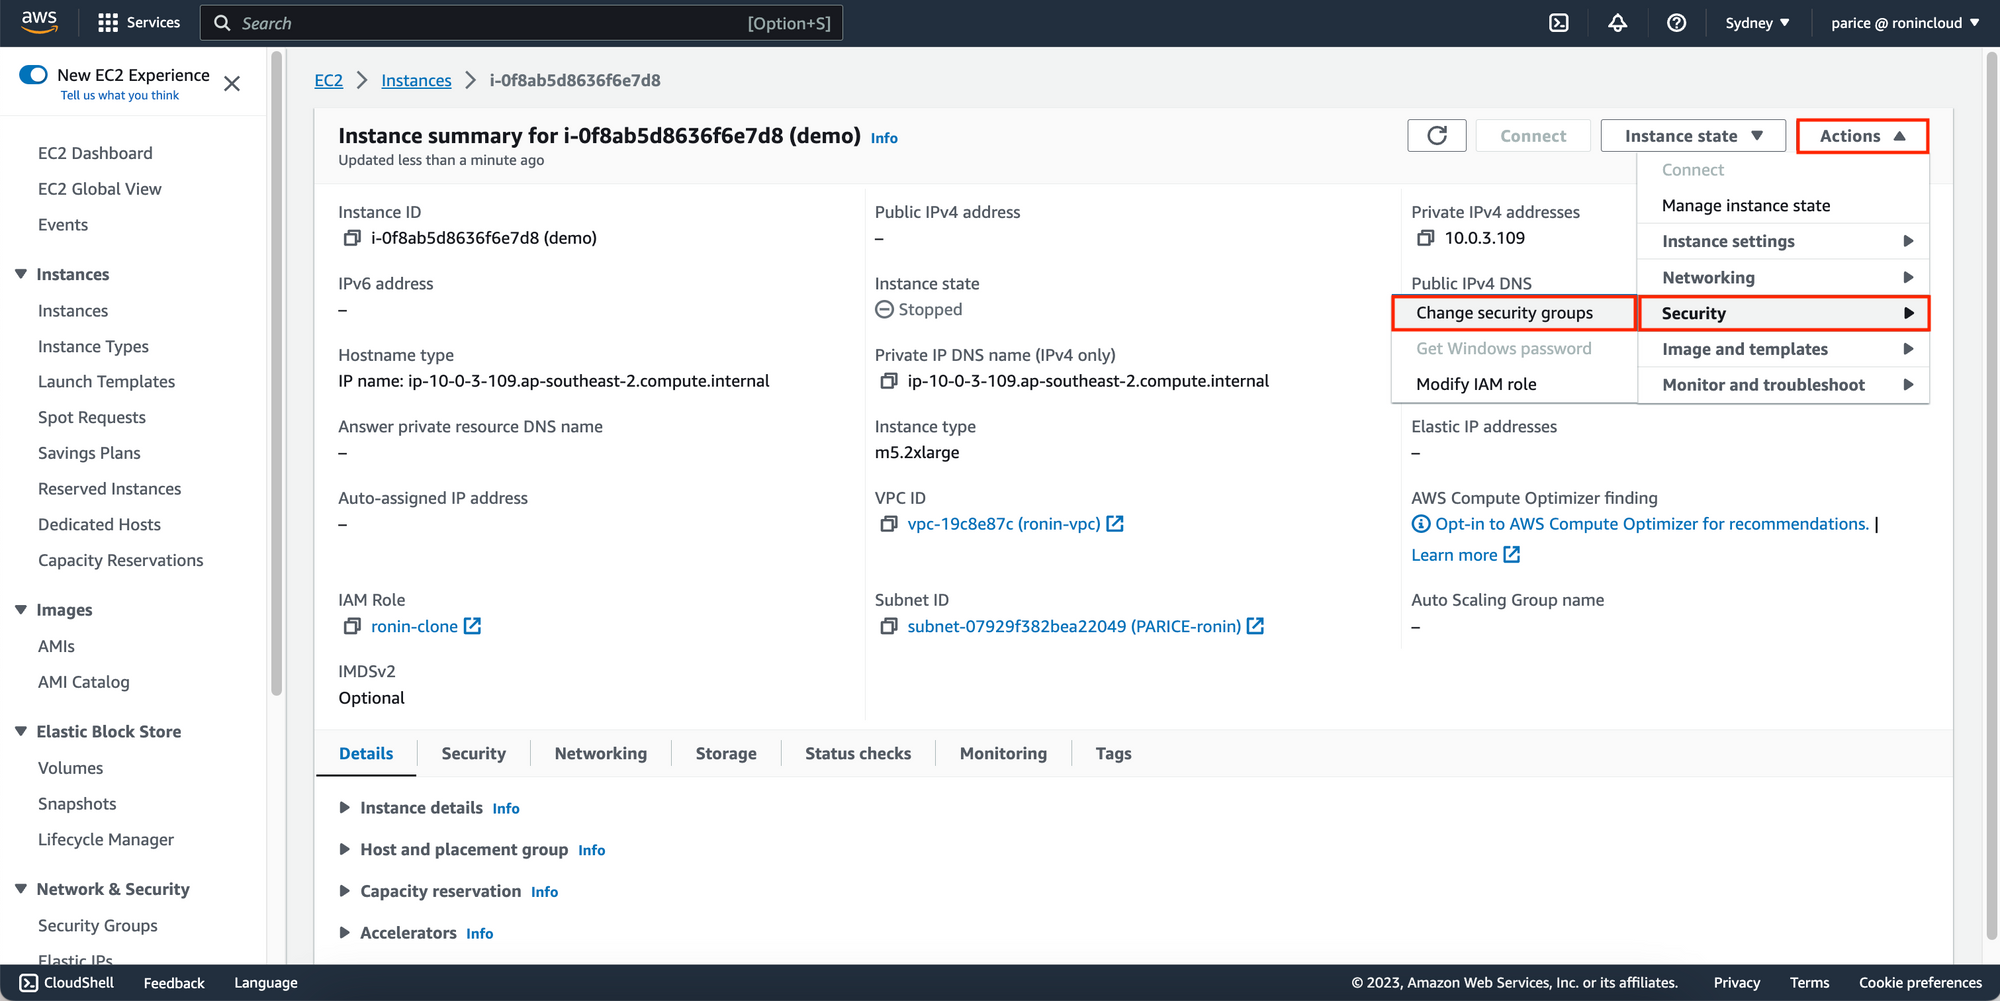
Select Instances in the left menu. Then find and click on the instance that is being used as a webserver.
In the top right click on Actions > Security > Change security groups
In the search bar search for the security group you just created e.g. "WebAccess", select the security group from the list and then click Add security group. Then click Done.
Ports 80 and 443 of your webserver should now be accessible to the public. To test this, your machine will already have a domain assigned to it from RONIN, so just type your machine's address in your browser e.g. http://demo.ronin.cloud. If your webserver is configured correctly to run on port 80, your website should appear.
2. Assign an elastic IP to your webserver (optional)
By default, each time you start and stop your machine it will be associated with a new public IP address. Sometimes this behaviour is unwanted if you are using a custom domain or need to assign an SSL certificate to a specific IP address.
You can assign a static IP address to your webserver machine as follows:
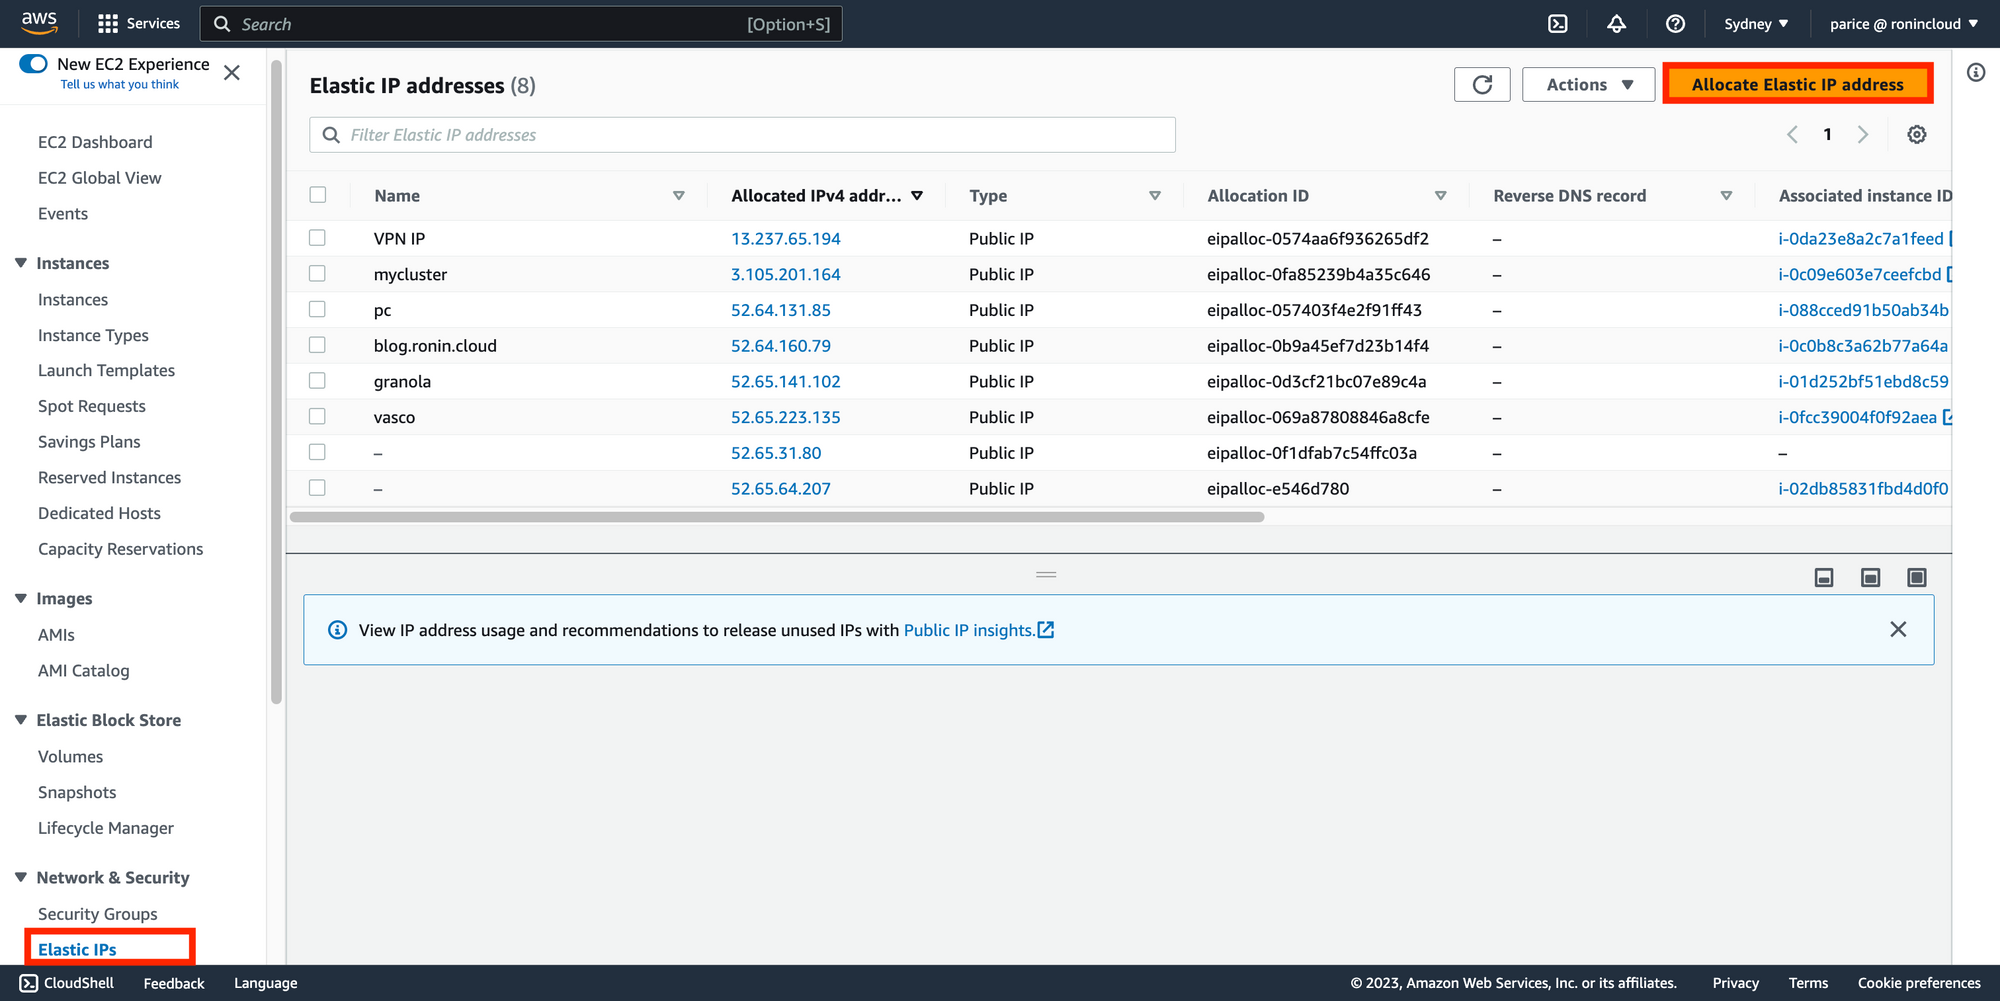
From EC2 in the AWS console, navigate to Elastic IPs in the left menu bar and click Allocate Elastic IP Address.
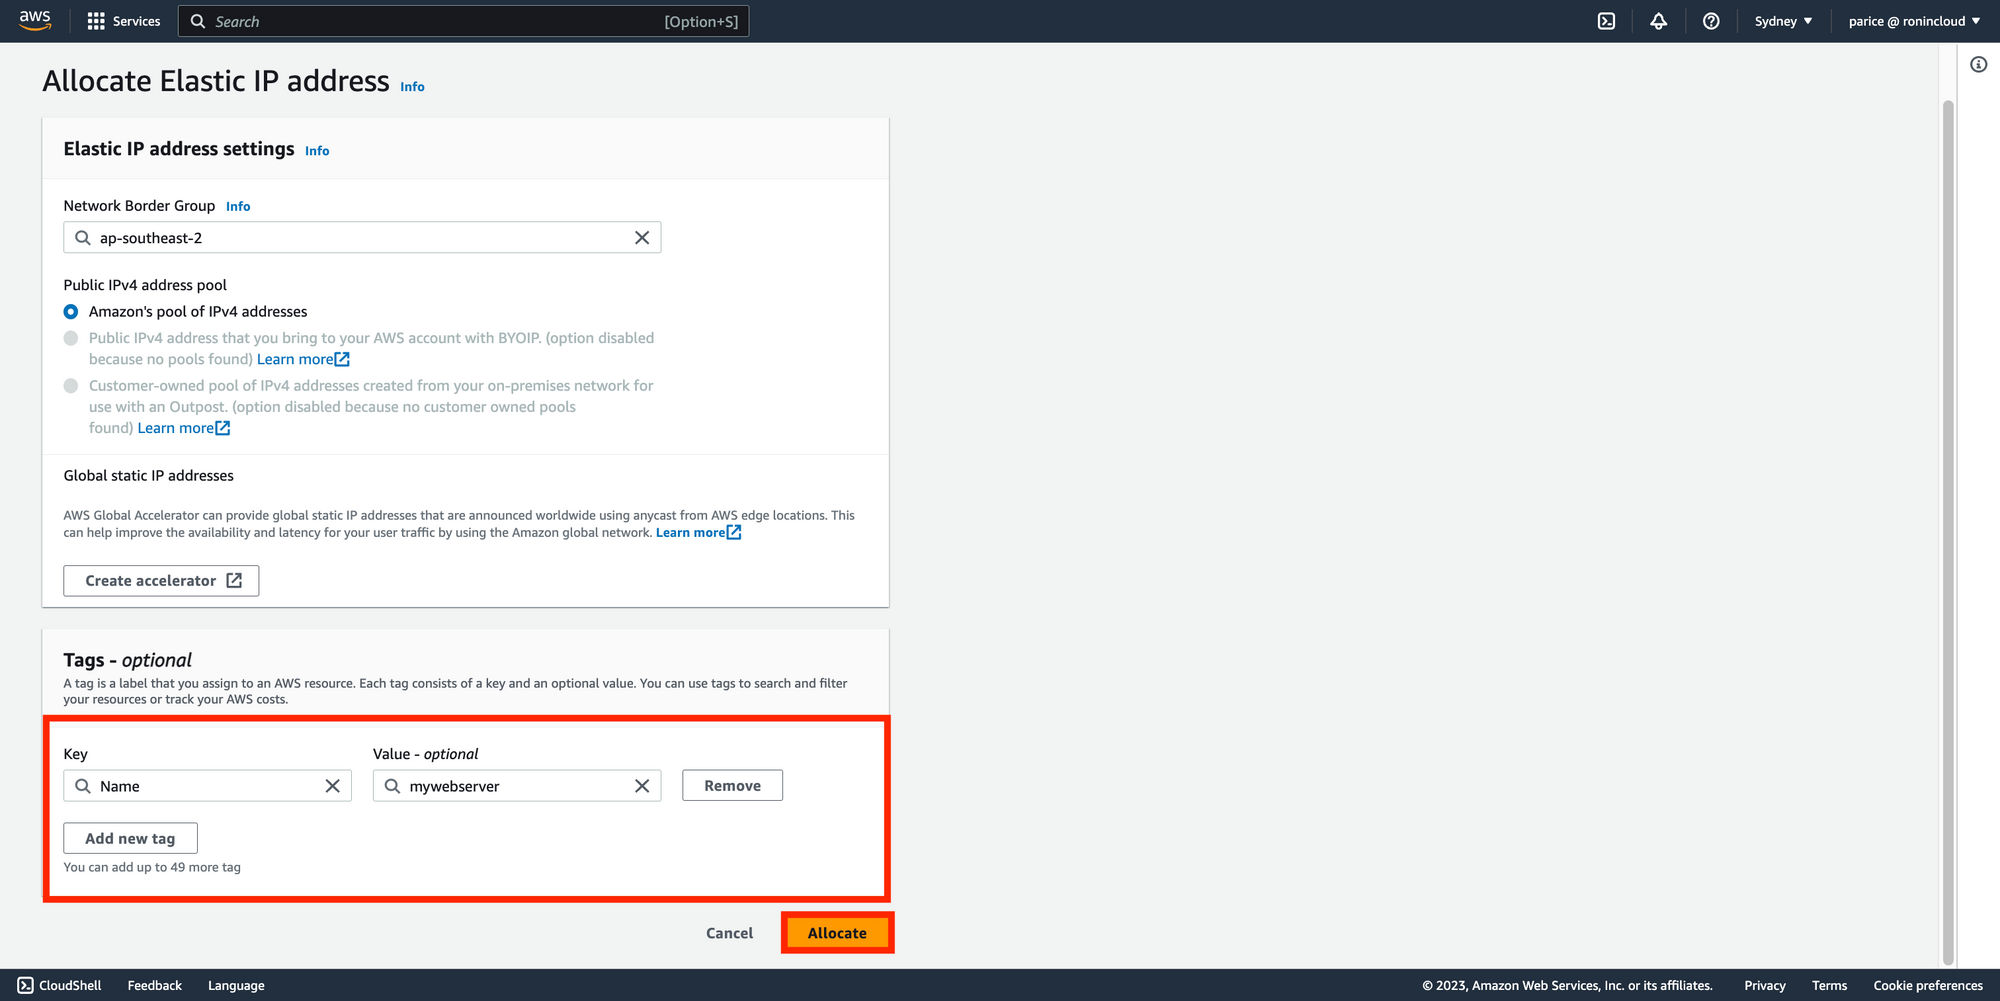
Leave the settings as default, but under tags click Add new tag and specify the Key as "Name" and the value as something that will help you identify this Elastic IP for your webserver e.g. "mywebserver". Then click "Allocate"
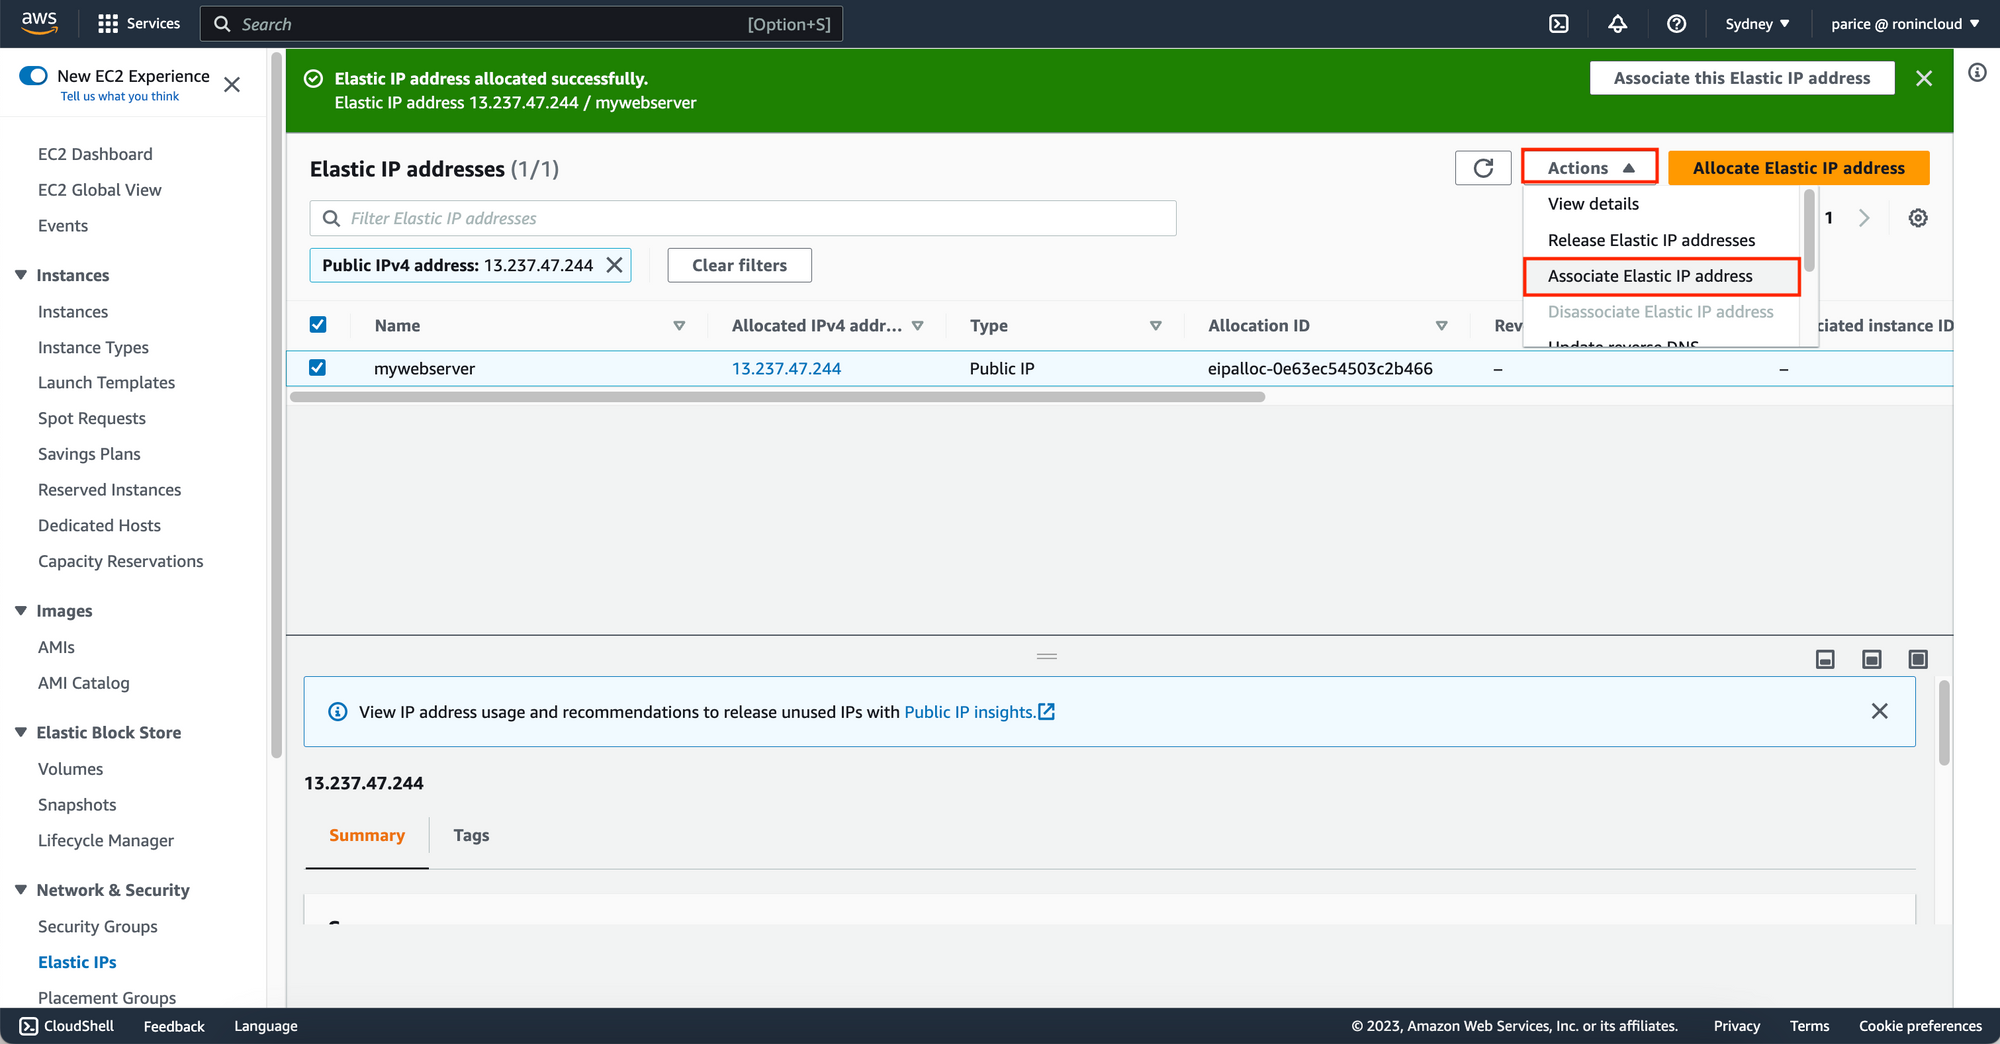
Ensure your new Elastic IP is selected and then click Actions in the top right then Associate Elastic IP address from the dropdown (or from the Green alert at the top of the screen).
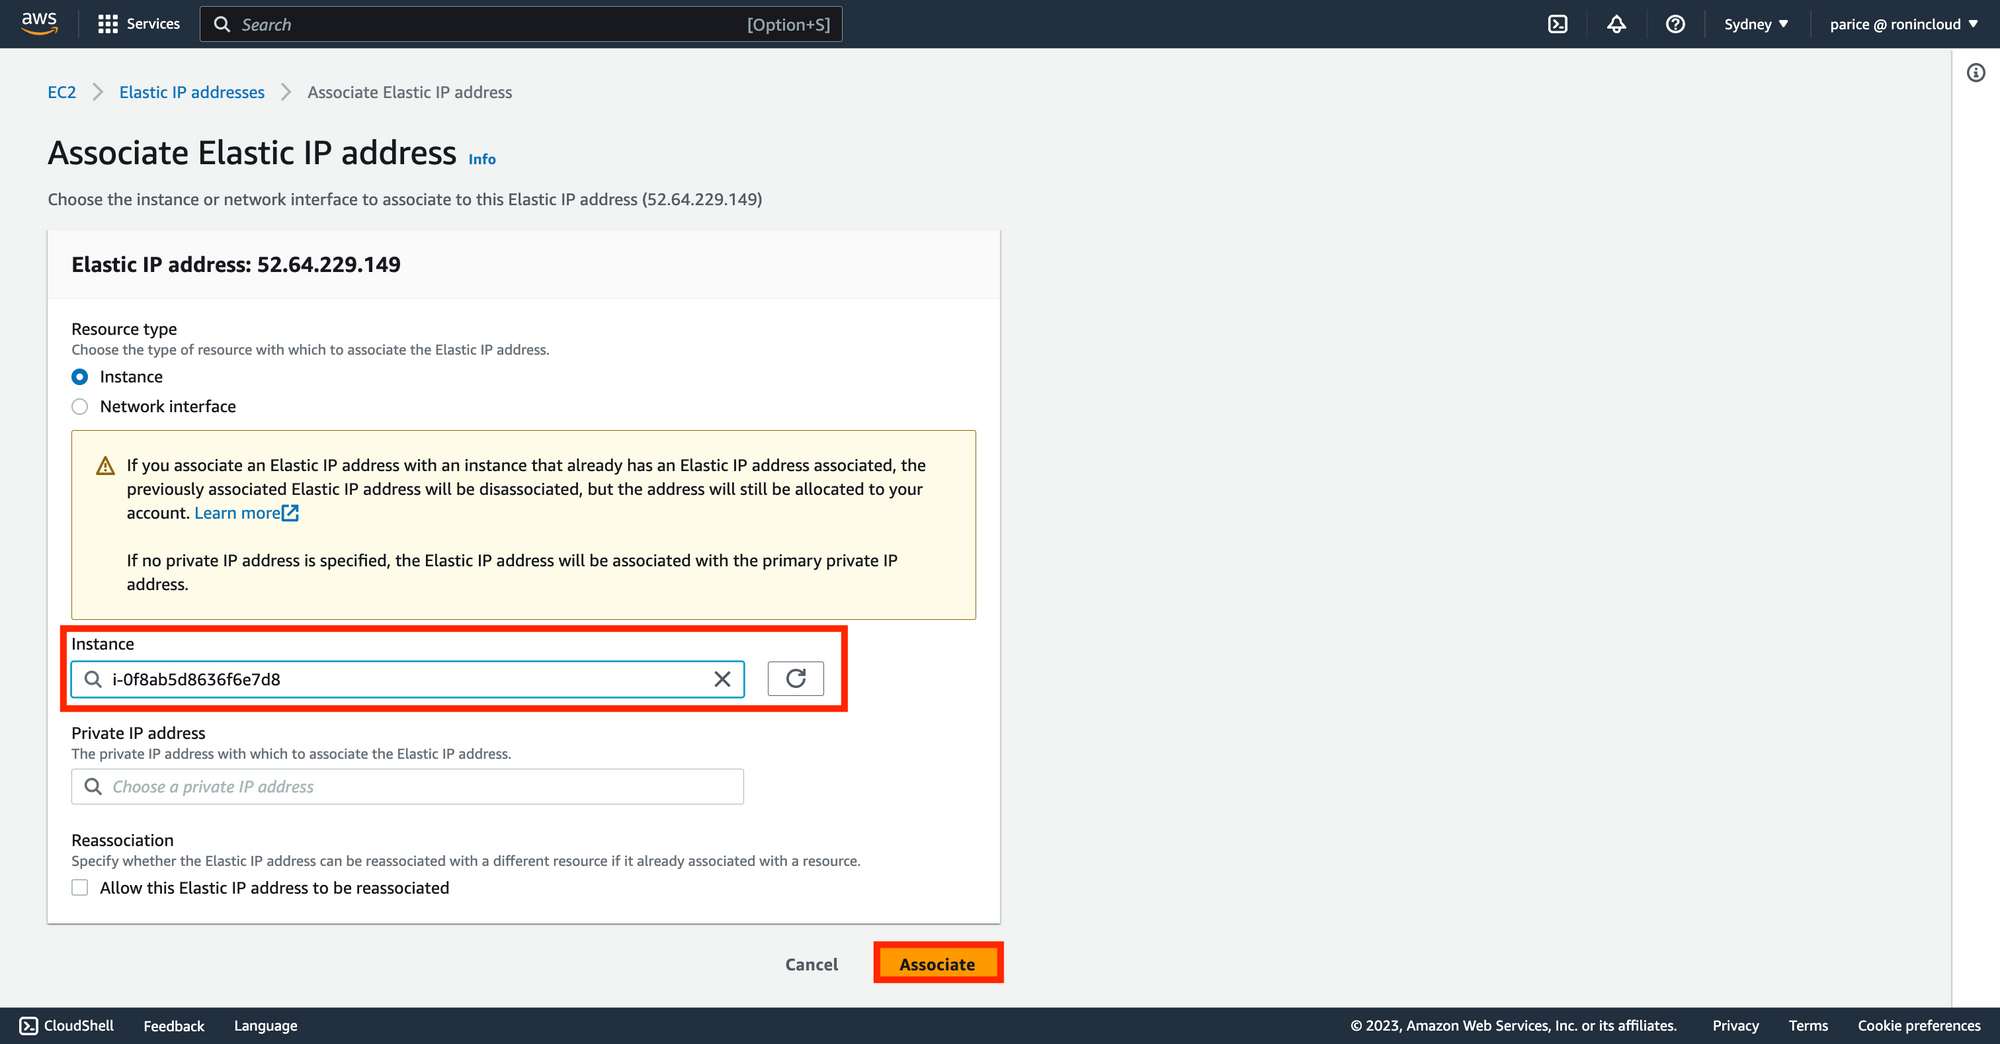
Leave the settings as default and search for the name of your webserver instance. Select your webserver, and then click Associate. Take note of the Elastic IP Address at the top of the form - this will become the new static IP address for your machine.
Your webserver will now permanently be assigned with that public IP address, even when it is stopped and restarted.