Creating an AI Machine in RONIN

Introduction
AI is everywhere right now - writing poems, summarising meetings, answering your oddly specific questions about 18th-century bread recipes. But behind the magic are some seriously powerful tools. We’re talking Artificial Intelligence (AI), Machine Learning (ML), Deep Learning, and Large Language Models (LLMs).
Big-brain models, like Gemma, LLaMA, Mistral and friends are trained on huge chunks of text and can do some wild things with language. But if you’re thinking about building your own AI magic, especially with data you don’t want floating around the internet, sometimes you want to use and tune these models locally.
But let’s not sugarcoat it, running LLMs or other AI tools on your own machine isn’t exactly “click-and-go.” It’s more like “click, swear, Google the error, install some dependencies, repeat.” You often need to get comfy with:
• NVIDIA GPU drivers – because your model needs a brain, and your GPU is it.
• PyTorch, TensorFlow, or similar Python wizardry – the libraries that make AI go brrr.
• Jupyter notebooks and other nerdy tools – your AI sandbox, where the fun (and occasional frustration) happens.
That said, once you’ve set everything up and things are actually running (cue angelic choir), you can unlock some serious power!
Now for the Good News…
We get it, setting all this up sounds… daunting. That’s exactly why we built a tool that does it all for you. No more digging through obscure driver documentation or wondering why your GPU is being weird. Our tool handles the installs, the configs, the drivers, the environments, everything, so you can skip the chaos and get straight to the fun part: actually building and running your models.
So if you’re working with sensitive data, or simply want to leverage or build powerful AI tools without the headache, you’re in the right place. Now, let’s show you how it works!
Create an AI machine in RONIN
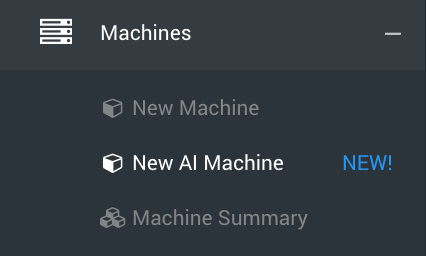
Login to RONIN and navigate to the New AI Machine screen by clicking on to the New AI Machine menu item in the main navigation menu in RONIN:
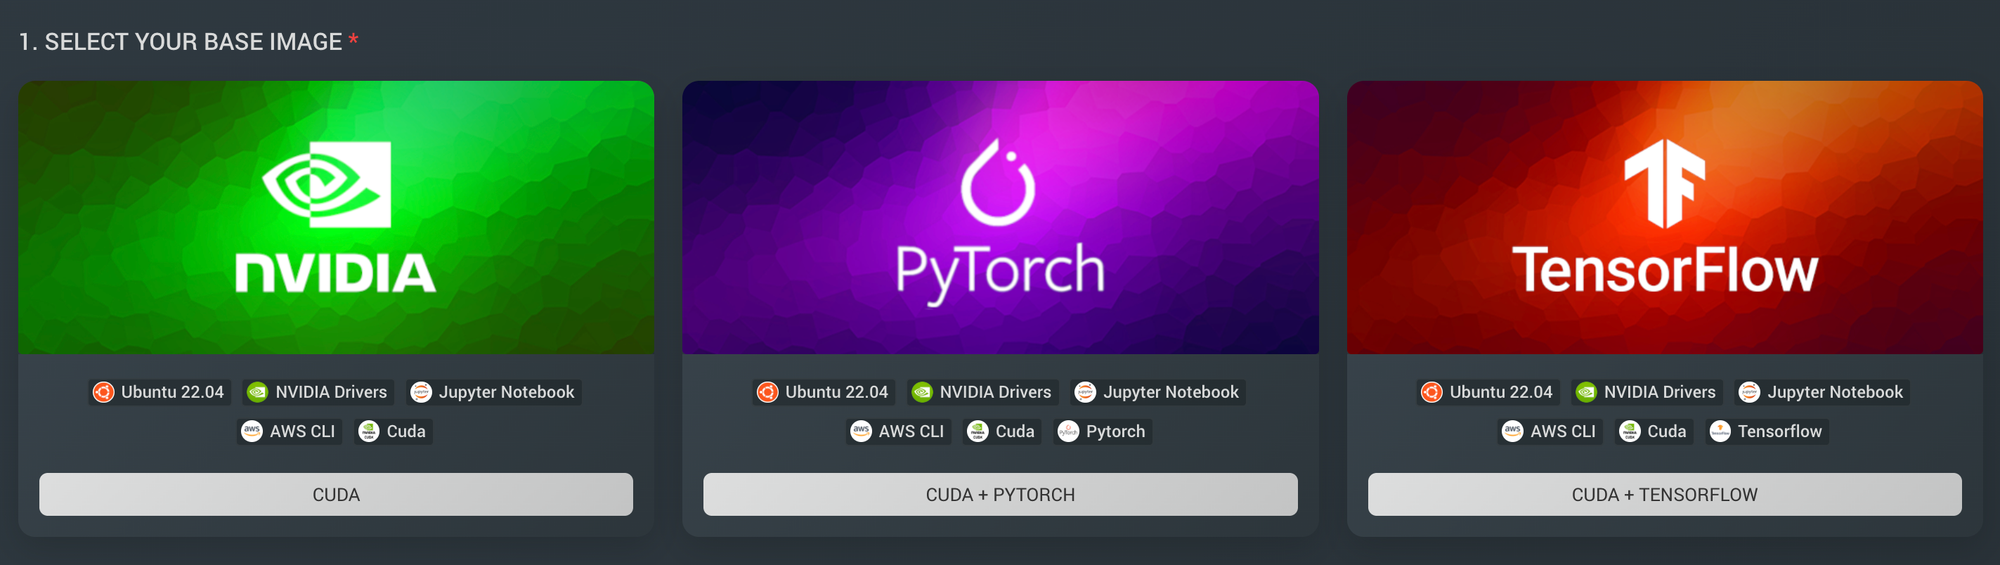
1.Select your base image
These images are based on the AWS Deep Learning images, which come pre-configured with a bunch of tools that you need to get started including NVIDIA drivers, CUDA, Jupyter and AWS CLI. The PyTorch and TensorFlow images also come with these frameworks preconfigured in their own virtual environment, that RONIN will auto-activate for you. If you'd like to learn more about these base images, see: https://docs.aws.amazon.com/dlami/latest/devguide/what-is-dlami.html
2.Add an LLM (optional)
If you'd also like RONIN to download and make available a popular LLM model on your machine via Ollama, select one of these options.
Ollama will be installed by default, even if you don't select an option here, so you can easily install your desired model later, or change to another model if needed.
All of the default models you can select from in RONIN can run pretty smoothly on a g5.2xlarge, which is only ~$1.50 per hour!

3.Address your machine
Give your machine a name - RONIN will let you know if that name is available or if it is already taken. If it is not available, edit the name until you get the green "Address is available" approval.

For this example, we are addressing the machine "myaimachine" (imaginative, we know!). When we launch this machine, the full address it will be accessible from is myaimachine.ronin.cloud.
RONIN will take care of all the networking internally and externally... you're welcome!
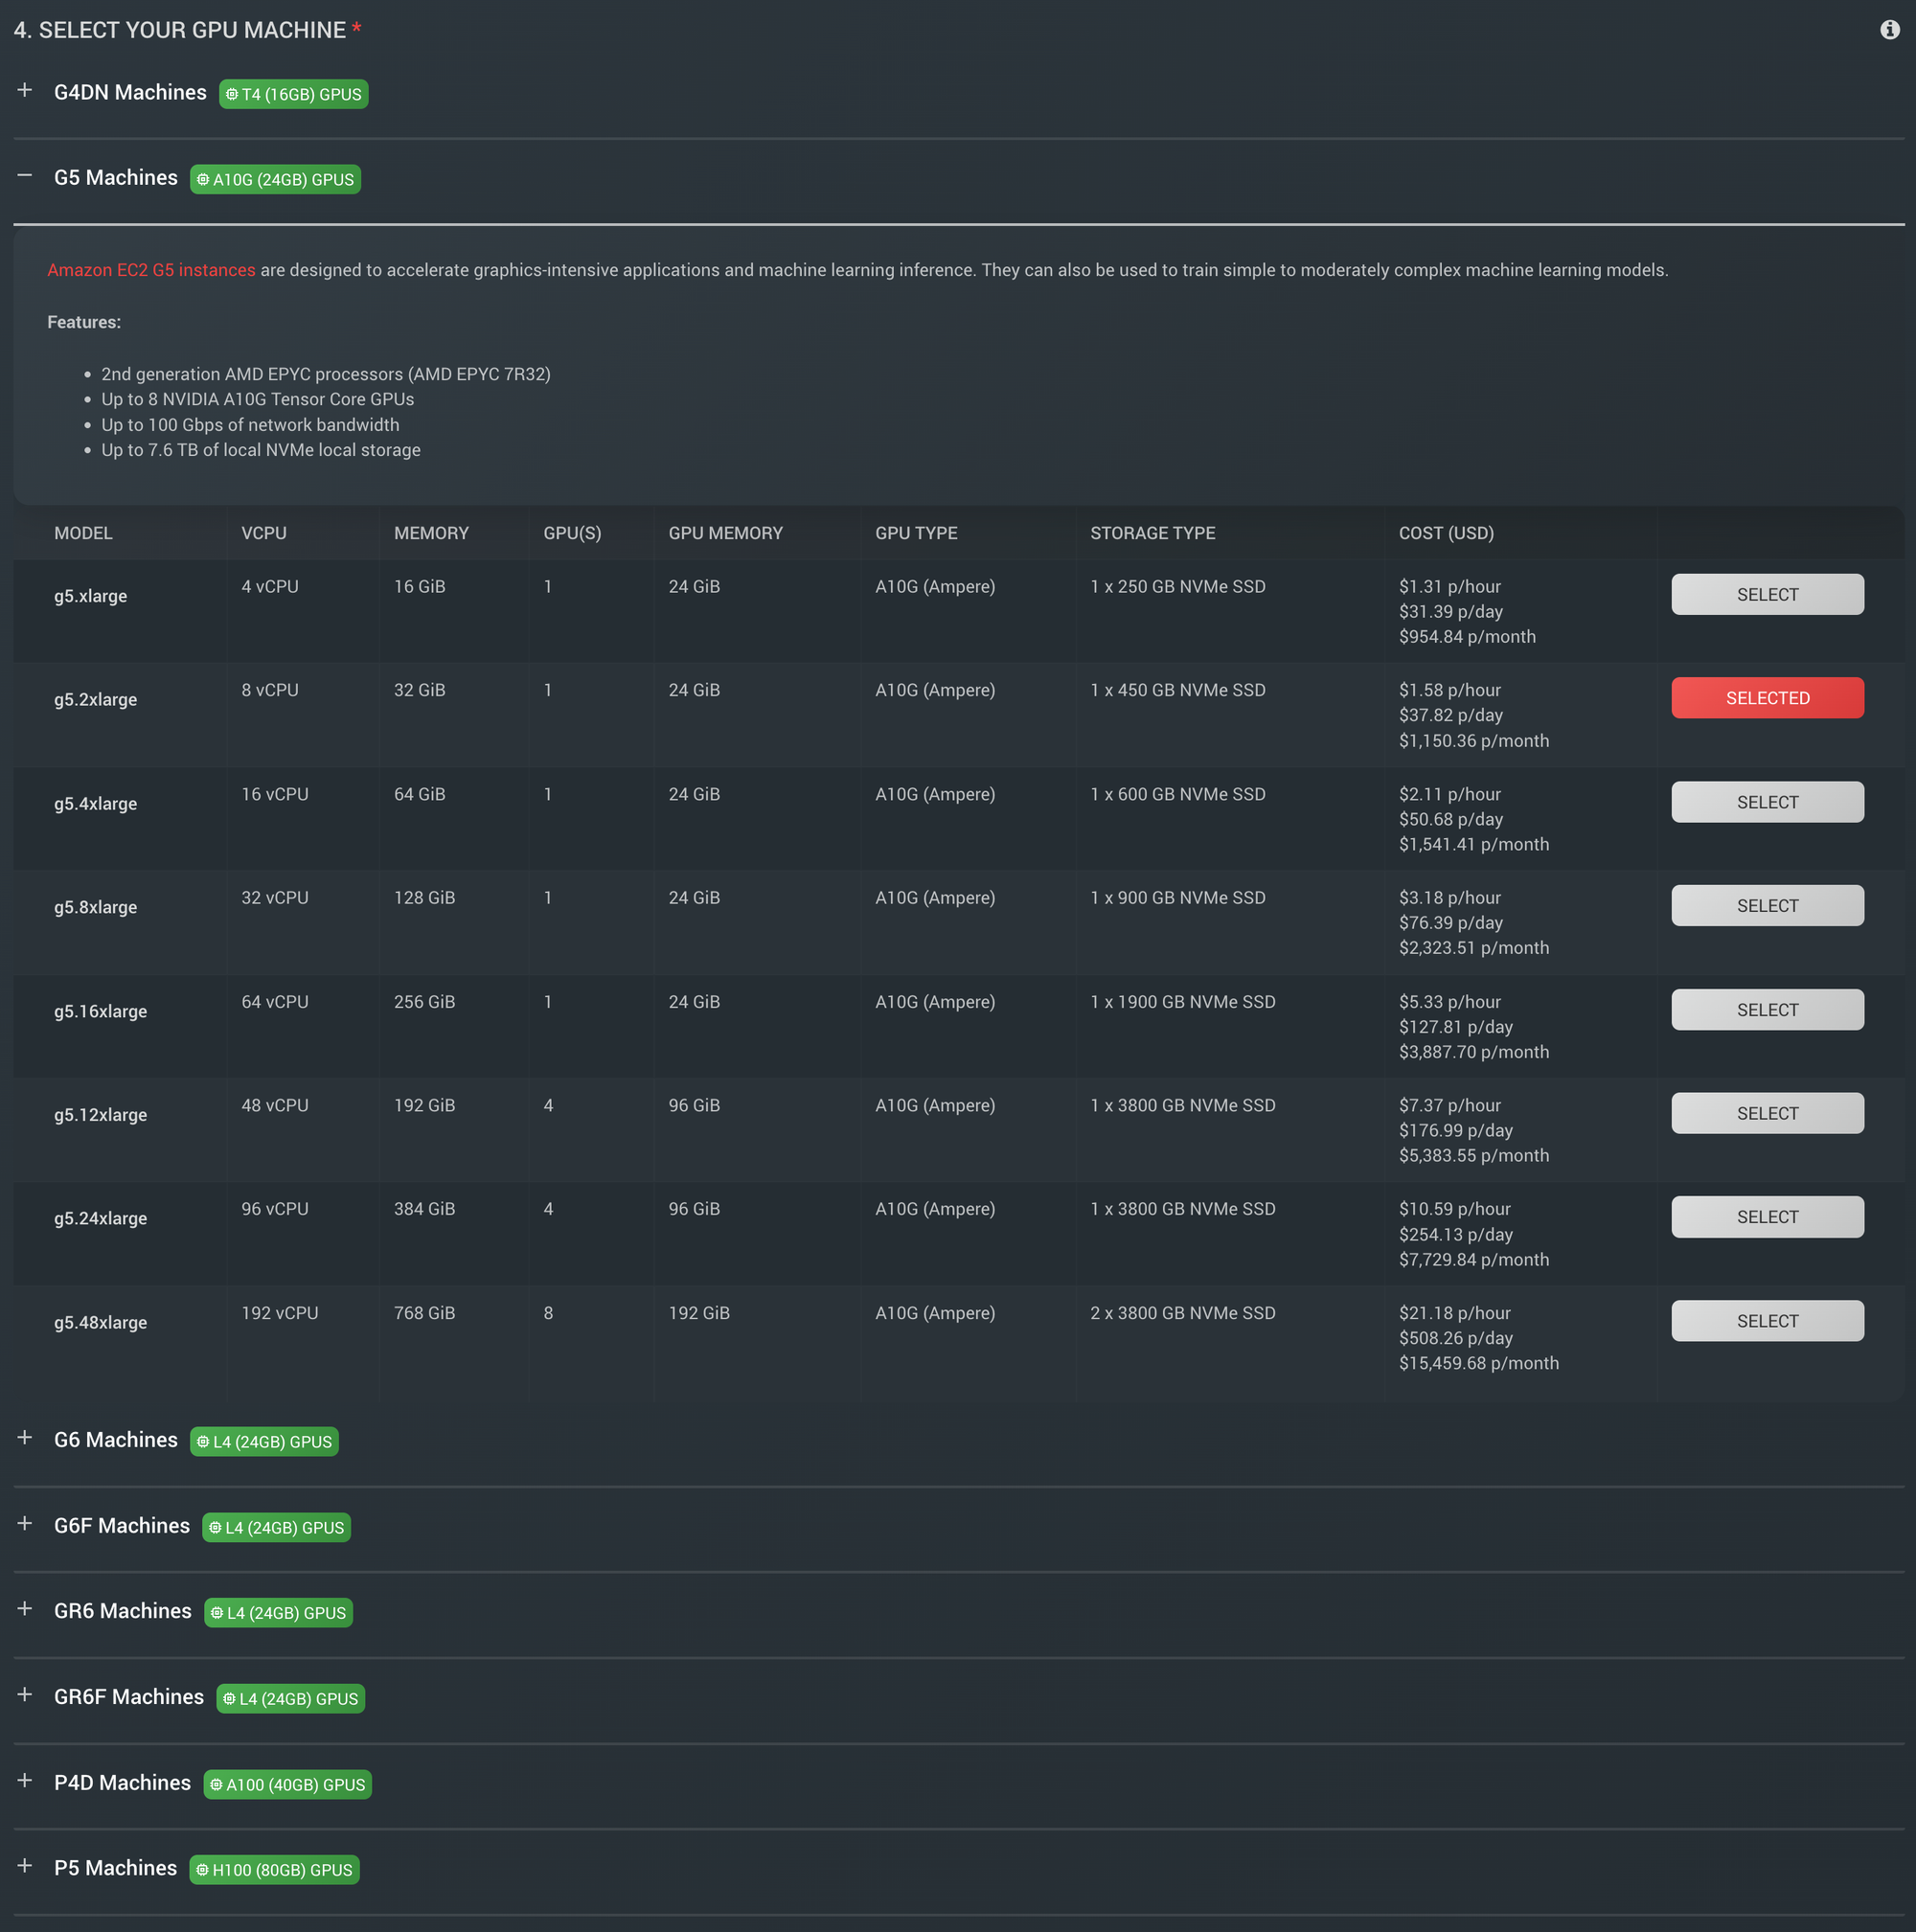
4.Select your GPU machine
There are a variety of GPU machine families available, each with differing GPU chips and respective VRAM (highlighted in green). The G4, G5 and G6 machines are a good place to start since they typically balance cost with performance. Larger models will often need larger GPU power i.e. more GPUs and more VRAM.
5.Configure additional storage
Root drive is already 150GB by default, but you can make this larger if you are using a bigger model or want more space for your data or analysis. Or you can attach some additional drives if you want the flexibility of being able to detach them, back them up etc without your data being tied to the operating system.

6.Select your SSH key
Create a new SSH key, or select an existing one from your project, to connect to your machine securely. Newly created keys will be downloaded to your Downloads folder.

SSH keys work similar to real world keys, so whoever has a copy of your key has full access to your machine, so be really careful where you store it and who you give it to!
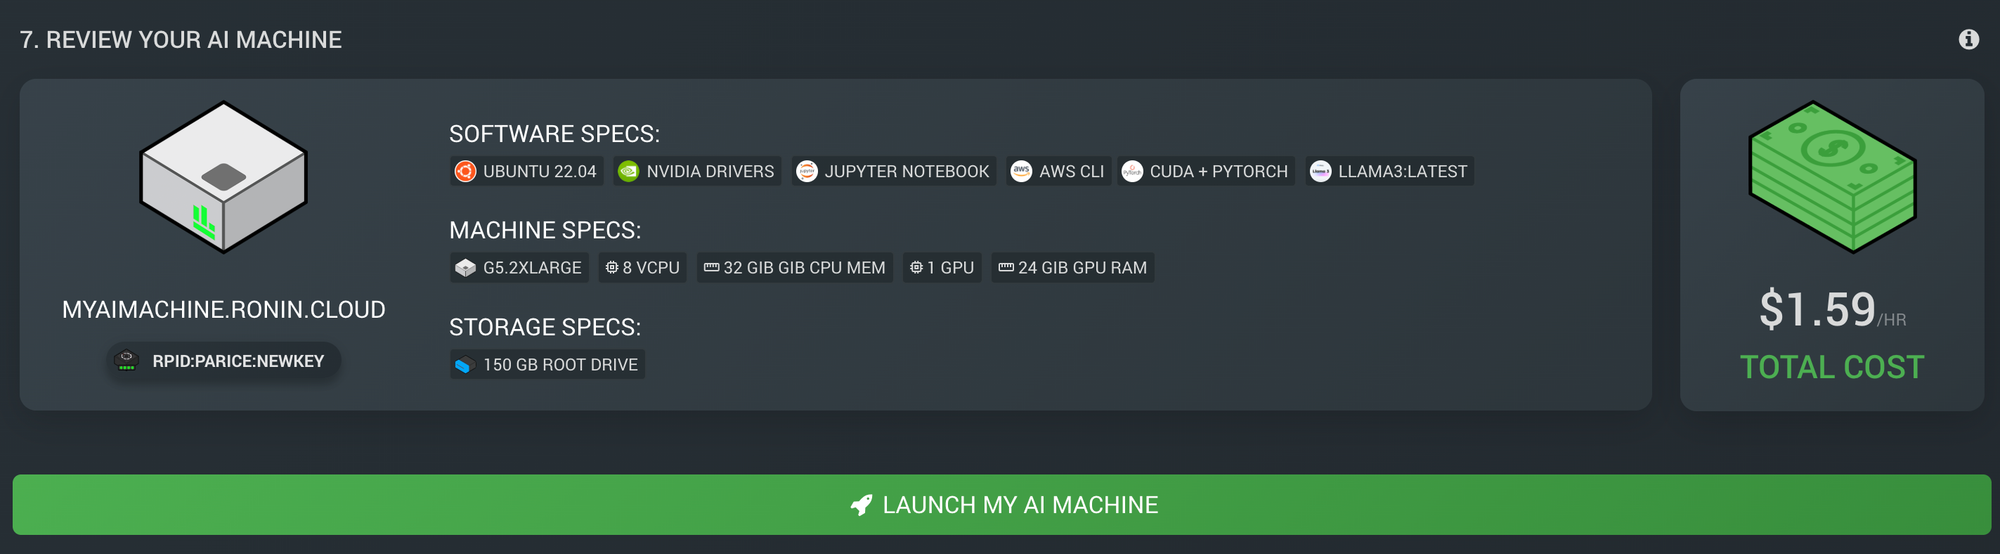
7.Review your AI machine
At the bottom you will see a summary of your AI machine configuration including the machine address, SSH key, software included based on your selected base image and LLM, machine specs based on your selected GPU machine type, storage specs, and total cost per hour.
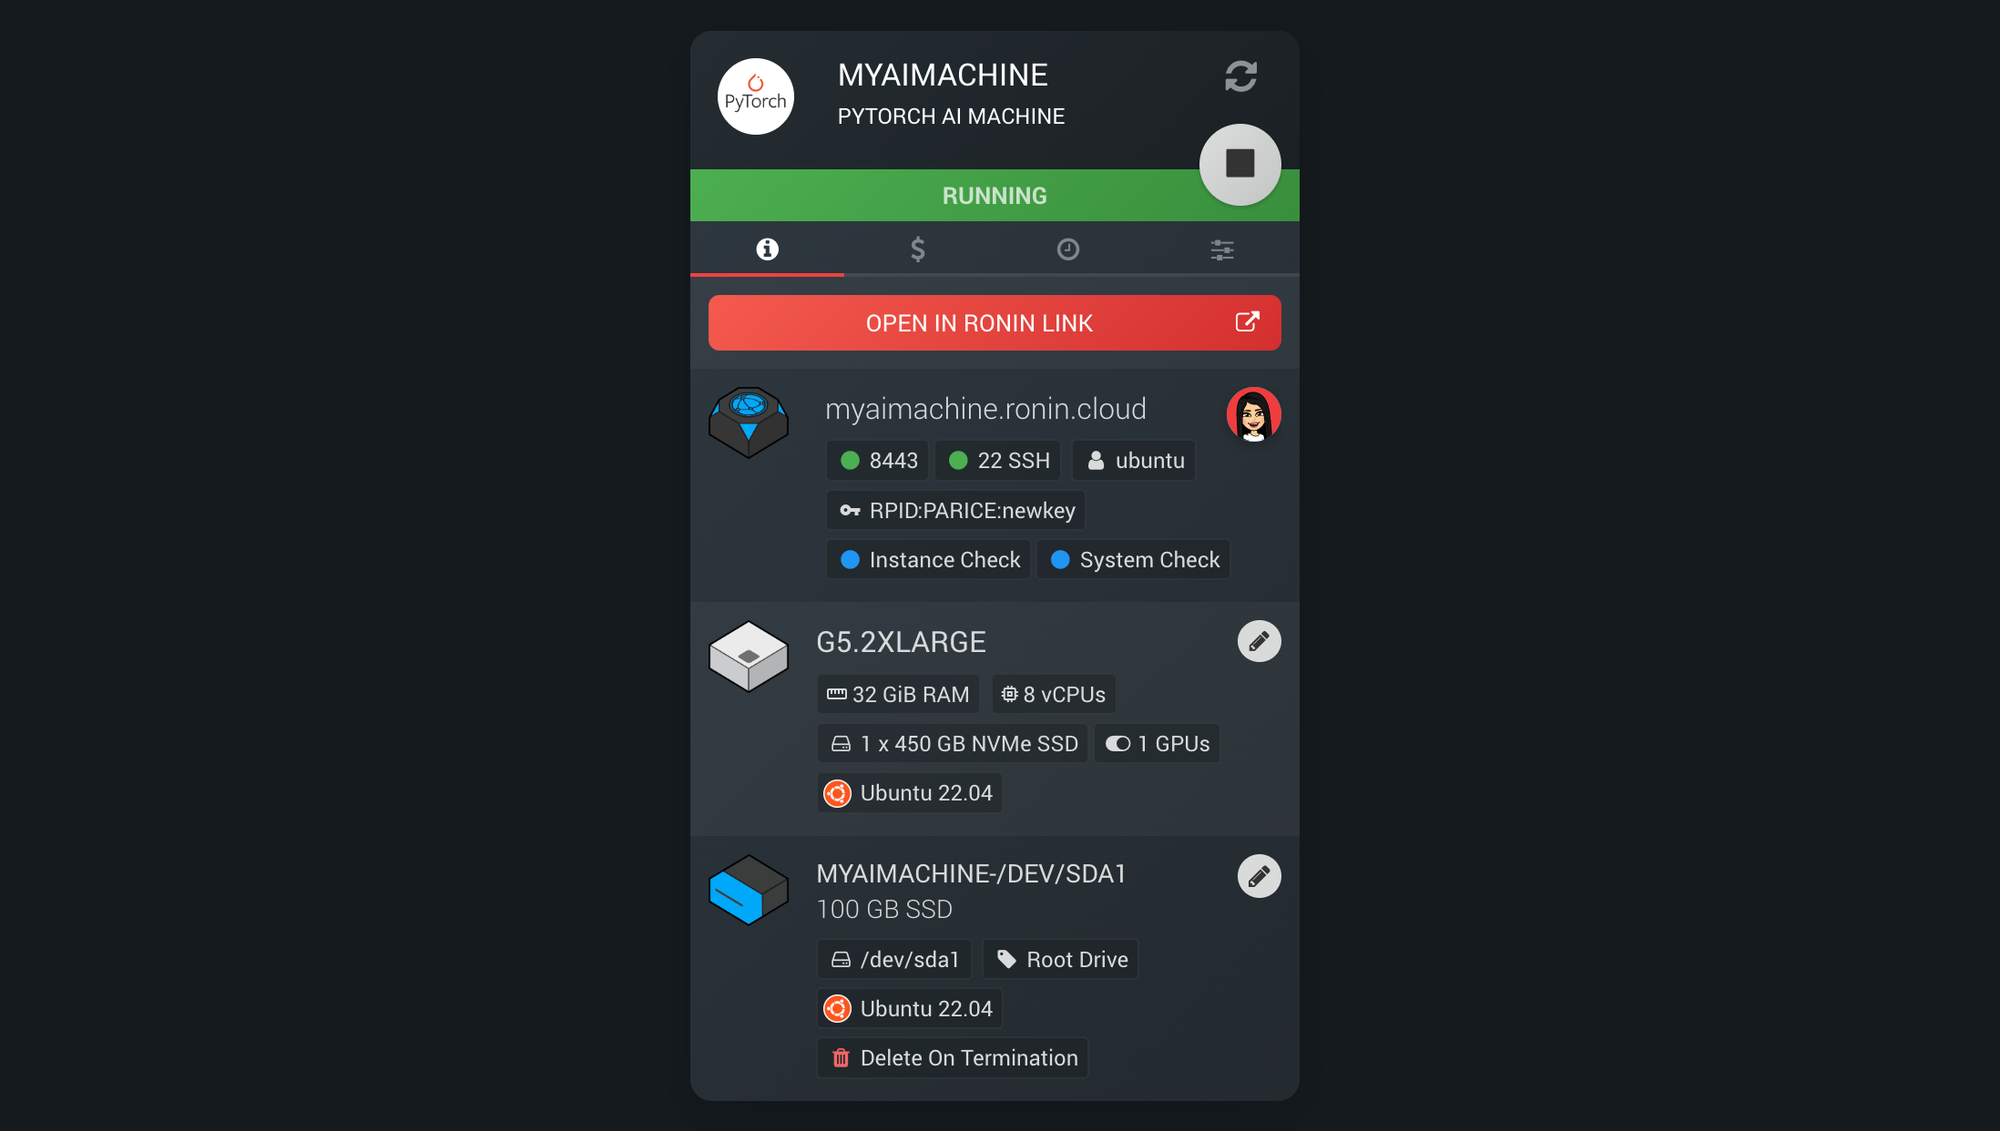
8.Launch and interact with your new AI machine
If you are happy with your machine configuration, you can click the green launch button and RONIN will start preparing this machine for you. Once it is launched, it will appear in your Machine Summary screen with your other single machines, where it can be managed as usual!
While your machine may say that it is Running shortly after launching it, it can take some time for RONIN to download any required LLM models (if selected) and finish setting up the environment. If you connect to the machine too early and try and start running things before the environment is fully set up, you will likely run into some errors and potentially interrupt the setup process, for this reason, we recommend waiting 5-10 minutes (for smaller LLM models) before connecting to your machine for the first time.
Using your new AI Machine
We recommend using our free desktop application RONIN LINK to connect and interact with your new AI Machine. So hit the "Open with RONIN LINK" button and wait for it to be added to your RONIN LINK application:
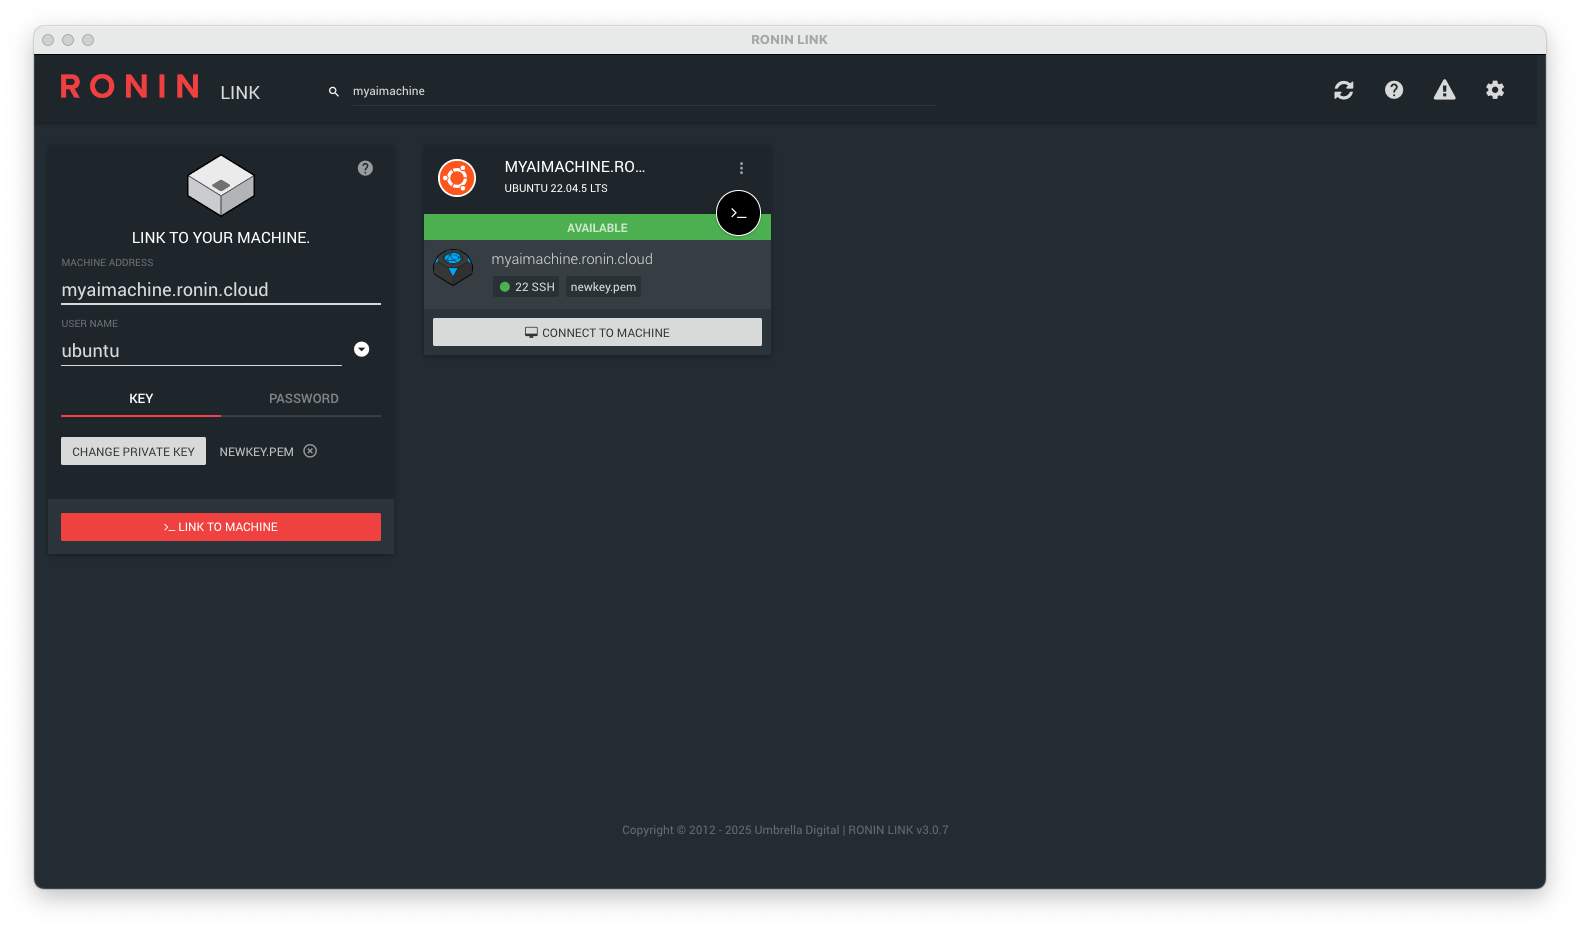
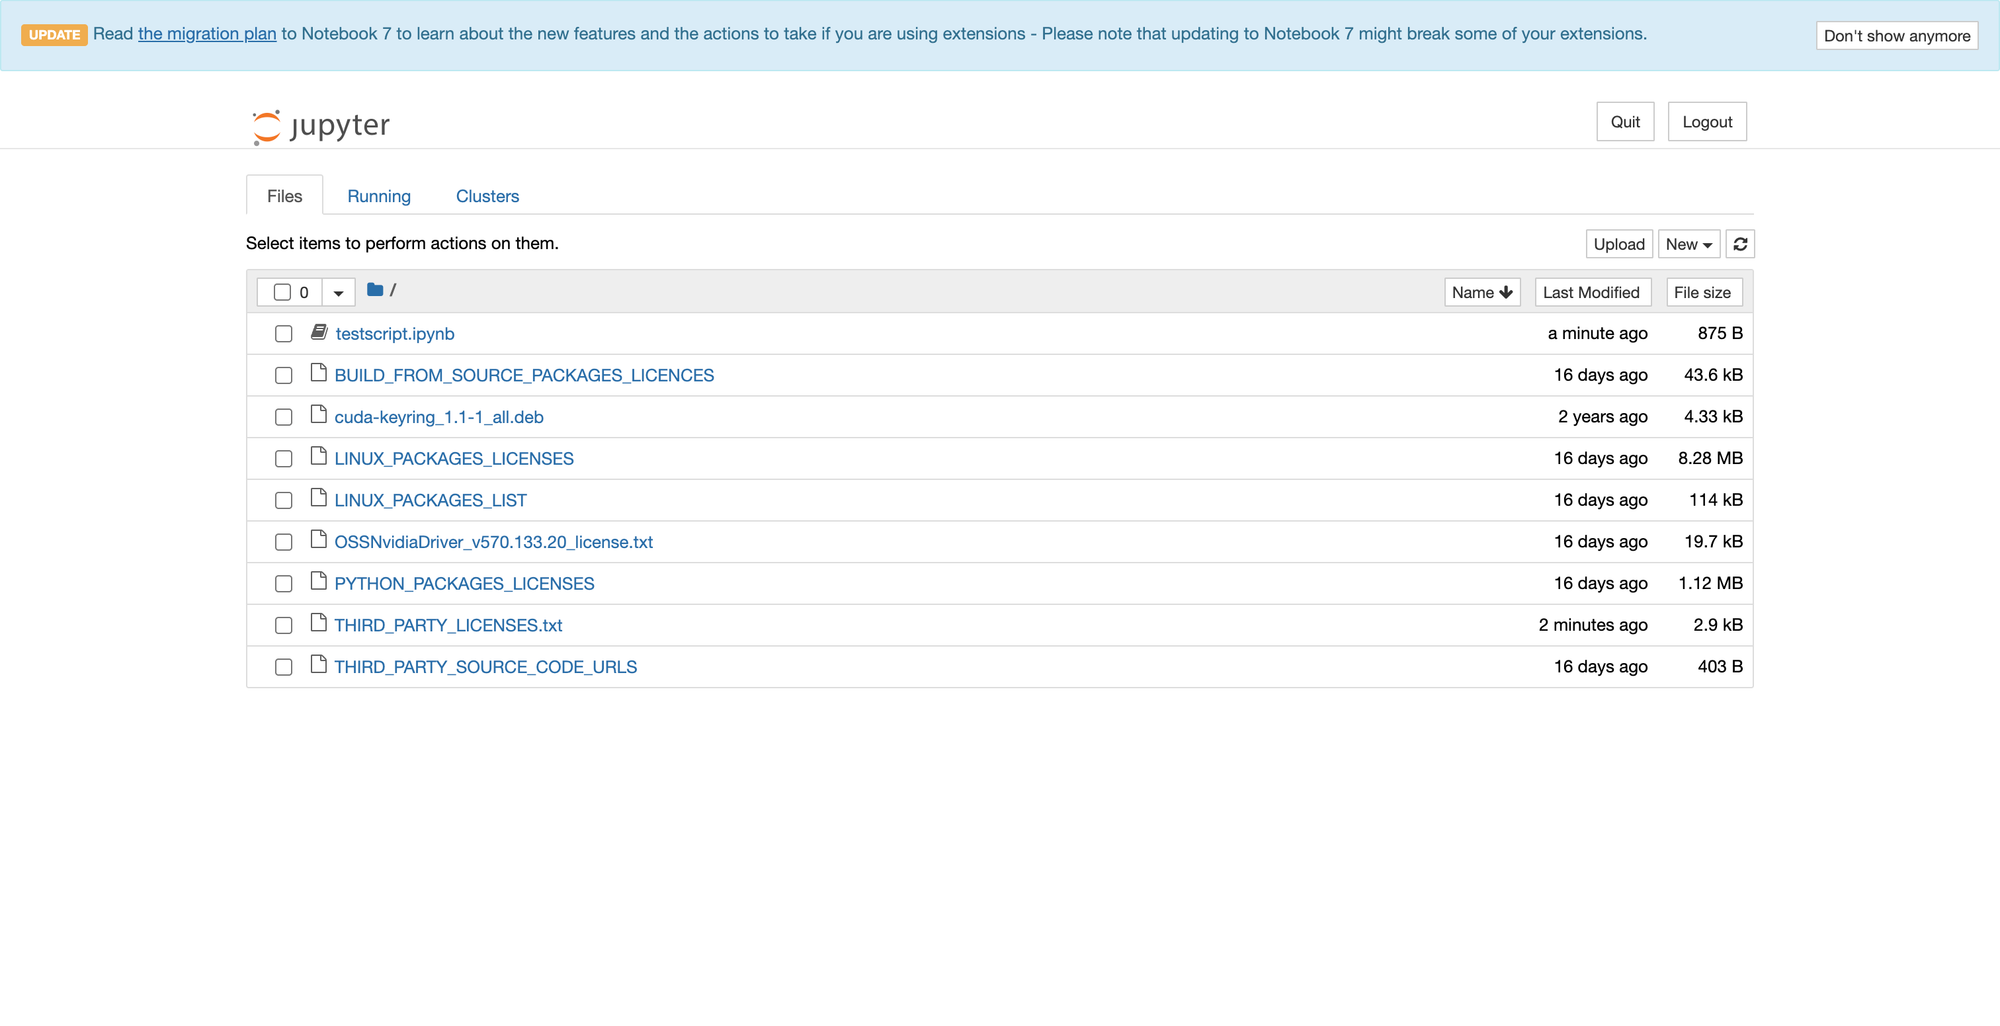
Connect to the machine terminal in RONIN LINK, you will know when your machine setup is complete when there is an test Jupyter notebook called testscript.ipynb in your home folder /home/ubuntu.
If the file is not there yet, you can use the CPU monitor to see what processes are currently running and wait for them to finish.
Once you can see the test file, you can link to Jupyter from the "Connect to Machine" modal, this will open Jupyter up in your browser.

Open and run the example notebook testscript.ipynb to make sure everything is setup correctly. Your output will be based on what base image and LLM you selected.
In the below example you can see we are checking that PyTorch has been installed and loaded correctly, making sure CUDA is available and that it can find the GPUs, loading our LLM model (if selected) and then running an example query with the model via Ollama:
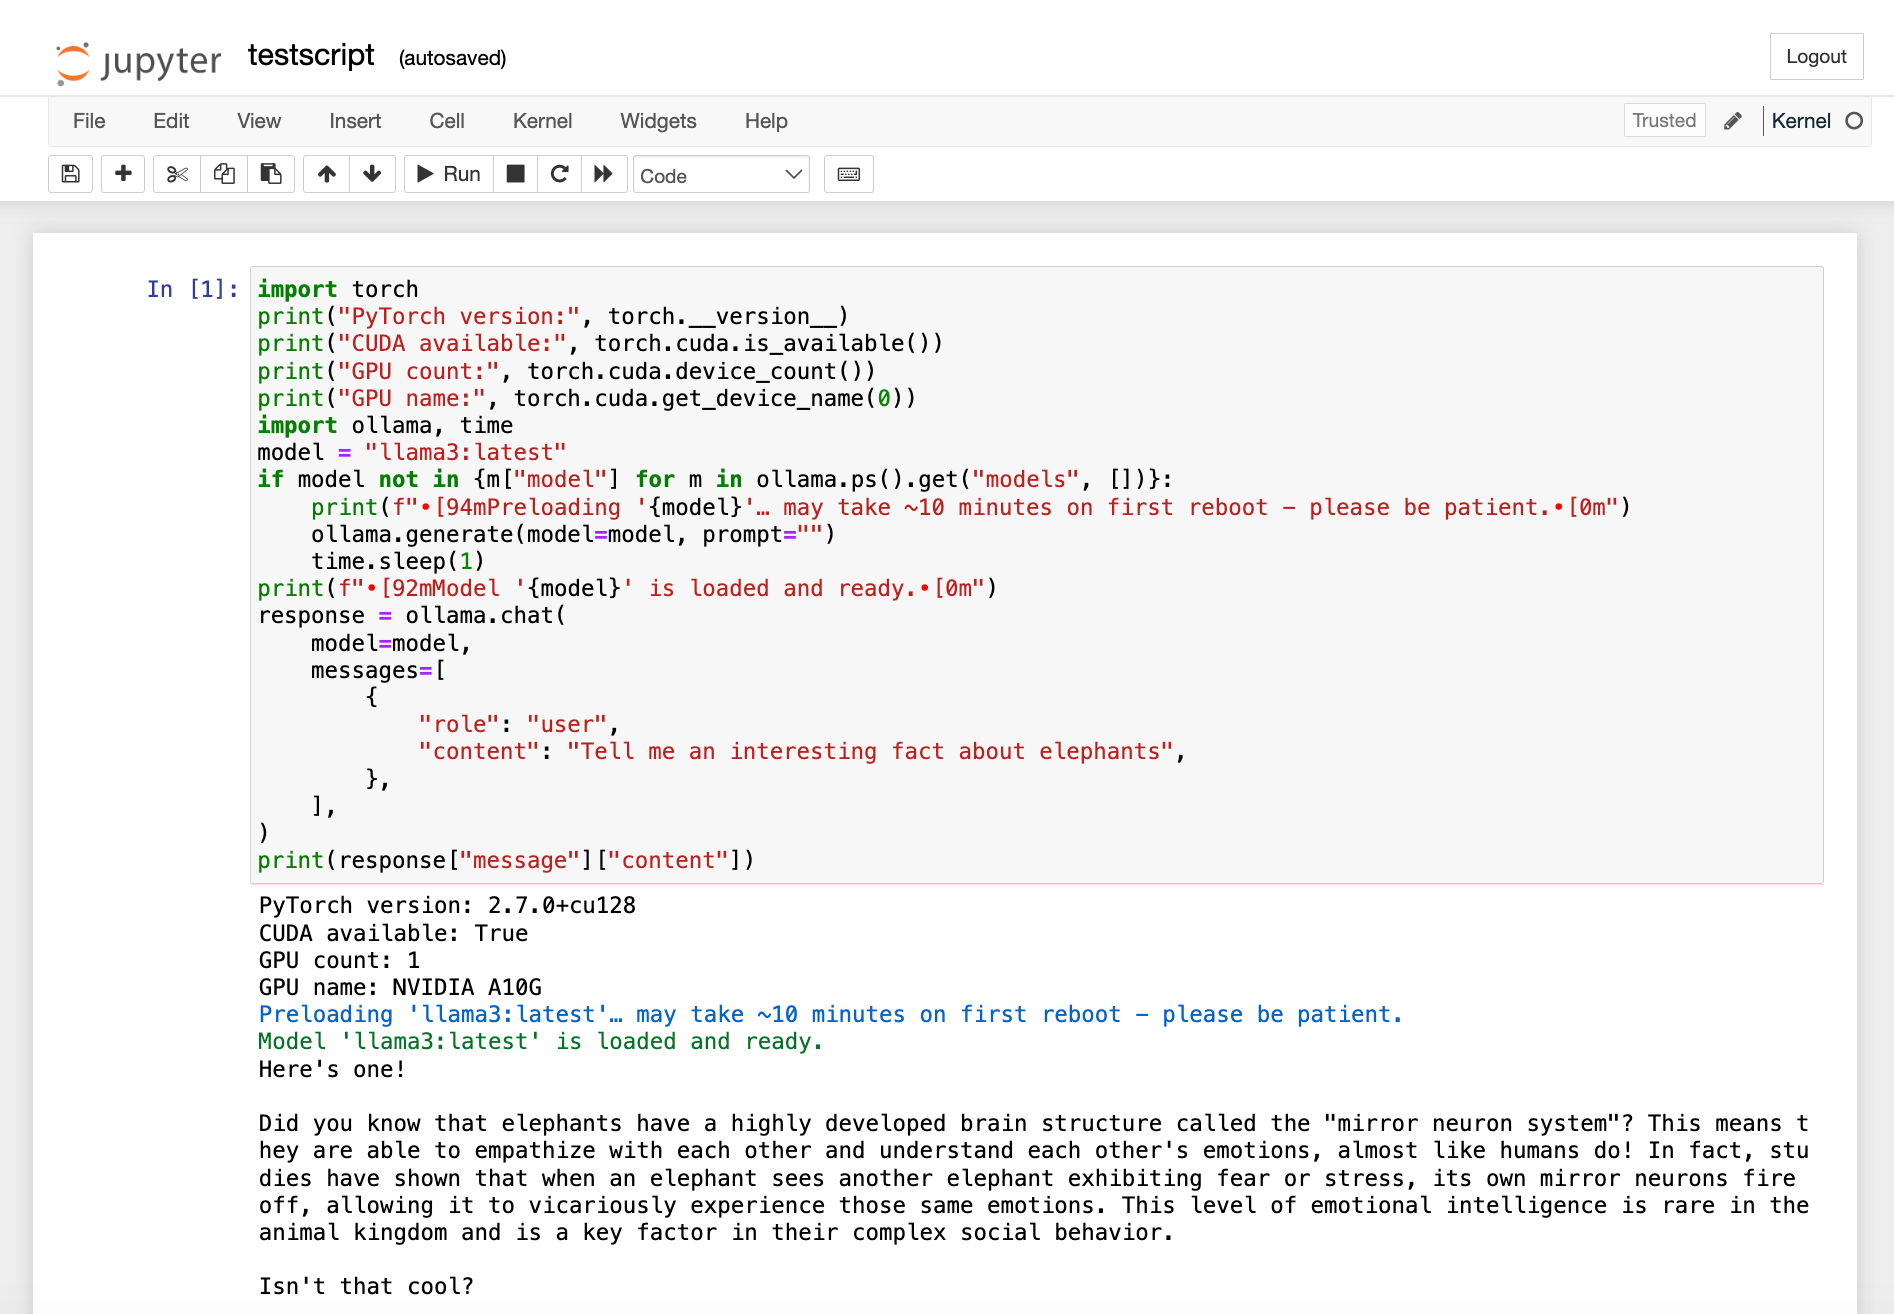
[*] will be marked to the left of it. If the output looks good from the test script, feel free to create your own notebook and start running your own code! You can also run your scripts or Ollama queries directly in the terminal if you would prefer. Since you have total admin/sudo permissions on the machine, you can continue adding your favourite software, packages, models, datasets and any other configurations so that you can run whatever AI workloads your heart desires in the cloud.
We're just glad we could lend a helping hand in kickstarting your AI journey!