Connecting to a Linux (Ubuntu) Machine with PuTTY
PuTTY is a free tool for connecting via SSH (Secure Shell) for Windows users. We will be using this to access our newly created Linux machine!

You poor thing. Coming to this page means you're being forced to use Windows and yet you still choose to work with a Linux machine.
Well, your friends at RONIN will help you get through this.
If you're a Linux / Mac user and you've lost your way, check out this instead How to connect to Linux (Ubuntu) via SSH
Quick Start - for those familiar with PuTTY
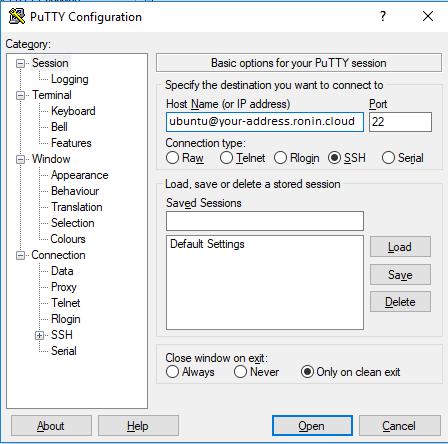
1. Start PuTTY
Here is an example of the settings in PuTTY that should get you started.
Remember to convert your .pem key to a PuTTY compatible .ppk key with PuTTYgen before this will work (more detail below)
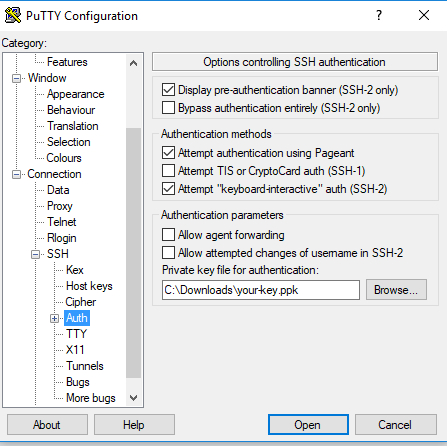
2. Set your ppk key
If you're wondering where to select your PuTTYGen key.
Connection > SSH > Auth
Detailed Description - for non Windows Enthusiasts
What is PuTTY?
PuTTY is a free tool for connecting via SSH (Secure Shell) for Windows users. Details on SSH can be found here.
Download PuTTY from here and install (default install is suitable for most)
PuTTY does not natively support the private key format (.pem) generated by RONIN. PuTTY has a tool named PuTTYgen, which can convert keys to the required PuTTY format (.ppk).
Generating a key with PuTTY
From the Start menu, choose All Programs > PuTTY > PuTTYgen.
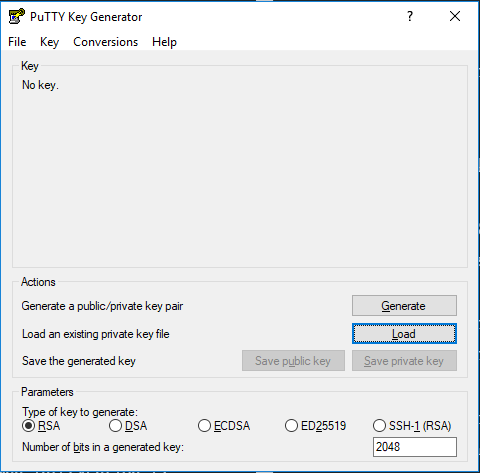
Under Type of key to generate, choose RSA.
Load an existing private key file > Load
By default, PuTTYgen displays only files with the extension .ppk. To locate your .pem file, select the option to display files of all types.
Select your key. This is your .pem file for the key pair that you specified when you launched your instance, and then choose Open.

Choose Save private key
This will save the key in the format that PuTTY can use. PuTTYgen displays a warning about saving the key without a passphrase. Choose Yes.
Specify the same name for the key that you used for the key pair
(for example, my-key-pair). PuTTY automatically adds the .ppk file extension.
A passphrase on a private key is an extra layer of protection, so even if your private key is discovered, it can't be used without the passphrase. This step is optional, but recommended.
Connect to your Linux (Ubuntu) Machine
From the Start menu, choose All Programs > PuTTY > PuTTY.
In the Category pane, choose Session
In the Host Name box, add the username and machine address in the following format
username@server.address eg: ubuntu@machine.ronin.cloud.
The default machine username changes across the operating systems. For example, ubuntu is the default username of an Ubuntu machine.A list of default usernames can be found here
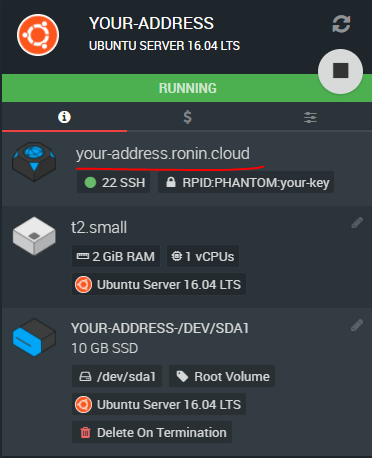
your-address.ronin.cloud is the address of your machine in RONIN. This can be found on the Machine Summary Screen. Example below.
Click Open in the PuTTY dialog box
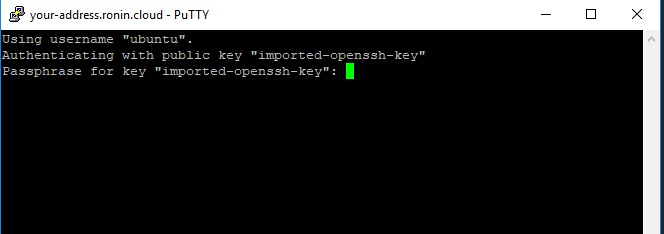
The connection should open in a new window. Optional - If you set a passphrase, enter it here and press Enter
If this is the first time you have connected to this instance, PuTTY displays a security alert dialog box that asks whether you trust the host you are connecting to. Type yes and hit Enter to continue.
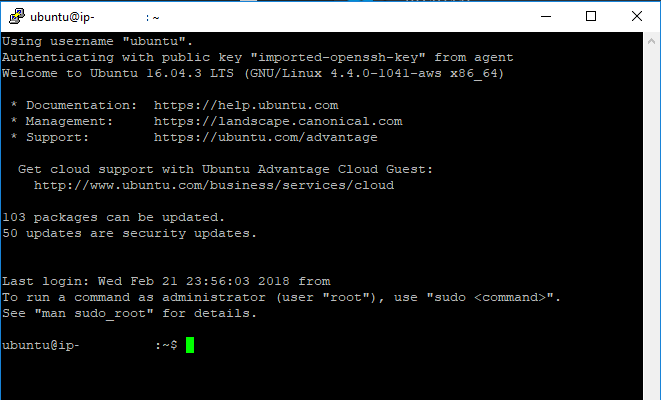
And we're in!
If all went to plan, you will see the welcome for your operating system
Next - uploading data to your machine.
If you are unsure on how you can upload data from your PC to this machine, check out our tutorial on WinSCP here