How to Request an EC2 Quota Increase on AWS (and Get it Approved Faster!)

Have you received an email that looks a bit like this, after trying to launch a machine in RONIN? Read on to find out how to increase quotas for machines in RONIN so you can get moving quicker!

Understanding AWS Service Quotas
AWS sets default quotas (limits) on various resources to prevent accidental overspending and ensure fair resource allocation across all users. For EC2, these quotas are typically measured in vCPUs and vary by region and instance family. When you launch an instance, its vCPU count is deducted from your available quota.
Step-by-Step Guide to Requesting a Quota Increase
Step 1: Navigate to the AWS Service Quotas Console
First, you need to access the Service Quotas console.
- Log in to your AWS Management Console.
- In the search bar at the top, type "Quotas" and select the service from the dropdown.
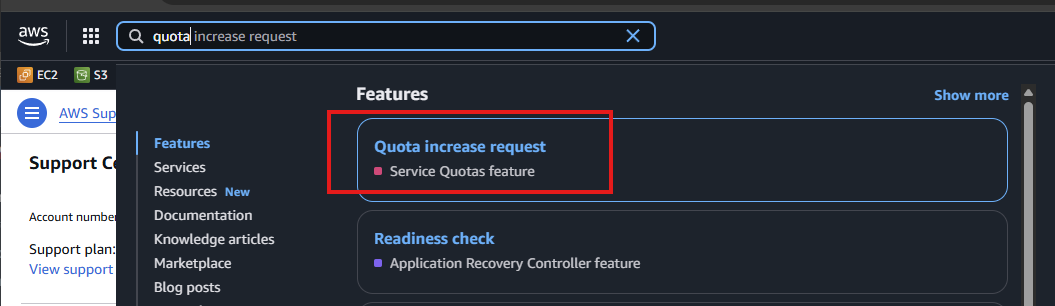
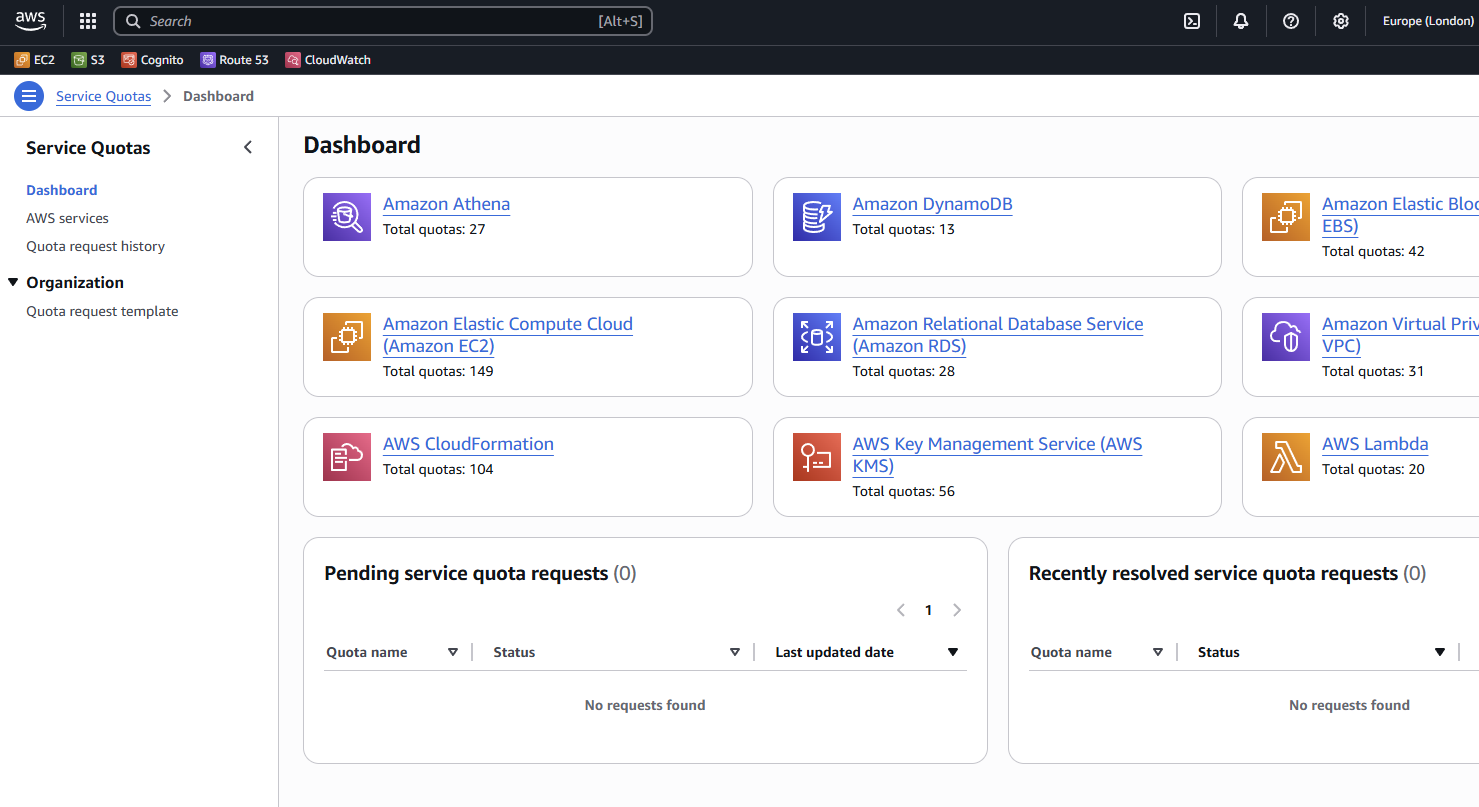
This is what the Service Quotas console looks like.
Step 2: Search for EC2 Quotas
In the Service Quotas console:
- In the left-hand navigation pane, click on AWS services.
- In the "Filter by service" search box, type "EC2" and select Amazon EC2.
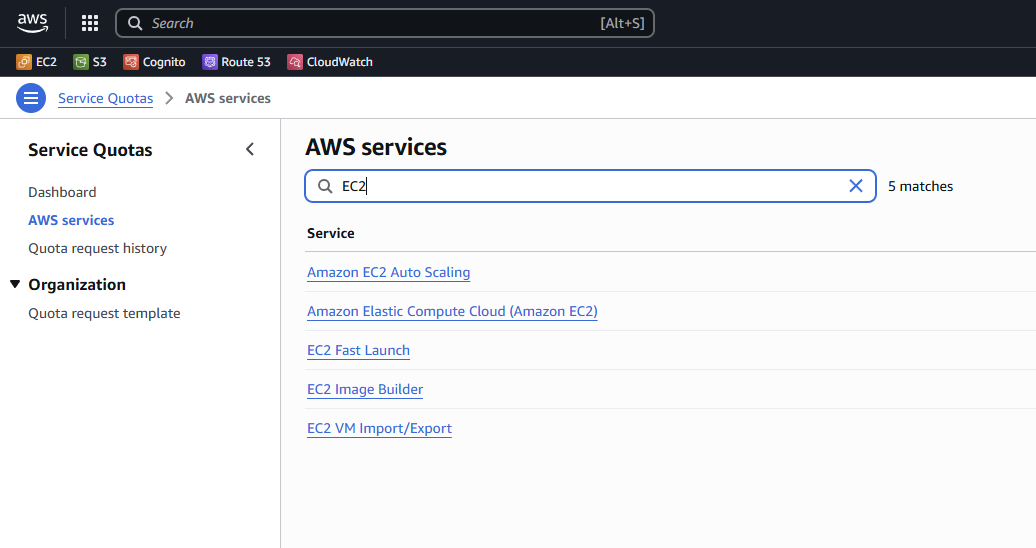
You'll then see a list of all your EC2-related quotas for the current region.
Step 3: Identify the Quota to Increase
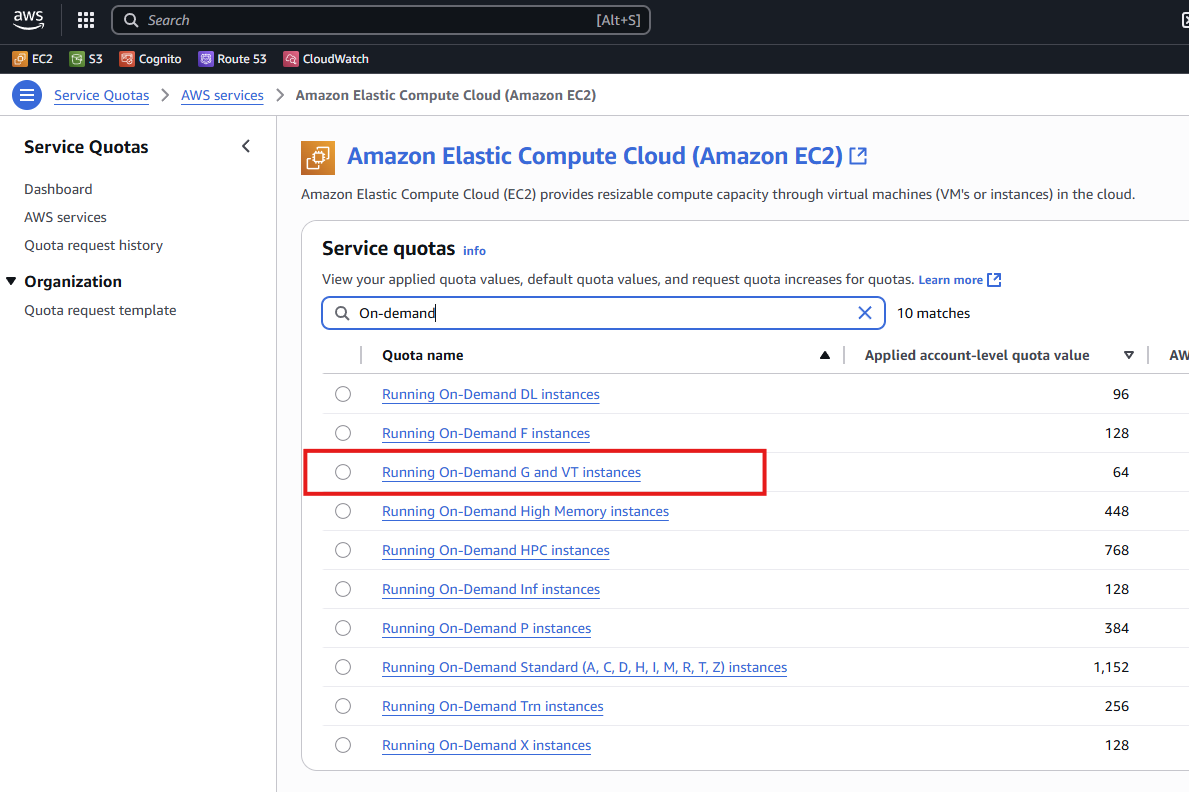
Look for the specific quota that is limiting your EC2 instance launches. Common ones include:
- Running On-Demand Standard (A, C, D, H, I, M, R, T, Z) instances: This is a very common quota that covers a wide range of instance types.
- Running On-Demand G and P instances: For GPU-intensive workloads.
- EBS volumes per region: If you're encountering issues with creating new EBS volumes.
Search for "On-demand" and click on the quota you wish to increase. For this example we will increase the G Instance Type
Step 4: Request the Quota Increase
On the quota details page:
- Click the Request increase at account level button.
- Enter your desired new quota value. Make sure this value is higher than your current "Applied quota value."
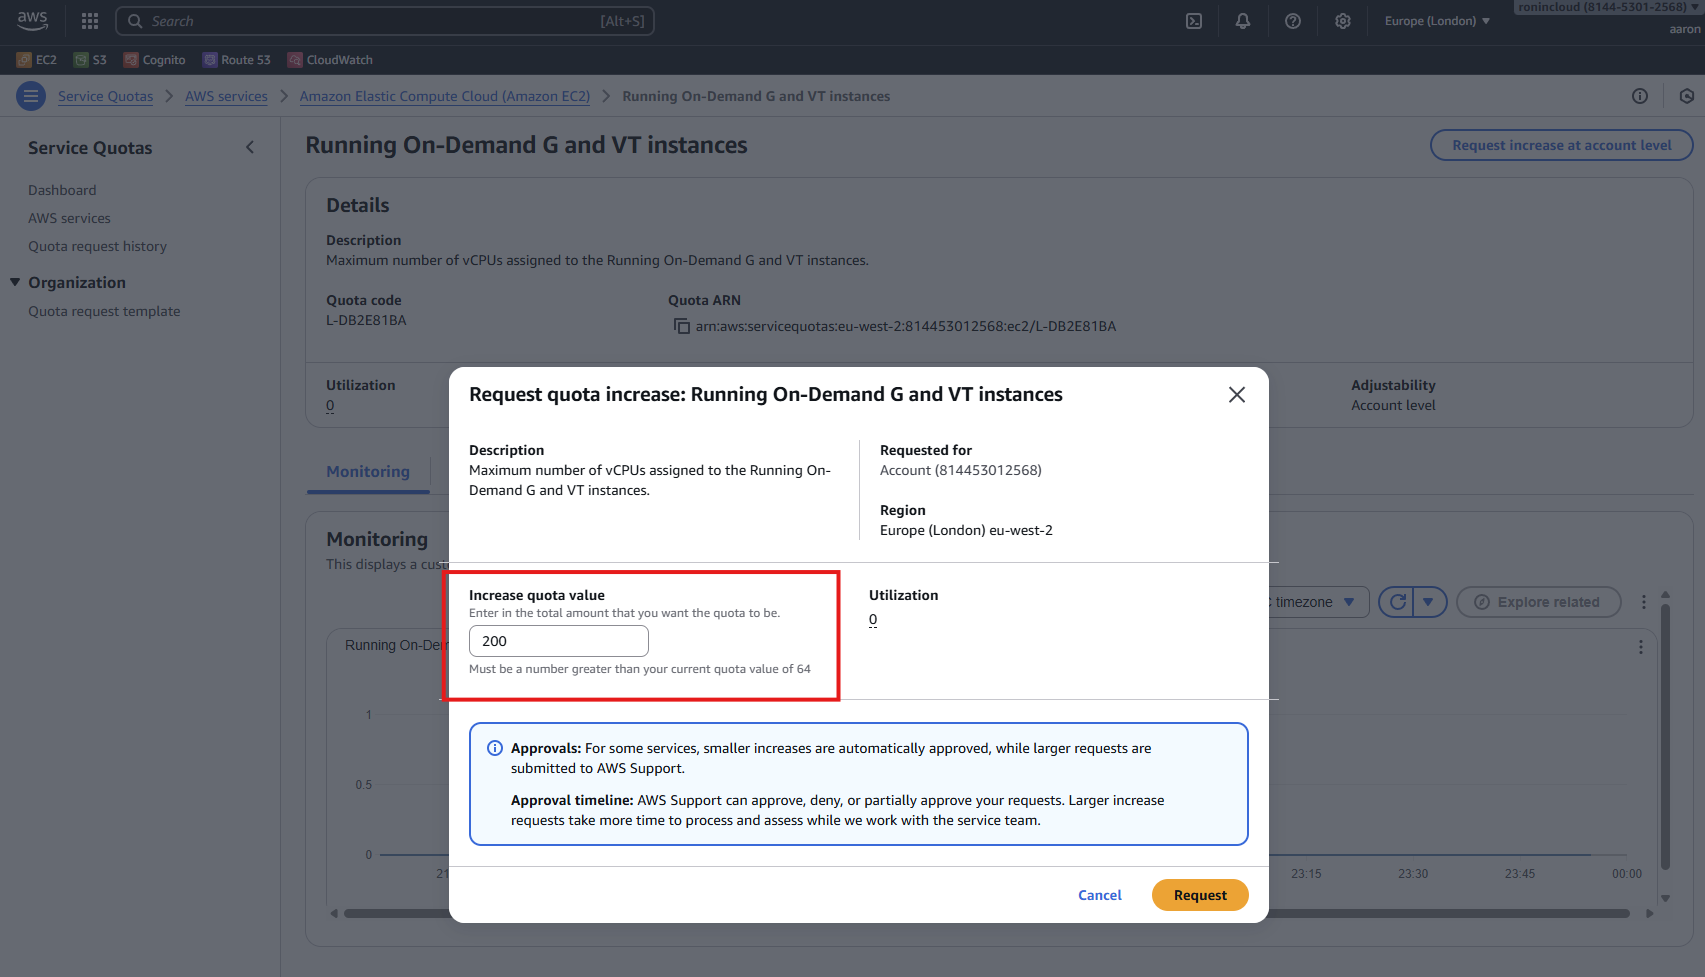
- Click Request.
If you need a significant increase, consider requesting it in stages. For example, instead of asking to go from 100 vCPUs to 1000 vCPUs in one go, you might request 200, then 400, and so on, as your needs grow. AWS is more likely to quickly approve requests that seem reasonable and aligned with your current usage patterns.
Monitoring Your Request
After submitting your request, you can monitor its status from the "Quota request history" tab in the Service Quotas console. You'll also receive email notifications regarding the approval or denial of your request. Approval times can vary, but often, smaller requests are processed within minutes or a few hours.
Conclusion
Increasing your EC2 quota on AWS is a simple process that can resolve "insufficient capacity" errors and allow your applications to scale as needed. By understanding where to find your quotas and applying the tip about requesting smaller increments, you can streamline the approval process and get back to building on AWS faster.